Category: Buying Guides

Practical buying guides, comparisons and how-to articles to help US homeowners and pet owners choose with confidence.

  • Best Seed Starting Kits for Beginners: 6 Easy Picks

    Best Seed Starting Kits for Beginners: 6 Easy Picks

    Skip to content

    Lawn & Garden • Seed Starting • Updated October 29, 2026

    Best Seed Starting Kits for Beginners: 6 Easy Picks

    Explore related guides: Gardening in Iowa: all guides · When to start seeds in Iowa · When to plant tomatoes · Raised beds for Iowa · Grow lights for seedlings.

    Starting your own tomatoes, peppers and flowers indoors is cheaper than buying transplants and lets you grow varieties garden centers never carry. The right seed starting kit for beginners takes the guesswork out of containers, watering and humidity. This guide explains what a kit needs, the light and heat seedlings want, when to start in Iowa and the Midwest, and six picks sold by Amazon.com.
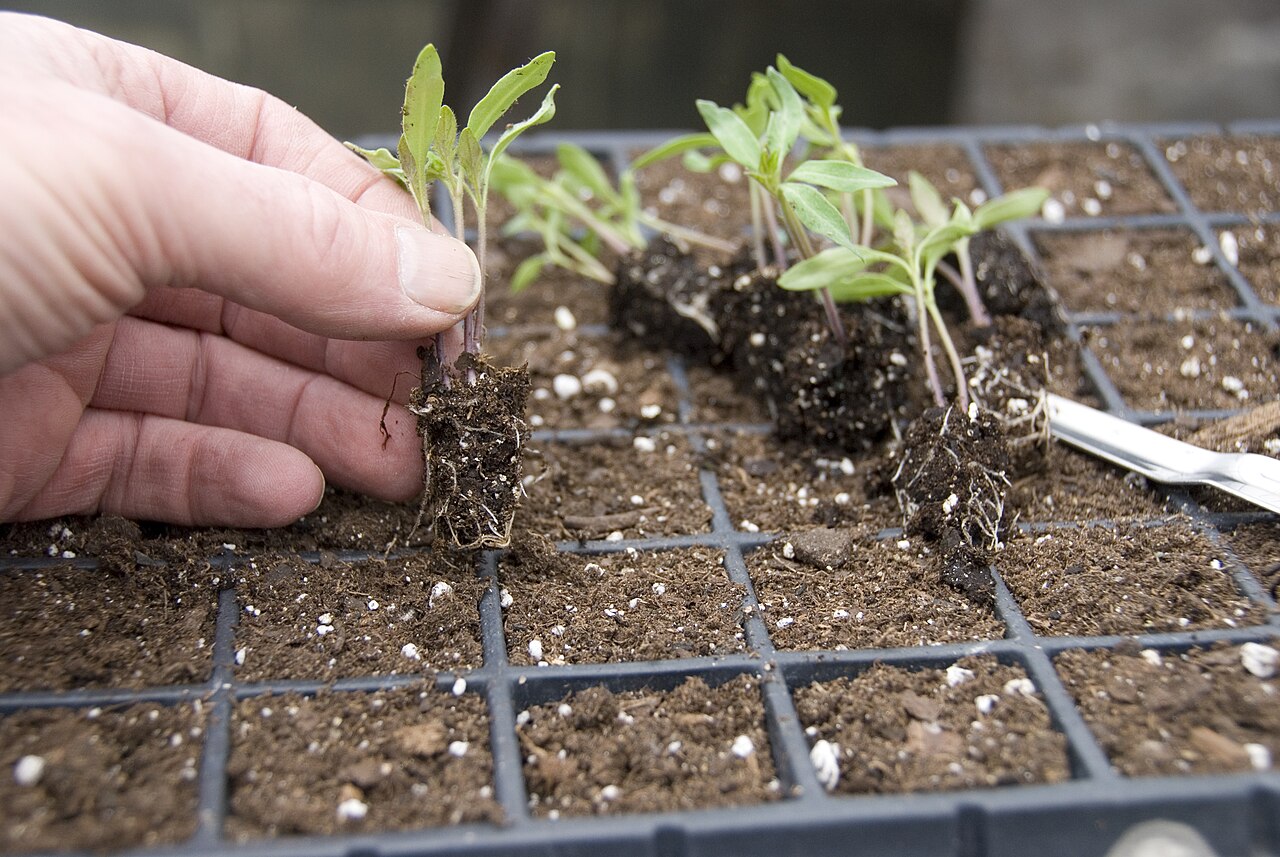
    Tomato seedlings in a seed starting kit for beginners, grown indoors
    Young tomato seedlings started indoors. Photo: Dwight Sipler, CC BY 2.0, via Wikimedia Commons.

    The short answer

    For most beginners, a reusable cell tray with a watering tray and a clear humidity dome is all the “kit” you need, plus a bag of soilless seed starting mix. What makes the real difference is light and warmth: a simple LED grow light kept a few inches above the seedlings for 14 to 16 hours a day, and a heat mat to hold the mix near 70 to 75°F for peppers and tomatoes. In Iowa, most warm-season crops are started indoors in March and April.

    What a seed starting kit for beginners should include

    The basics of indoor seed starting and why each one matters
    Item Why it matters
    Cell tray or pellets Gives each seedling its own space so roots do not tangle
    Watering tray Lets you water from below, which keeps seeds in place
    Humidity dome Holds moisture until seeds sprout; remove it after
    Soilless seed starting mix Light, porous and free of disease, unlike garden soil
    Grow light Windows are too dim in late winter; seedlings stretch
    Heat mat Speeds germination for warm-season crops

    Iowa State University Extension recommends a lightweight, porous, disease-free commercial soilless mix for starting seeds, and says almost any clean container works as long as it has drainage holes. If you reuse trays, wash them in soapy water and disinfect them in 1 part bleach to 9 parts water.

    Light and heat: the two things kits often leave out

    • Light. Seedlings on a windowsill usually turn tall and spindly because winter light is weak and one-sided. Keep a grow light about 2 to 4 inches above the seedlings, raise it as they grow, and run it 14 to 16 hours a day on a timer.
    • Heat for germination. ISU Extension notes that most vegetable seeds germinate best when the mix is 70 to 75°F. In a cool basement, a heat mat under the tray makes a big difference for tomatoes, peppers and eggplant.
    • Air. A small fan on low strengthens stems and helps prevent damping-off, a disease that makes seedlings collapse at the soil line.

    When to start seeds in Iowa and the Midwest

    ISU Extension horticulturist Aaron Steil warns that seedlings started too early become lanky and transplant poorly. Check the seed packet for the weeks of indoor growth, then count back from your planting date. In much of Iowa, frost-tender vegetables and flowers go outside from late April to early May, and cool-season crops in early to mid-April.

    See our seed starting calendar for Iowa for crop-by-crop dates, and when to plant tomatoes in Iowa for transplanting.

    How to use a seed starting kit, step by step

    1. Moisten the mix before filling the cells, until it feels like a wrung-out sponge.
    2. Sow at the depth on the packet, usually two or three seeds per cell, and label each row.
    3. Cover with the dome and set the tray on a heat mat until seeds sprout.
    4. Remove the dome and turn on the light as soon as most seeds are up.
    5. Water from below and let the surface dry slightly between waterings to avoid damping-off.
    6. Thin to one seedling per cell by snipping extras, and move them to bigger pots when the second set of true leaves appears.
    7. Harden off for one to two weeks before planting outside, giving seedlings a little more time outdoors each day.

    Best seed starting kits and supplies for beginners

    All six were listed as sold by Amazon.com at the time of writing. Check the current listing before you buy.

    Best overall: Burpee SuperSeed 36-Cell Reusable Seed Starting Tray

    Product pick

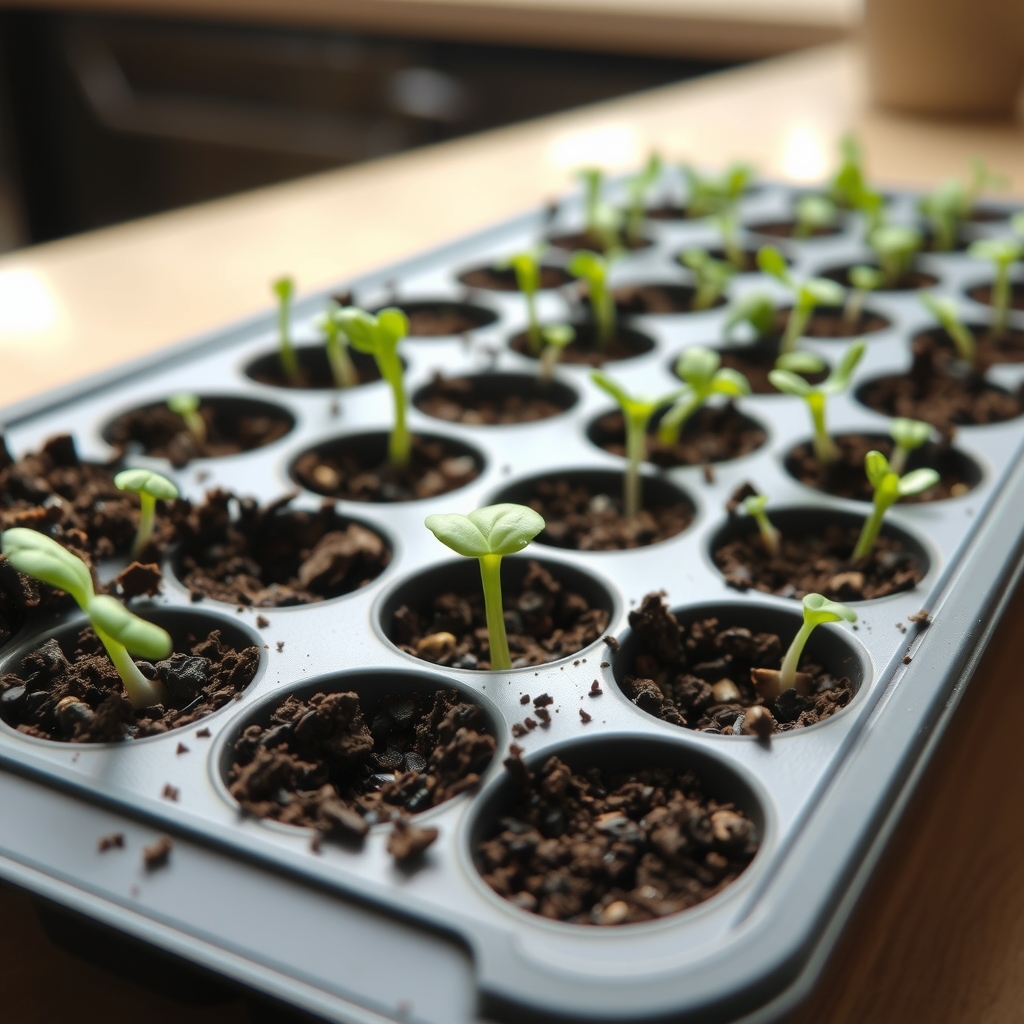
    Burpee SuperSeed 36-Cell Reusable Seed Starting Tray

    36-cell seed starting tray with young seedlings, illustrative AI image

    Illustrative image (AI-generated), not the exact product.

    See current photos and price on Amazon →

    The flexible, food-grade silicone cells pop seedlings out with their root ball intact, which is the step beginners most often struggle with. Molded slots in each cell improve drainage, deep channels in the watering tray pull extra water away from the roots, and the whole set is reusable and dishwasher safe. Add your own seed starting mix and a dome or plastic wrap to hold moisture until seeds sprout.

    Easiest start: Jiffy T14H Peat Pellet Seed Starter Kit

    Product pick

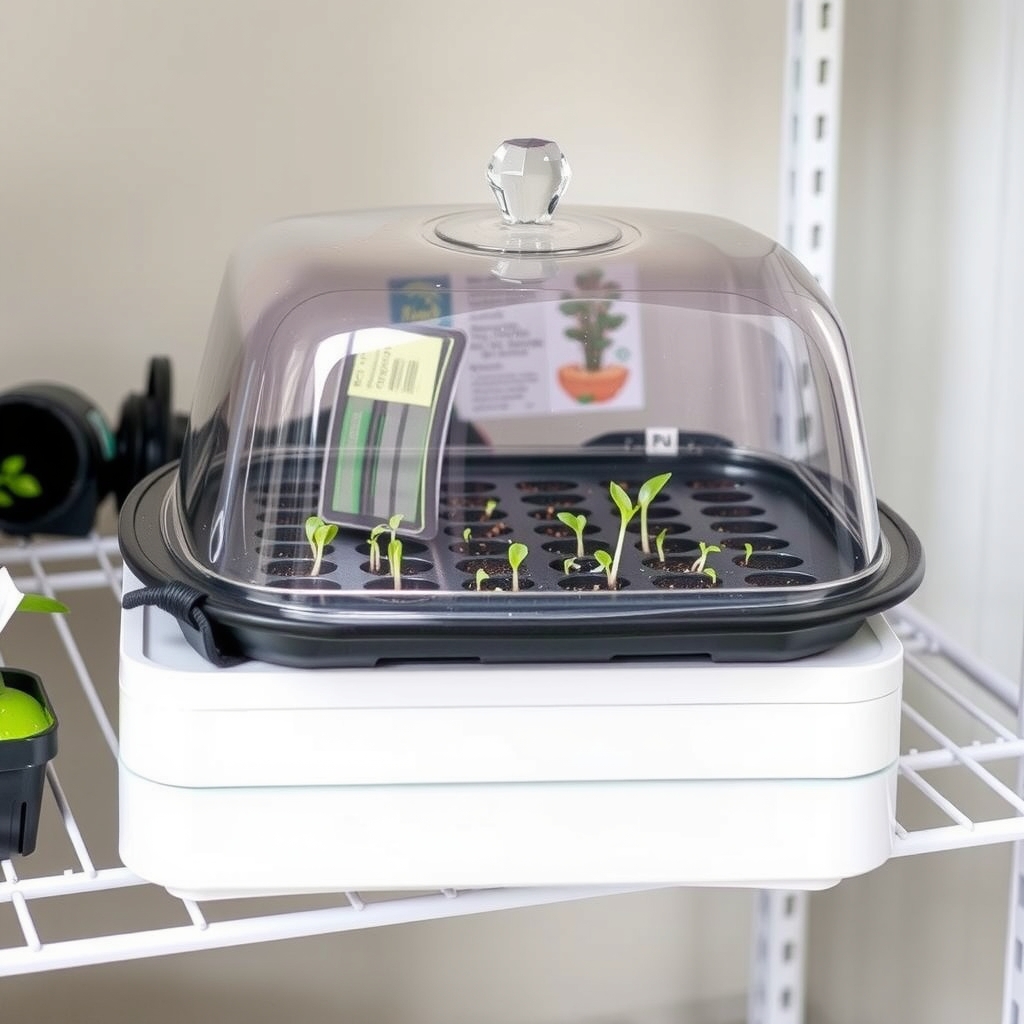
    Jiffy T14H Seed Starter Kit with 14 Peat Pellets
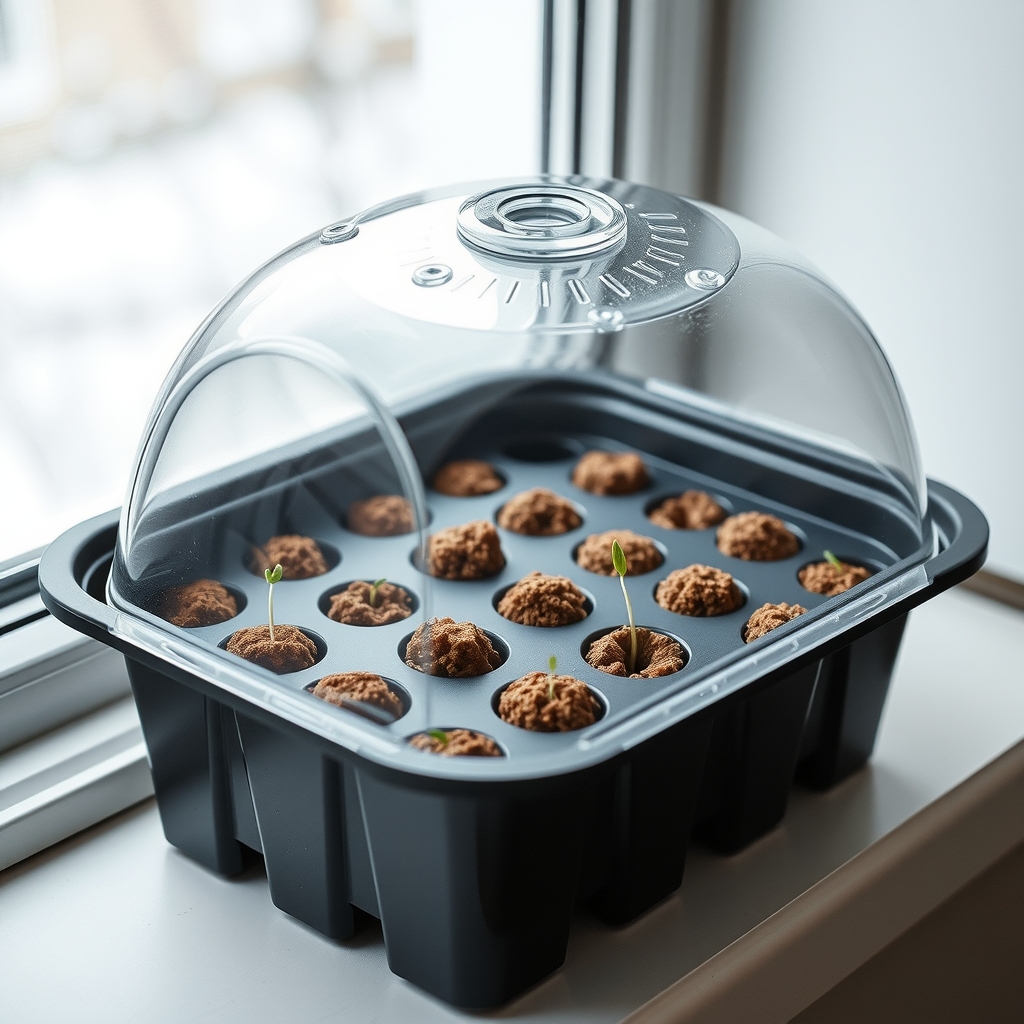
    Peat pellet seed starter kit with a clear dome, illustrative AI image

    Illustrative image (AI-generated), not the exact product.

    See current photos and price on Amazon →

    No mix, no mess: add water and the 14 compressed peat pellets swell into ready-to-plant cells. The kit includes a watertight base, a water-wicking tray and a clear greenhouse dome, and the large 50 mm pellets suit tomatoes and peppers. You plant the whole pellet later, so there is no transplant shock. It is small, so it is best for a first try or a few favorite varieties.

    For small spaces: Burpee SuperSeed Windowsill 8 XL-Cell Tray

    Product pick

    Burpee SuperSeed Windowsill Seed Starting Tray, 8 XL Cells

    Small 8-cell seed tray with pepper seedlings on a windowsill, illustrative AI image

    Illustrative image (AI-generated), not the exact product.

    See current photos and price on Amazon →

    Eight extra-large pop-out silicone cells fit on a windowsill or under a small clip light, and the big cells give tomatoes and peppers more root room before transplanting. It uses the same drainage and watering system as the 36-cell tray. A good pick for apartments or for growing just a few plants.

    For any tray: Mountain Valley Seed Co. Clear Humidity Domes, 5-Pack

    Product pick

    Mountain Valley Seed Co. Clear Plastic Humidity Domes, 5-Pack

    Clear humidity dome over a seed tray with condensation, illustrative AI image

    Illustrative image (AI-generated), not the exact product.

    See current photos and price on Amazon →

    A dome holds moisture around the seeds until they sprout, then comes off. These five reusable 2-inch-tall domes fit standard 10 by 20 inch trays, so you can turn plain cell flats into a full kit or replace a cracked lid. Lift them a crack once sprouts appear to let in air.

    For faster germination: Hydrofarm Jump Start Seedling Heat Mat

    Product pick

    Hydrofarm Jump Start Seedling Heat Mat, 17 Watt

    Black seedling heat mat under a seed tray on a shelf, illustrative AI image

    Illustrative image (AI-generated), not the exact product.

    See current photos and price on Amazon →

    This waterproof mat fits under a standard tray and warms the root zone about 10 to 20°F above room temperature, which helps tomatoes and peppers sprout faster in a cool Midwest basement. The maker recommends pairing it with its JumpStart digital thermostat so the mix stays near 70 to 75°F instead of overheating.

    For light: LEOTER Clip-On LED Grow Light

    Product pick

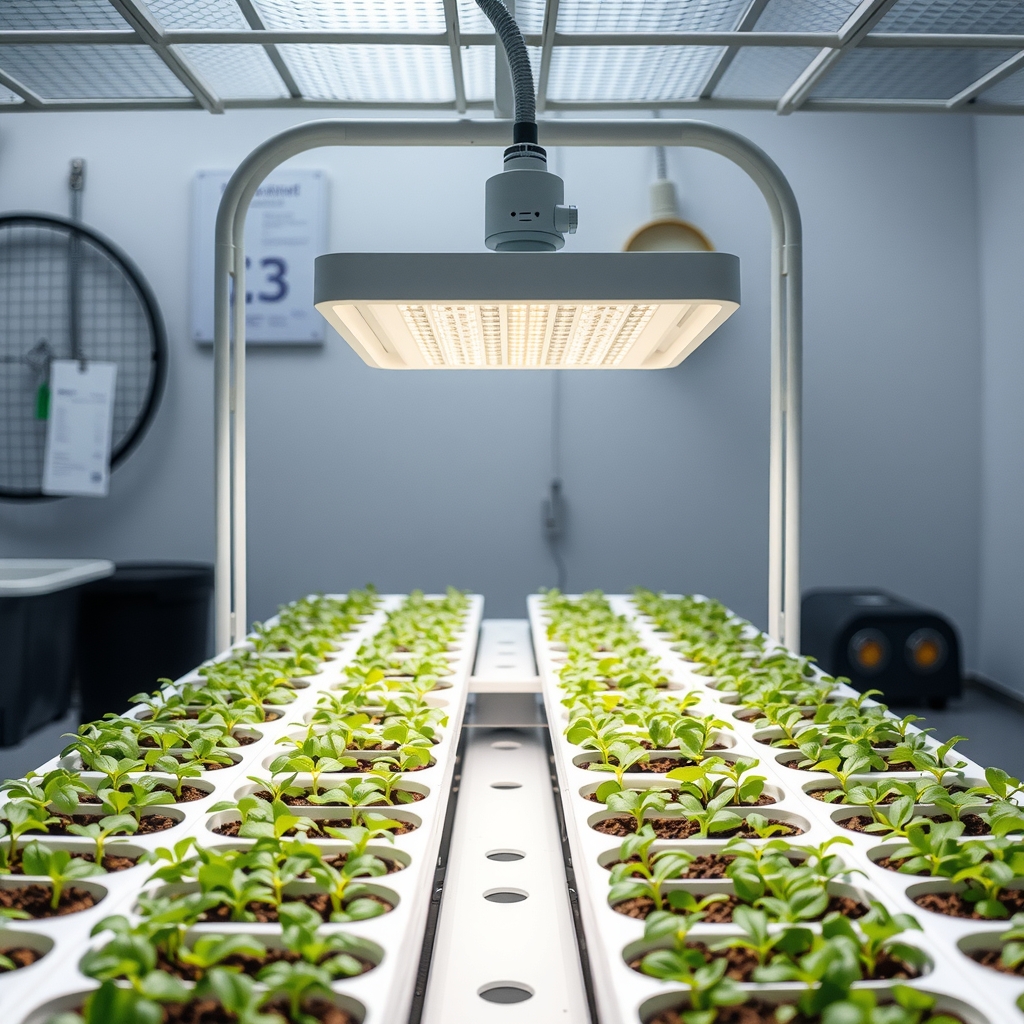
    LEOTER 80-LED Clip-On Grow Light with Timer
    Clip-on LED grow light a few inches above seedlings, illustrative AI image

    Illustrative image (AI-generated), not the exact product.

    See current photos and price on Amazon →

    Four adjustable gooseneck heads with 80 LEDs clip onto a shelf or table edge and bend down close to small trays. A built-in timer and 10 brightness levels make the 14-to-16-hour schedule automatic. It is best for one or two small trays; for a full 10 by 20 flat, a hanging LED shop light covers the tray more evenly.

    Conclusion

    The best seed starting kit for beginners is a simple one: clean cells or pellets, a watering tray, a dome and a good soilless mix. Add a grow light and a heat mat and your seedlings will be short, sturdy and ready for the garden. In Iowa, plan to sow most warm-season crops indoors in March and April so they are ready to plant out in late April to May.

    FAQs

    What do I need to start seeds indoors?
    Clean containers with drainage holes, a soilless seed starting mix, seeds, a tray to water from below, a dome or plastic cover, and a light. A heat mat helps warm-season crops sprout faster.

    Do I need a grow light to start seeds?
    Usually yes. Late-winter window light is too weak and one-sided, so seedlings stretch and flop. A grow light 2 to 4 inches above the plants for 14 to 16 hours a day grows stocky transplants.

    When should I start seeds indoors in Iowa?
    Count back from your planting date using the weeks listed on the seed packet. Most frost-tender crops are planted outside in Iowa from late April to early May, so tomatoes and peppers are usually started indoors in March.

    Can I use garden soil to start seeds?
    No. Garden soil is heavy, compacts easily and can carry diseases and weed seeds. Use a commercial soilless seed starting mix, which is light, porous and disease-free.

    Do seeds need a heat mat?
    Not all seeds, but most vegetables germinate best at 70 to 75°F. A heat mat is especially useful for tomatoes, peppers and eggplant in a cool basement.

    Why are my seedlings tall and thin?
    They are reaching for light. Lower the grow light to a few inches above the leaves, run it 14 to 16 hours a day, and avoid starting seeds too early.

    Sources and review scope

    This guide was prepared on October 29, 2026 from the following sources and from the product listings on Amazon.com. Homingwell did not perform hands-on testing. Sellers were checked on Amazon.com on the same date.

    Explore more Lawn & Garden buying guides.
  • Best Compost Bins for Cold Climates: 6 Picks

    Best Compost Bins for Cold Climates: 6 Picks

    Skip to content

    Lawn & Garden • Winter • Updated October 29, 2026

    Best Compost Bins for Cold Climates: 6 Picks

    Explore related guides: Gardening in Iowa: all guides · Fall garden cleanup · Winterize raised beds · Winter bird feeders · Soil test kits.

    Fall leaves and kitchen scraps make free garden soil, but a Midwest winter can freeze a small compost bin solid by January. The best compost bin for cold climates is big enough to hold heat, has a lid to keep snow out, and fits how much material you have. This guide explains how composting works in the cold, bins versus tumblers, how to keep compost going through winter, and six picks sold by Amazon.com.

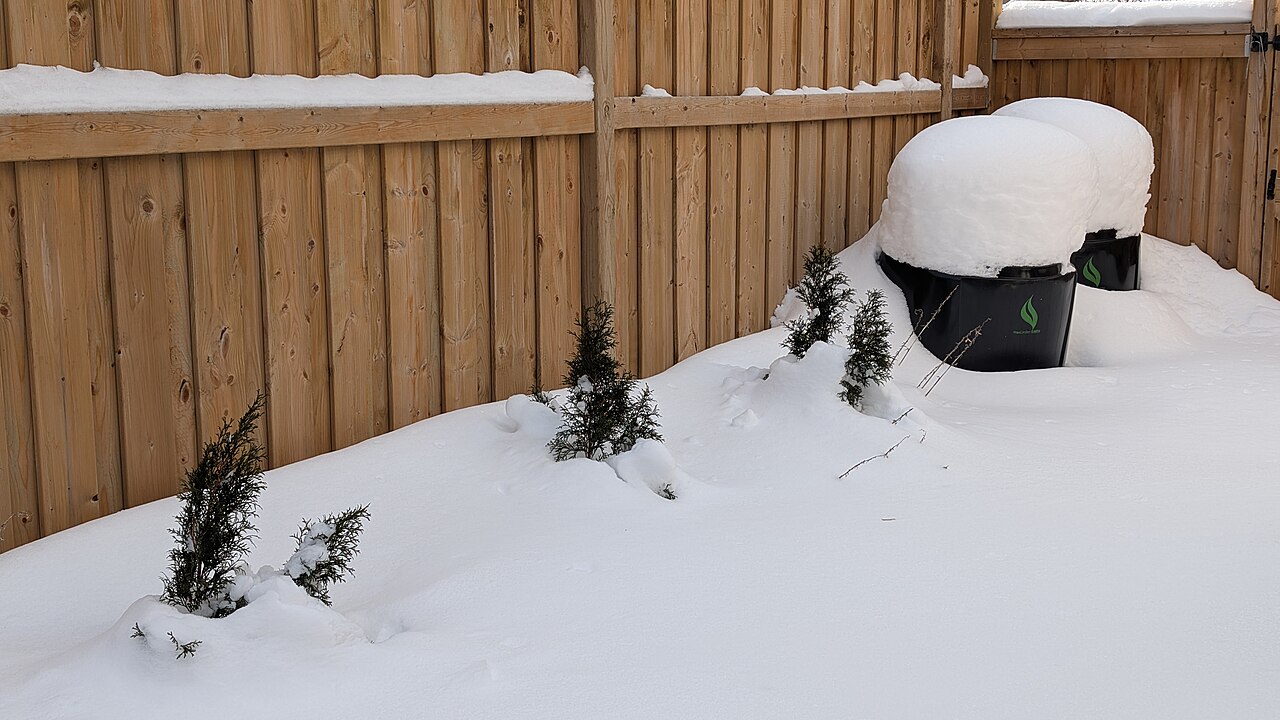
    Compost bin for cold climates covered in snow in winter
    Compost bins under a blanket of snow. Photo: Sikander, CC BY-SA 4.0, via Wikimedia Commons.

    The short answer

    In a cold climate, size matters most. A large stationary bin of about 80 gallons, filled with a good mix of leaves and scraps, holds enough heat to keep working longer into winter. A dual-chamber tumbler is the tidier, rodent-resistant choice for smaller yards, but expect it to pause in the coldest weeks. For year-round composting, add an indoor worm bin in the basement and a lidded kitchen pail to collect scraps between trips outside.

    How composting works in a cold climate

    University of Illinois Extension explains that freezing weather slows composting rather than stopping it. In the hot, active phase, heat-loving bacteria work best between about 113 and 167°F. Below 68°F, cold-tolerant bacteria take over, but they work more slowly. The bigger the pile, the more heat it makes and keeps; small piles are prone to freezing, which halts composting until spring.

    That is why a pile of about 1 cubic yard, roughly 3 by 3 by 3 feet, is the usual target. Iowa State University Extension adds that piles should be built in layers, because too much of any one material slows things down. A pile of mostly leaves, for example, lacks the nitrogen microbes need.

    Compost bin for cold climates: bin or tumbler?

    Stationary compost bins and tumblers compared for cold-climate gardeners
    Stationary bin Tumbler
    Typical capacity About 7 to 20 cubic feet About 4 to 15 cubic feet
    Winter heat Better: more volume holds more heat Smaller drum freezes sooner
    Turning Pitchfork or aerator Spin the drum
    Pests and tidiness Lid helps; open bottom touches soil Sealed drum keeps rodents out
    Adding material Add any time Dual chambers let one side finish

    An Ohio extension expert notes that tumblers keep rodents out, look tidy and are easy to turn, but they hold less material than a bin of the same footprint and usually cost more. For most Iowa and Midwest yards with plenty of fall leaves, a large bin is the better winter workhorse, and a tumbler works well alongside it for kitchen scraps.

    How to keep compost going through winter

    1. Fill it in fall. A full bin heads into winter warmer than a half-empty one. Mix shredded leaves with grass clippings or garden waste.
    2. Stockpile browns. Bag dry leaves now so you have carbon to cover kitchen scraps all winter.
    3. Pick a sunny, sheltered spot. Afternoon sun and a windbreak help. Keep it close enough to reach after a snowstorm.
    4. Insulate. Stack straw bales or bags of leaves around the bin, or wrap it with a tarp.
    5. Bury scraps in the center. North Carolina State Extension suggests tucking new scraps into the warm middle of the pile and covering them, which also discourages pests.
    6. Keep it covered. A lid stops snow and rain from soaking the pile.
    7. Do not worry about turning. Turning in deep cold lets heat escape; wait for a thaw.
    8. Go indoors if needed. Illinois Extension suggests worm bins or Bokashi buckets when outdoor composting is not practical in the coldest months.

    Finished compost is ready for spring beds. If you are getting raised beds for Iowa ready, a few inches of compost on top is the easiest soil upgrade.

    Best compost bins and tools for cold climates

    All six were listed as sold by Amazon.com at the time of writing. Check the current listing before you buy.

    Best for winter: VEVOR 80-Gallon Garden Compost Bin

    Product pick

    VEVOR 80-Gallon Garden Compost Bin

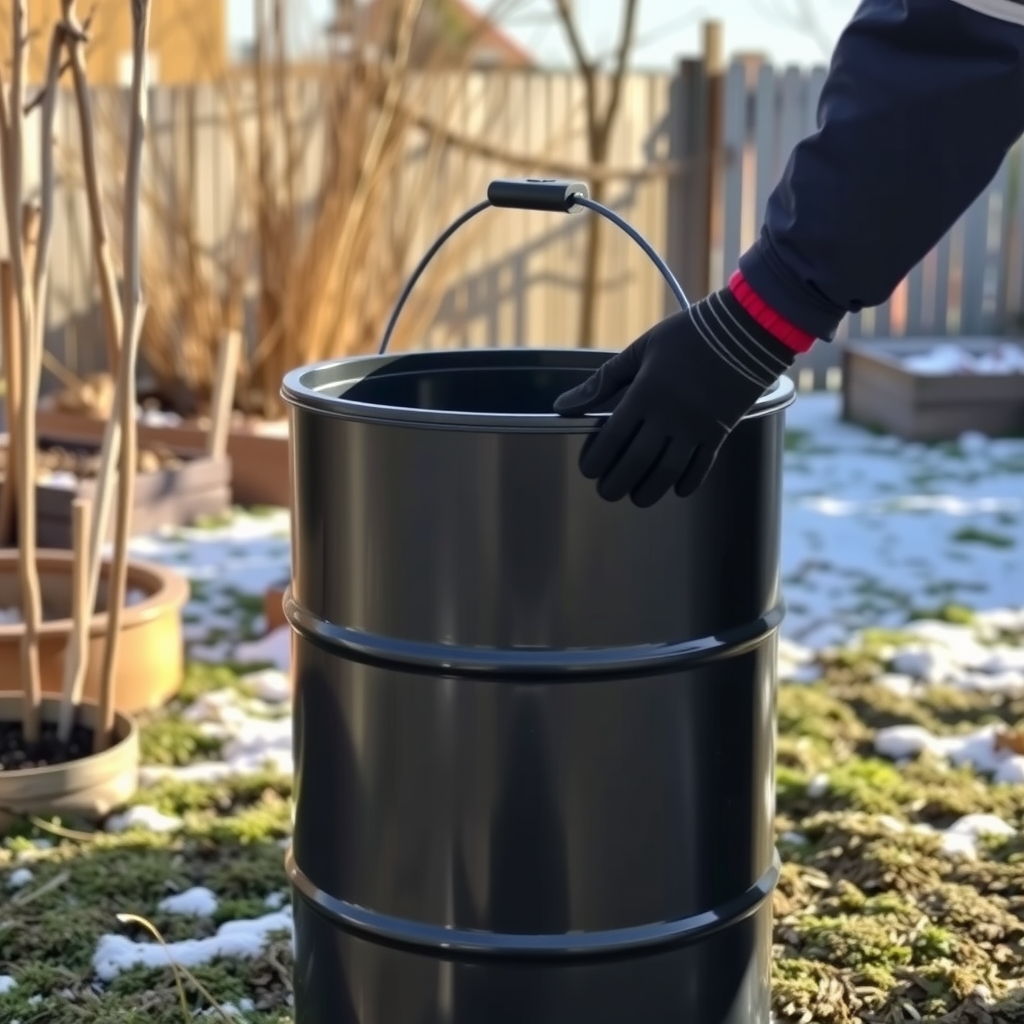
    Black stationary compost bin in a snowy backyard, illustrative AI image

    Illustrative image (AI-generated), not the exact product.

    See current photos and price on Amazon →

    At about 80 gallons, or roughly 10.7 cubic feet, this stationary bin holds enough material to keep working longer into a Midwest winter than a small tumbler. The black, UV-resistant plastic absorbs sun, vents on all four sides let air in, a top lid keeps out snow and critters, and a bottom door lets you pull finished compost from the base. It assembles in minutes.

    Best tumbler: VEVOR 43-Gallon Dual-Chamber Compost Tumbler

    Product pick

    VEVOR 43-Gallon Dual-Chamber Compost Tumbler

    Dual-chamber compost tumbler in a snowy backyard, illustrative AI image

    Illustrative image (AI-generated), not the exact product.

    See current photos and price on Amazon →

    Two chambers let one batch finish while you add fresh scraps to the other. A sliding door with a large opening makes loading and emptying easy, internal grooves break up clumps as it turns, and the frame is rated for about 110 pounds. A tumbler is tidy and rodent-resistant, but the smaller volume means it will slow down or freeze in the coldest weeks.

    Tumbler alternative: East Oak 43-Gallon Dual-Chamber Compost Tumbler

    Product pick

    East Oak 43-Gallon Dual-Chamber Compost Tumbler

    Gloved hand at a black compost container on a cold day, illustrative AI image

    Illustrative image (AI-generated), not the exact product.

    See current photos and price on Amazon →

    Another 43-gallon dual-chamber tumbler, with a black drum that absorbs sunlight, aeration holes, deep fins for easy turning and a powder-coated steel frame. It is a good alternative if the VEVOR is out of stock. As with any tumbler, keep the green and brown balance right and expect slower progress in deep cold.

    For indoor winter composting: FCMP Outdoor Essential Living Composter Worm Bin

    Product pick

    FCMP Outdoor Essential Living Composter, 2-Tray Worm Bin

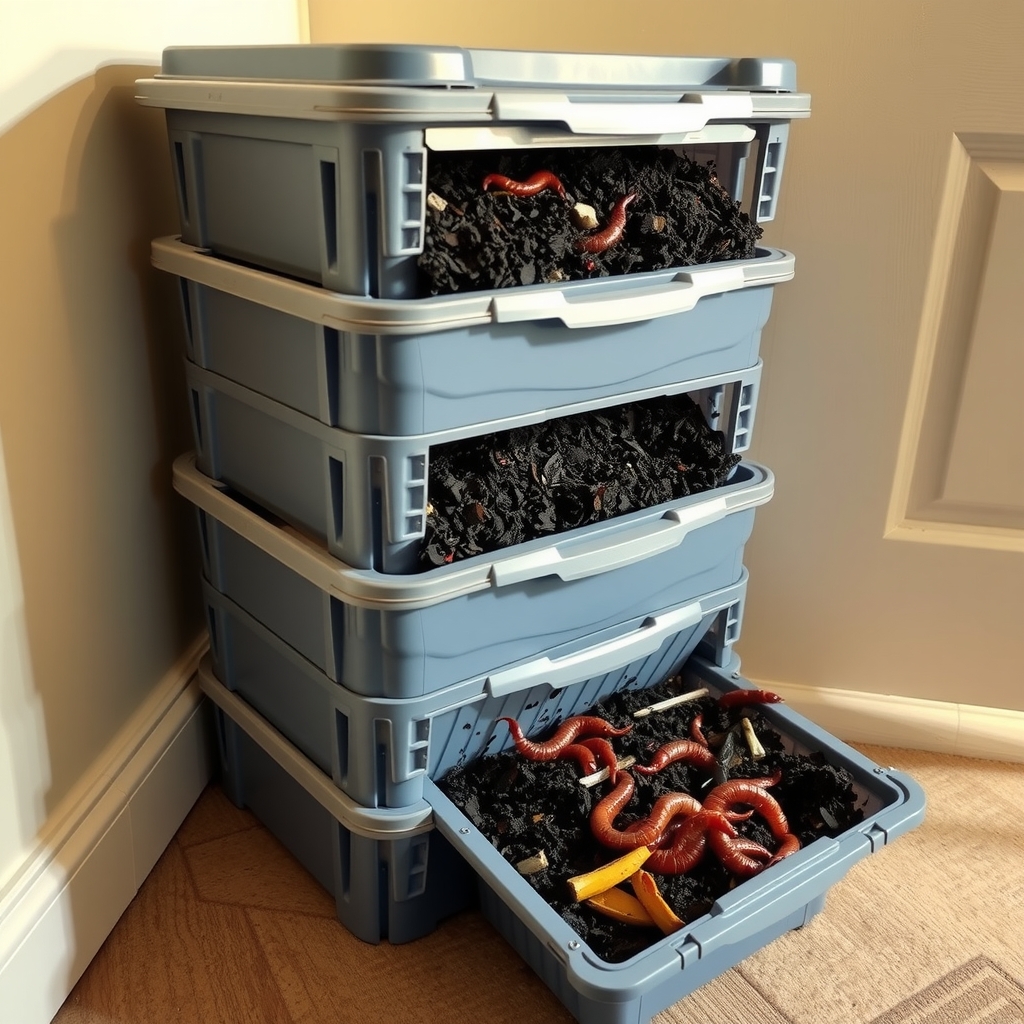
    Indoor worm composting bin with trays in a basement, illustrative AI image

    Illustrative image (AI-generated), not the exact product.

    See current photos and price on Amazon →

    When the outdoor bin freezes, worms keep working indoors. Extension guidance is to keep worm bins between about 59 and 77°F, so a basement or heated garage is ideal. This two-tray bin has a moisture channel to keep bedding from drying out, and a base reservoir that collects liquid you can dilute for houseplants. Worms are sold separately.

    For collecting scraps: Chef’n EcoCrock Counter Compost Bin

    Product pick

    Chef’n EcoCrock Counter Compost Bin, 0.75 Gallon

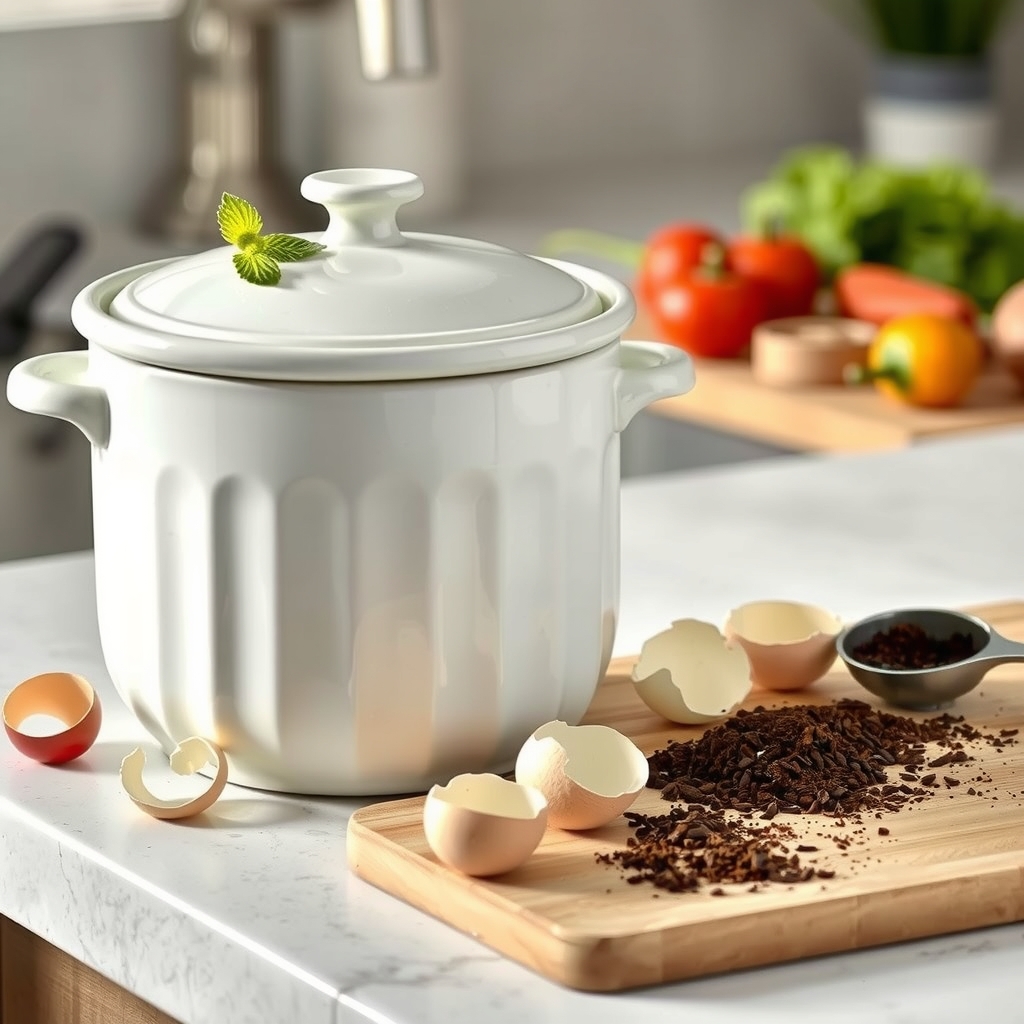
    Ceramic countertop compost crock with kitchen scraps, illustrative AI image

    Illustrative image (AI-generated), not the exact product.

    See current photos and price on Amazon →

    A lidded kitchen pail means fewer cold trips to the bin. This 0.75-gallon ceramic crock has a removable inner bucket for easy emptying and a vented lid with replaceable charcoal filters to trap odors. Empty it every few days and cover each addition outdoors with leaves.

    For spring: Achla Designs Compost Sifter Screen

    Product pick

    Achla Designs Compost Sifter Screen with Handles

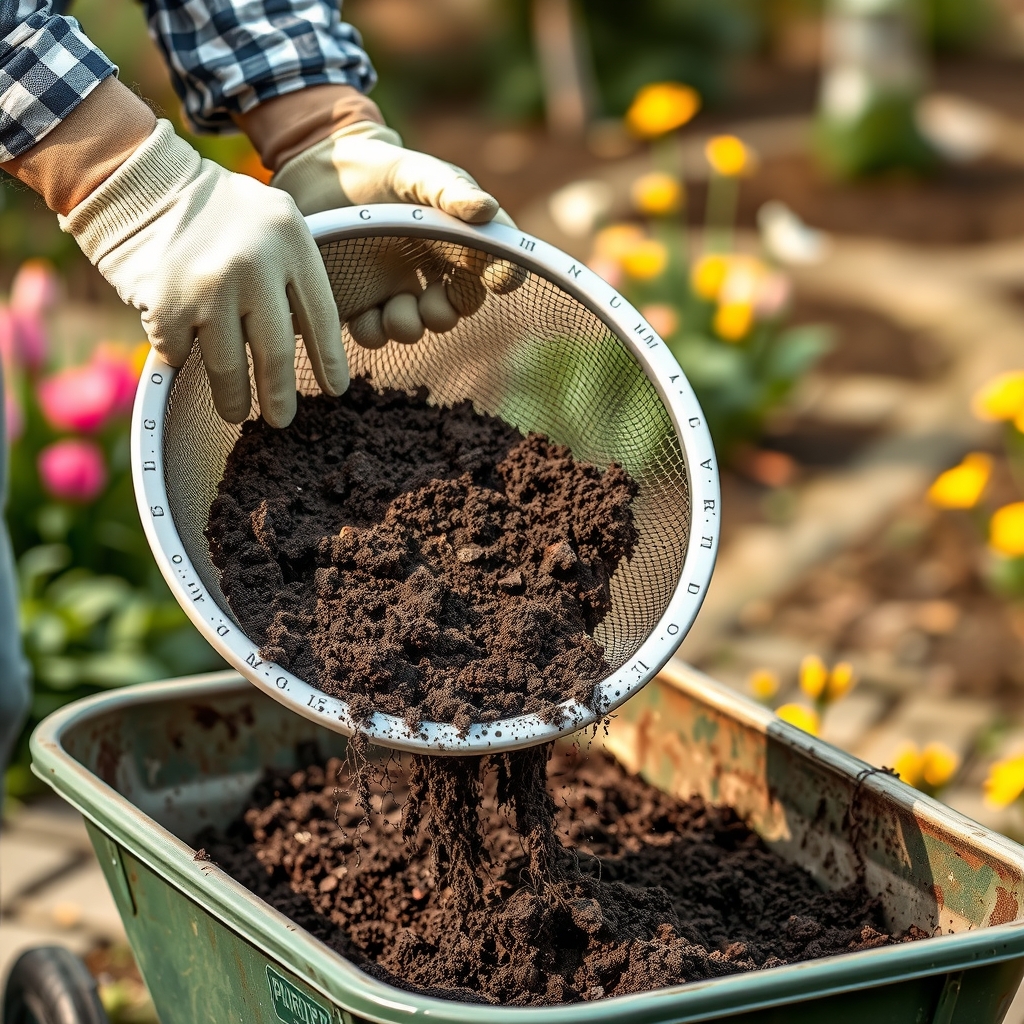
    Sifting finished compost through a mesh screen, illustrative AI image

    Illustrative image (AI-generated), not the exact product.

    See current photos and price on Amazon →

    Winter compost often comes out of the bin chunky. This galvanized steel screen with 3/8-inch mesh sifts out fine compost for seed starting and beds, and you toss the big pieces back in the bin. The handles make it easy to shake over a wheelbarrow.

    Conclusion

    The best compost bin for cold climates is a large, lidded bin filled well in fall, insulated, and fed with scraps buried in the center. Add a tumbler if you want a tidy, rodent-proof option for kitchen waste, and a worm bin indoors to keep composting through the deep freeze. Come spring, sift the finished compost and spread it on your beds.

    FAQs

    Does compost work in winter?
    Yes, but slowly. University of Illinois Extension notes that cold slows composting rather than stopping it. Large piles hold heat and keep working, while small bins often freeze and pick up again when it warms in spring.

    Is a compost tumbler or a bin better for cold climates?
    A large stationary bin holds more material, and volume is what keeps compost warm in winter. A tumbler is tidier, keeps out rodents and is easier to turn, but it holds less and often freezes solid in a Midwest January.

    How big should a compost bin be for winter?
    Aim for about 1 cubic yard, roughly 3 by 3 by 3 feet. Piles that size or larger generate and hold more heat. Smaller bins and tumblers still work, but expect them to pause in deep cold.

    Can I add kitchen scraps to compost in winter?
    Yes. Keep scraps in a lidded kitchen pail, bury them in the center of the pile where it is warmest, and cover each addition with a layer of leaves or other browns.

    How do I keep my compost bin from freezing?
    Fill it well in fall, put it in a sunny spot out of the wind, and insulate it with straw bales, bagged leaves or a tarp. Cover the pile so snow and rain do not soak it.

    What can I compost indoors in winter?
    A worm bin kept between about 59 and 77°F in a basement or heated garage turns fruit and vegetable scraps into worm castings all winter. Bokashi buckets are another indoor option.

    Sources and review scope

    This guide was prepared on October 29, 2026 from the following sources and from the product listings on Amazon.com. Homingwell did not perform hands-on testing. Sellers were checked on Amazon.com on the same date.

    Explore more Lawn & Garden buying guides.
  • Best Winter Bird Feeders for the Midwest: 6 Top Picks

    Best Winter Bird Feeders for the Midwest: 6 Top Picks

    Skip to content

    Lawn & Garden • Winter • Updated October 28, 2026

    Best Winter Bird Feeders for the Midwest: 6 Top Picks

    Explore related guides: Gardening in Iowa: all guides · Best snow shovels · Pet-safe ice melt · Fall garden cleanup.

    Cardinals, chickadees, juncos and woodpeckers stay in Iowa and the Midwest all winter, and a well-stocked feeder brings them right to your window. The right winter bird feeder keeps seed dry, keeps squirrels out and is easy to clean. This guide covers feeder types, the best winter foods, where to put a feeder, how to keep it clean, and six products sold by Amazon.com.

    Winter bird feeder busy with songbirds in the Midwest
    A cardinal and a downy woodpecker at a snowy feeder. Photo: U.S. Fish and Wildlife Service Midwest, public domain, via Wikimedia Commons.

    The short answer

    For most Midwest yards, start with a squirrel-proof tube or hopper feeder filled with black oil sunflower seed, plus a suet feeder for woodpeckers and nuthatches. Add a tray for ground-feeding juncos and cardinals, and a birdbath heater so birds have open water. Put feeders up in October or early November, out of the north wind and near shrubs for cover, and clean them every two weeks.

    Choosing a winter bird feeder: the main types

    Common bird feeder types and the winter birds they attract
    Feeder Best for Good to know
    Tube Chickadees, finches, nuthatches, titmice Keeps seed fairly dry; metal ports resist squirrels
    Hopper (house) Cardinals, jays, sparrows and most feeder birds Holds a lot of seed; roof protects it from snow
    Platform or tray Juncos, doves, sparrows, cardinals Easy to fill; needs drainage and frequent cleaning
    Suet cage Woodpeckers, nuthatches, chickadees High-energy food, best in cold weather
    Nyjer (thistle) tube Goldfinches, house finches Needs small ports to stop spills

    Iowa DNR recommends offering a variety of feeder types in different spots around your yard to attract the widest range of birds. A good feeder is sturdy, keeps seed dry, and is easy to take apart and clean.

    Best winter bird foods

    • Black oil sunflower seed. If you offer only one food, Iowa DNR says it should be this one. It is high in fat and protein, and cardinals, chickadees, nuthatches, jays, finches and woodpeckers all eat it.
    • Suet. Pure fat is a high-energy winter food for downy, hairy and red-bellied woodpeckers, nuthatches and chickadees.
    • White proso millet. A favorite of juncos and native sparrows. Scatter it on a tray or packed-down snow.
    • Nyjer seed. Draws goldfinches and house finches to a tube feeder with small ports.
    • A simple homemade mix. Iowa State University Extension suggests 50 percent black oil sunflower, 35 percent white proso millet and 15 percent cracked corn.
    • Skip the fillers. Milo, wheat, oats and red millet bulk up cheap mixes but most birds leave them on the ground.

    Where to put a bird feeder in winter

    1. Start early. October and early November are the best time, while winter birds are setting up their feeding routes.
    2. Block the wind. Iowa DNR suggests a sheltered spot out of the north wind with sunny exposure.
    3. Give birds cover. Trees and shrubs nearby, especially evergreens, give birds a place to wait and escape. A discarded Christmas tree or brush pile works too.
    4. Stop squirrels. Put a baffle above hanging feeders and below pole-mounted ones, and keep feeders away from branches and roofs squirrels can jump from.
    5. Keep it easy to refill. In a cold snap birds can empty a feeder fast, so place it where you can reach it after a snowstorm.
    6. Add water. Open water is scarce in a deep freeze, so a heated birdbath helps as much as food.

    How to keep feeders clean

    Dirty feeders can spread diseases like salmonella between birds. Extension specialists recommend cleaning seed feeders at least every two weeks, and more often when they are busy. Cornell Lab of Ornithology’s Project FeederWatch reports that a soak in diluted bleach removes more salmonella than soap and water alone.

    1. Empty the feeder and scrub off all visible debris.
    2. Soak it for 10 minutes in a 10 percent bleach solution (1 part bleach to 9 parts water).
    3. Rinse thoroughly and let it dry completely before refilling.
    4. Rake up spilled seed and hulls under the feeder, and keep that debris out of your garden beds.

    If you see sick birds, take feeders down for a week so the birds spread out.

    Best bird feeders and accessories for Midwest winters

    All six were listed as sold by Amazon.com at the time of writing. Check the current listing before you buy.

    Best overall: Squirrel Buster Plus Squirrel-Proof Bird Feeder

    Product pick

    Squirrel Buster Plus Squirrel-Proof Bird Feeder

    Tube bird feeder with a cardinal in a snowy yard, illustrative AI image

    Illustrative image (AI-generated), not the exact product.

    See current photos and price on Amazon →

    When a squirrel climbs on, its weight pulls a shroud down over the feeding ports, and the spring tension is adjustable so heavier birds like cardinals can still feed. It holds about 5 pounds of seed, has six ports and a cardinal ring, and comes apart by hand for cleaning. It costs more than a basic tube, but the maker’s point that it pays for itself in saved seed rings true in a yard full of squirrels.

    Spinning squirrel deterrent: Droll Yankees Squirrel Proof Bird Feeder

    Product pick

    Droll Yankees Squirrel Proof Bird Feeder, 5 lb

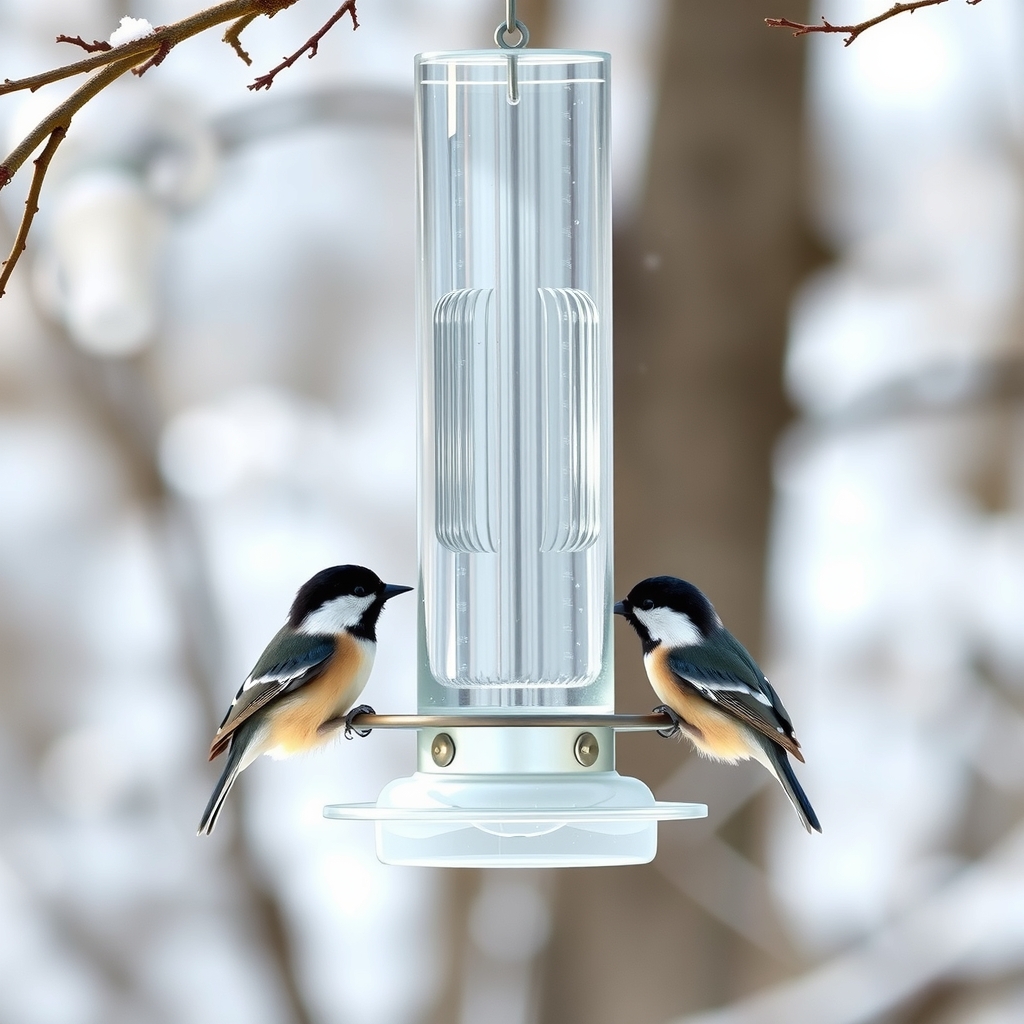
    Chickadees at a tube bird feeder in snow, illustrative AI image

    Illustrative image (AI-generated), not the exact product.

    See current photos and price on Amazon →

    This 5-pound polycarbonate tube uses a weight-sensitive perch ring with a small motor that gently spins squirrels off, while birds feed normally. The rechargeable battery is sealed inside the feeder. It suits yards where squirrels have beaten ordinary baffles, but remember it needs recharging now and then.

    For ground feeders: Wild Wings Cedar Hanging Tray Feeder

    Product pick

    Wild Wings Cedar Hanging Tray Bird Feeder

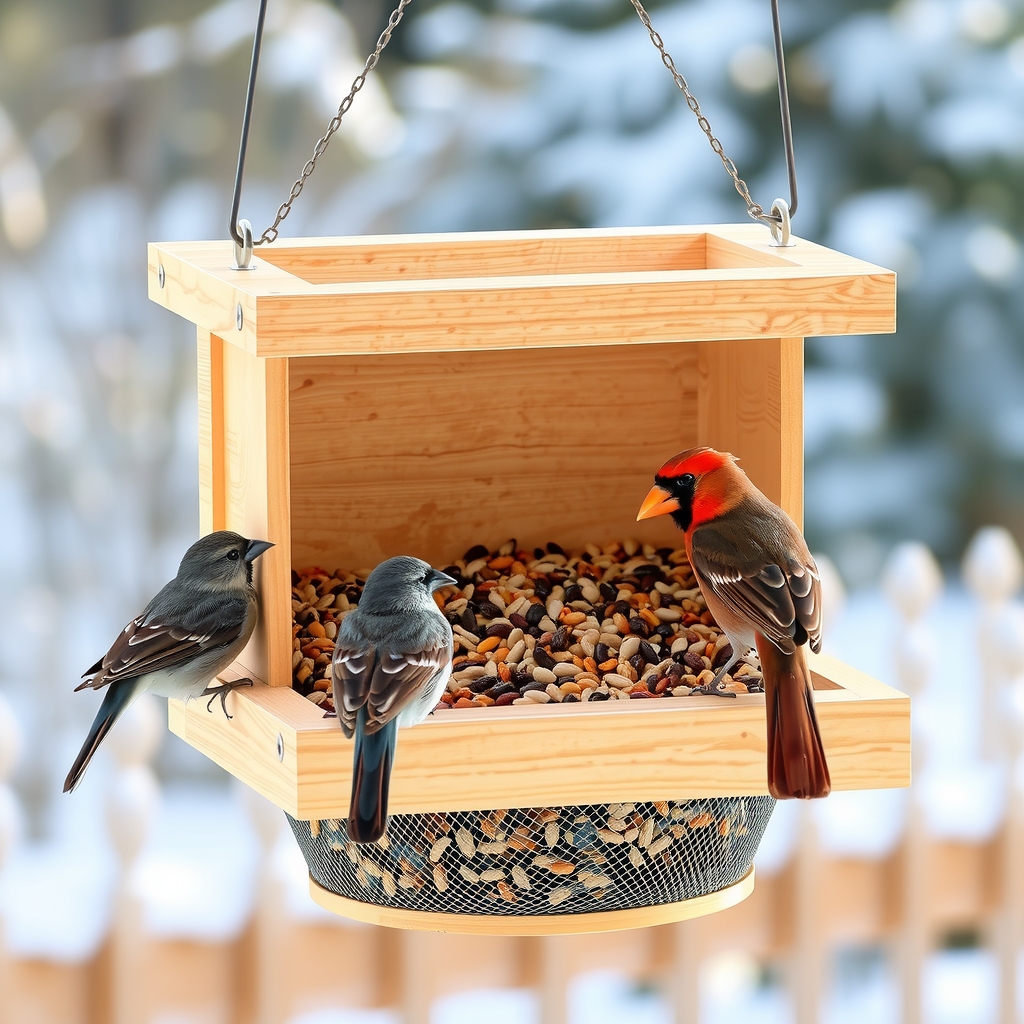
    Cedar tray bird feeder with juncos in winter, illustrative AI image

    Illustrative image (AI-generated), not the exact product.

    See current photos and price on Amazon →

    Juncos, cardinals, doves and jays like an open tray. This cedar platform has a removable mesh seed tray that drains rain and snowmelt and lifts out for cleaning, which matters because open trays get dirty faster. It holds any seed, plus in-shell peanuts and dried fruit.

    For woodpeckers: More Birds Double Suet Cake Feeder

    Product pick

    More Birds Double Suet Cake Feeder with Weather Guard

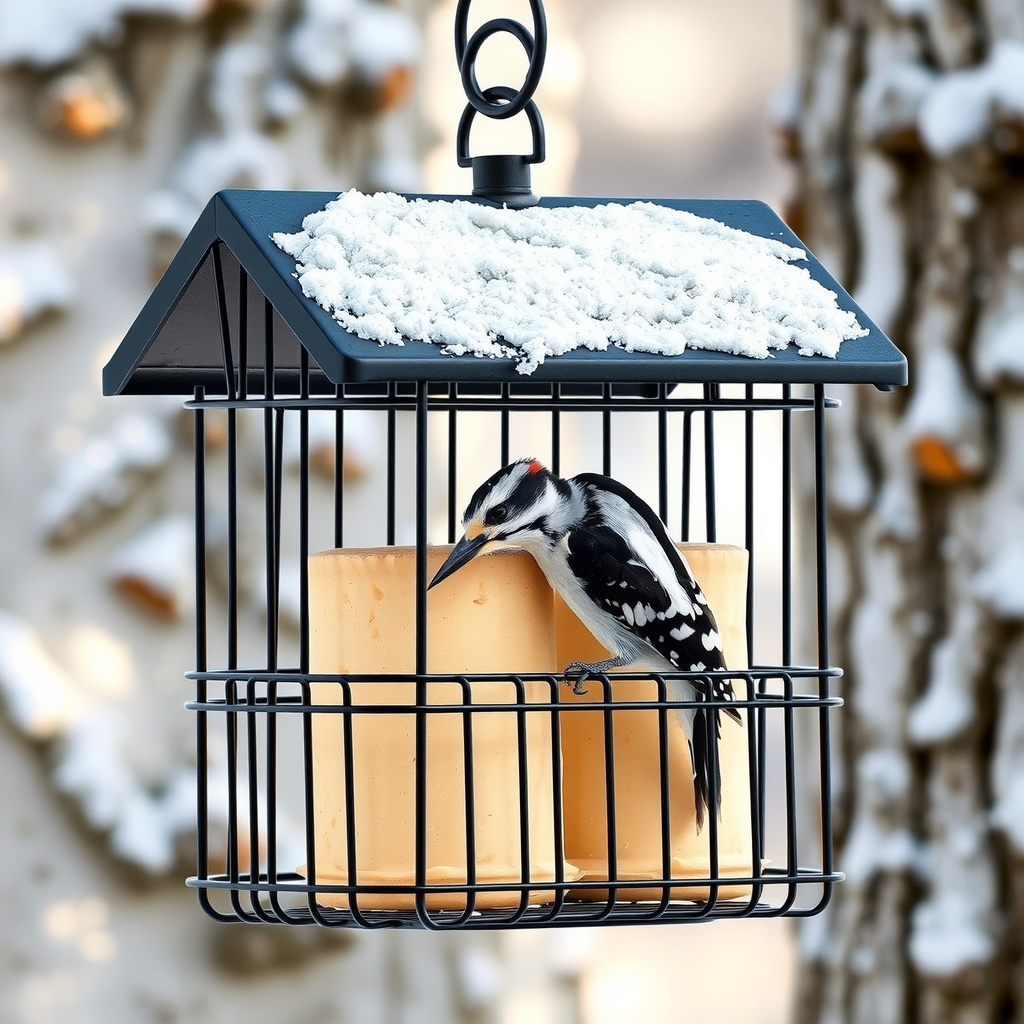
    Downy woodpecker at a double suet feeder in winter, illustrative AI image

    Illustrative image (AI-generated), not the exact product.

    See current photos and price on Amazon →

    Suet is one of the best winter foods for woodpeckers and nuthatches, and this powder-coated steel cage holds two cakes at once under a roof that keeps off snow. The grid spacing suits clinging birds, and the locking closure opens quickly with gloves on.

    For open water: Farm Innovators Birdbath Heater De-Icer, 44 Watt

    Product pick

    Farm Innovators Econo Birdbath Heater De-Icer, 44 Watt

    Bird drinking from open water in a snowy birdbath, illustrative AI image

    Illustrative image (AI-generated), not the exact product.

    See current photos and price on Amazon →

    Drop this flat 10 by 10 inch heater into a shallow birdbath to keep water from freezing. It has no thermostat, so it runs whenever it is plugged in; unplug it on mild days to save power. You will need an outdoor-rated extension cord, sold separately.

    To stop squirrels: Perky-Pet 16-Inch Transparent Squirrel Baffler

    Product pick

    Perky-Pet 16-Inch Transparent Squirrel Baffler

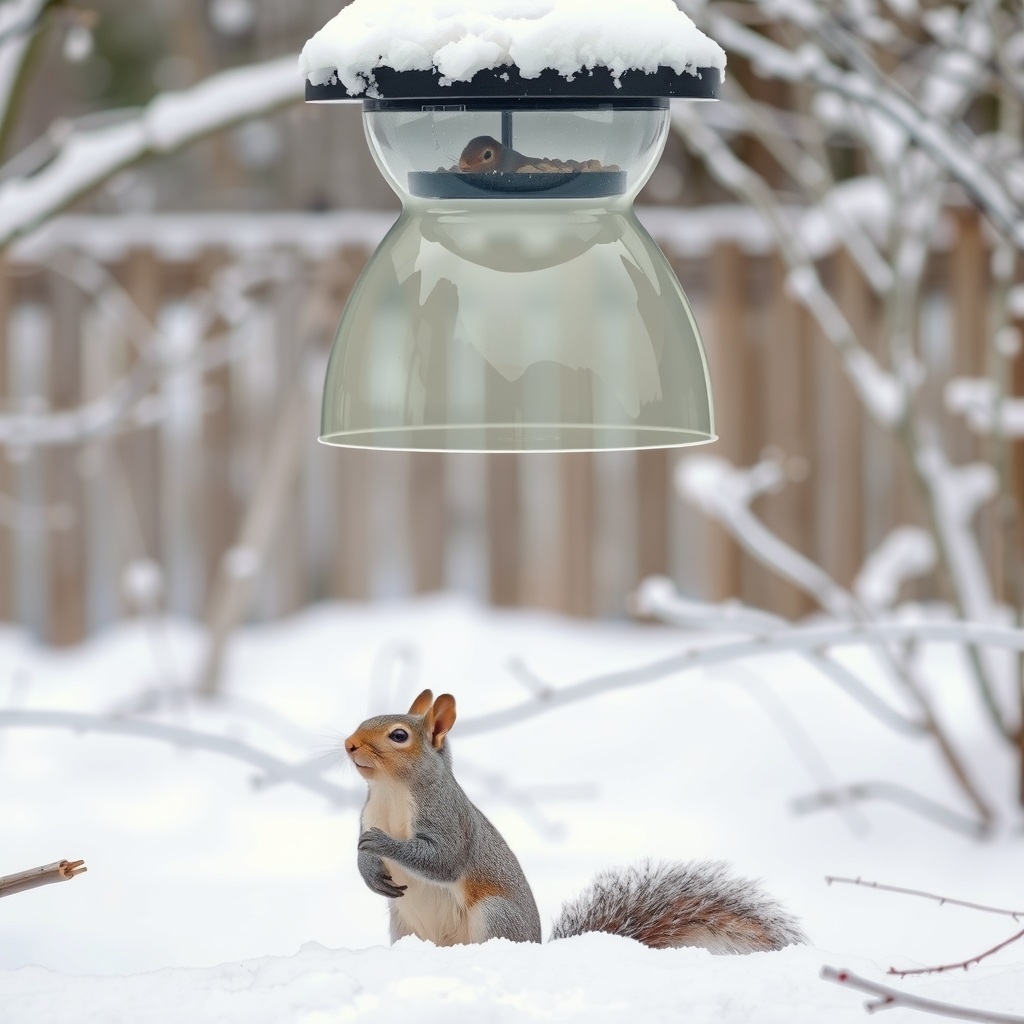
    Clear squirrel baffle dome above a bird feeder in snow, illustrative AI image

    Illustrative image (AI-generated), not the exact product.

    See current photos and price on Amazon →

    A clear 16-inch dome that hangs above a feeder or mounts on a pole below it, so squirrels cannot reach the seed. It also sheds snow off the feeder. It is the cheapest way to squirrel-proof a feeder you already own.

    Conclusion

    The best winter bird feeder setup is simple: a squirrel-proof seed feeder with black oil sunflower seed, a suet cage, a tray for ground feeders and open water. Put them up by early November in a sheltered spot near cover, keep them full through cold snaps, and clean them every two weeks to keep your winter birds healthy.

    FAQs

    When should I start feeding birds in Iowa?
    October or early November is ideal. That is when birds that spend the winter in Iowa set up their feeding routes, so feeders that are up early are more likely to become part of them.

    What is the best bird seed for winter?
    If you offer only one food, make it black oil sunflower seed. It is high in fat and protein and attracts the widest variety of birds. Add suet for woodpeckers and nuthatches, and white proso millet for juncos and sparrows.

    How do I keep squirrels off my bird feeder?
    Use a weight-activated squirrel-proof feeder, or put a baffle above a hanging feeder or below a pole-mounted one. Place the feeder well away from branches, fences and roofs that squirrels can jump from.

    How often should I clean a bird feeder?
    Extension and Cornell Lab advice is to clean seed feeders at least every two weeks, more often in heavy use. Scrub off debris, soak in a 10 percent bleach solution, rinse well and let it dry before refilling.

    Do birds need water in winter?
    Yes. Water can be harder for birds to find than food in a deep freeze. A heated birdbath or a birdbath heater keeps a shallow dish of water open.

    Where should I put a bird feeder in winter?
    Put it out of the north wind, in a sunny spot near trees or shrubs for cover, and close enough to the house to watch and refill easily. Keep it away from places where cats can hide.

    Sources and review scope

    This guide was prepared on October 28, 2026 from the following sources and from the product listings on Amazon.com. Homingwell did not perform hands-on testing. Sellers were checked on Amazon.com on the same date.

    Explore more Lawn & Garden buying guides.
  • Best Snow Shovel for Midwest Winters: 6 Back-Saving Picks

    Best Snow Shovel for Midwest Winters: 6 Back-Saving Picks

    Skip to content

    Lawn & Garden • Winter • Updated October 28, 2026

    Best Snow Shovel for Midwest Winters: 6 Back-Saving Picks

    Explore related guides: Gardening in Iowa: all guides · Pet-safe ice melt · Solar lights for cold climates · Garden tool storage · Winter bird feeders.

    An Iowa or Midwest winter can drop light powder one week and heavy, wet snow the next. The best snow shovel is the one that lets you move that snow without hurting your back or straining your heart. This guide explains the main shovel types, the features that actually reduce strain, how to shovel safely, and six shovels sold by Amazon.com for different jobs.

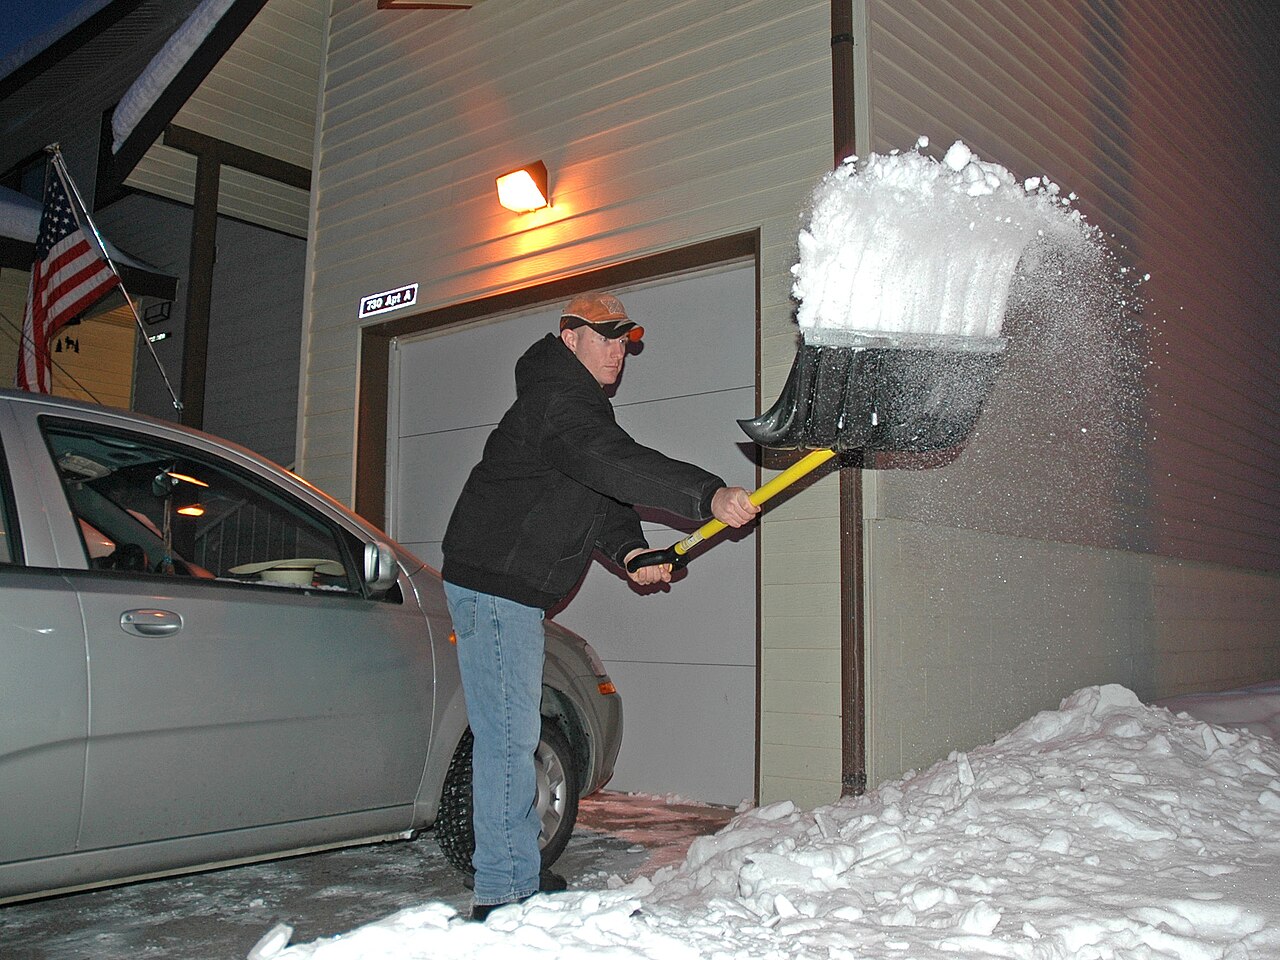
    Best snow shovel in use clearing a snowy driveway after a winter storm
    Clearing a driveway after a winter storm. Photo: U.S. Air Force, public domain, via Wikimedia Commons.

    The short answer

    For most Midwest homes, the best snow shovel is an 18-inch combination shovel with a bent ergonomic handle and a D-grip. It can push snow when the snow is light and lift small loads when it is heavy. Add a wide pusher if you have a long driveway, and a small shovel for steps and the car. Whatever you buy, push snow instead of lifting it when you can, lift small loads, and take breaks.

    Snow shovel types compared

    Common snow shovel types and where they work best
    Type Best for Watch out for
    Pusher (wide, flat blade) Light to medium snow on driveways and long walks Not made for lifting or tossing
    Combo shovel/pusher All-around use: push light snow, lift small loads Smaller scoop than a dedicated scoop shovel
    Ergonomic bent-handle shovel Reducing forward bending Harder to toss snow in some directions
    Two-handle (strain-reducing) People with back concerns who must lift Takes practice; not ideal for every snow type
    Wheeled pusher Long, flat driveways and rural lanes Cannot lift or toss; costs more
    Compact shovel Steps, decks and a car emergency kit Too small for a whole driveway

    Features that make a snow shovel easier on your back

    • Light weight. You cannot control how heavy the snow is, but you can control the weight of the shovel. Poly blades and aluminum or fiberglass shafts keep it down.
    • The right length. Ergonomics guidance suggests the shovel should reach at least elbow height, and ideally closer to your chest, so you do not stoop.
    • A bent shaft. University at Buffalo industrial engineering research found that bent-handle shovels reduce how far you bend your lower back. Bent shafts also suit pushing more than throwing.
    • A D-grip. A D-shaped handle keeps your wrist in a more neutral position and is easier to hold in winter gloves.
    • A smaller blade for lifting. A blade of about 10 to 14 inches holds less snow, which keeps each lift lighter. Save wide blades for pushing.
    • A wear strip. A metal or nylon strip on the blade edge scrapes better and makes a plastic blade last longer.

    How to shovel snow safely

    Snow shoveling sends thousands of people to the emergency room. A national study from Nationwide Children’s Hospital estimated about 11,500 snow shovel related injuries and medical emergencies a year in the U.S. The lower back was the most commonly injured area, and heart problems, while less common, were the most serious.

    1. Push, do not lift, when you can. The American Heart Association says lifting heavy snow can raise blood pressure quickly, and recommends pushing snow and lifting smaller loads more often.
    2. Take frequent breaks and pay attention to how you feel. Cold air and hard work together add load on the heart.
    3. Skip the big meal and the alcohol right before or after shoveling.
    4. Lift with your legs. Bend your knees, keep your back straight, keep the load close to your body, and turn your feet instead of twisting your spine.
    5. Clear deep snow in layers. Take off a few inches at a time, or shovel during a long storm instead of waiting for it all to pile up.
    6. Talk to your doctor first if you have a heart condition, do not exercise regularly, or are middle-aged or older.

    Stop and call 911 if you feel chest pain or pressure, pain spreading to your arm, neck or jaw, shortness of breath, or lightheadedness while shoveling.

    When you finish, keep salty snow off lawns and garden beds, and use a gentle melter only where people walk. Our pet-safe ice melt guide explains how.

    Best snow shovels for Midwest winters

    All six were listed as sold by Amazon.com at the time of writing. Check the current listing before you buy.

    Best overall: VEVOR 18-inch Poly Snow Shovel Pusher

    Product pick

    VEVOR 18-inch Poly Snow Shovel Pusher

    Ergonomic combo snow shovel on a cleared sidewalk, illustrative AI image

    Illustrative image (AI-generated), not the exact product.

    See current photos and price on Amazon →

    An 18-inch blade is the sweet spot for most Midwest storms: wide enough to push light snow quickly, small enough to lift a safe load when the snow is heavy. This one has a poly blade with a metal edge for scraping compacted snow and thin ice, an extended handle that stands about 55 inches tall to reduce bending, and a D-shaped non-slip grip. It assembles without tools.

    For back concerns: VEVOR 18-inch Poly Snow Shovel with Assisted Handle

    Product pick

    VEVOR 18-inch Poly Snow Shovel with Assisted Handle

    Snow shovel on a snowy front walk by a brick house, illustrative AI image

    Illustrative image (AI-generated), not the exact product.

    See current photos and price on Amazon →

    The same 18-inch poly blade and metal edge, plus an assisted handle that gives your second hand a grip partway down the shaft. Holding the shovel with both hands spread apart lets your arms and legs share the lift, which is the idea behind strain-reducing two-handle shovels. It takes a little practice, but it is worth trying if your lower back complains after shoveling.

    Best pusher for driveways: VEVOR 22-inch Wide Plastic Snow Shovel

    Product pick

    VEVOR 22-inch Wide Plastic Snow Shovel

    Wide snow pusher clearing a path on a snowy driveway, illustrative AI image

    Illustrative image (AI-generated), not the exact product.

    See current photos and price on Amazon →

    Pushing is safer than lifting, and a 22-inch blade clears a driveway or long sidewalk in fewer passes. It has a metal edge for packed snow, an extended handle and a D-grip. Use it to push light to medium snow to the edge, and switch to a smaller blade when the snow is wet and heavy, since a wide blade full of slush is too much to lift.

    For long driveways: Garvee 29-inch Snow Pusher with Wheels

    Product pick

    Garvee 29-inch Snow Pusher with Wheels

    Manual wheeled snow pusher on a rural driveway, illustrative AI image

    Illustrative image (AI-generated), not the exact product.

    See current photos and price on Amazon →

    If you have a long, flat driveway or a rural lane, wheels let you move a wide load without carrying the weight of the blade. This pusher has a 29.5-inch powder-coated steel blade with a plastic base to protect the ground, five angle settings to throw snow to either side, a height-adjustable T-grip handle and 9.3-inch rubber wheels. It cannot lift or toss snow and costs more than a shovel, so keep a small shovel for steps and edges.

    For steps and decks: VEVOR 14-inch Aluminum Snow Shovel

    Product pick

    VEVOR 14-inch Aluminum Snow Shovel

    Compact aluminum snow shovel on snowy porch steps, illustrative AI image

    Illustrative image (AI-generated), not the exact product.

    See current photos and price on Amazon →

    A narrow aluminum blade is the right tool for porch steps, decks and the tight spots a wide blade cannot reach. At 14 inches it sits right in the blade size ergonomics experts recommend for lifting, so every scoop stays light. It shares the extended handle and D-grip of the larger models.

    For the car: MICHELIN 40-inch Folding Utility Snow Shovel, 2-Pack

    Product pick

    MICHELIN 40-inch Folding Utility Snow Shovel, 2-Pack

    Folding snow shovel in a car trunk on a snowy day, illustrative AI image

    Illustrative image (AI-generated), not the exact product.

    See current photos and price on Amazon →

    Every Midwest car should carry a shovel in winter. This folding shovel has an 8.5 by 11 inch anodized aluminum scoop and a telescoping handle that extends to 40 inches, with dual non-slip grips. It folds small enough to fit under a seat or in an emergency kit. The 2-pack means one for each car, or one for the garage door.

    Conclusion

    The best snow shovel for a Midwest winter is light, the right length for you, and matched to the job: an 18-inch shovel for everyday storms, a wide pusher or wheeled pusher for long driveways, and a small shovel for steps. Push instead of lifting when you can, keep each load small, take breaks, and stop right away if you feel chest pain.

    FAQs

    What type of snow shovel is best for heavy, wet snow?
    A shovel with a smaller blade is safer for heavy, wet snow because each scoop weighs less. A combo shovel with a bent handle, or a two-handle shovel, can also reduce strain on your back.

    Are ergonomic bent-handle snow shovels worth it?
    Research from the University at Buffalo found that bent-handle shovels reduce how far you bend your lower back. They work best for pushing and lifting small loads, and may feel awkward for tossing snow.

    Is it better to push or lift snow?
    Push when you can. The American Heart Association says lifting heavy snow can raise blood pressure quickly and recommends pushing snow and lifting smaller amounts more often.

    How long should a snow shovel be?
    Ergonomics guidance suggests a shovel that reaches at least your elbow, and ideally closer to your chest, so you do not have to stoop.

    Is shoveling snow bad for your heart?
    For most people it is fine, but cold weather and hard effort together add load on the heart. People with heart disease, high blood pressure or who do not exercise regularly should talk to a doctor before shoveling.

    Should I use a plastic or metal snow shovel?
    Poly blades are light and resist sticking and rust, which is why most ergonomic shovels use them. A metal wear strip on the edge helps the blade scrape better and last longer.

    Sources and review scope

    This guide was prepared on October 28, 2026 from the following sources and from product listings. Homingwell did not perform hands-on testing.

    Explore more Lawn & Garden buying guides.
  • Best Pet-Safe Ice Melt for Walks and Gardens

    Best Pet-Safe Ice Melt for Walks and Gardens

    Skip to content

    Lawn & Garden • Pets • Updated October 28, 2026

    Best Pet-Safe Ice Melt for Walks and Gardens

    Explore related guides: Gardening in Iowa: all guides · Solar lights for cold climates · Winterize raised beds · Garden tool storage · Best snow shovels.

    Rock salt keeps steps from turning into ice rinks, but it is hard on dogs’ paws and the lawn and shrubs along your walk. The best pet-safe ice melt is one that uses gentler ingredients, still works in a Midwest cold snap, and goes down in thin layers. This guide explains what is actually in ice melt, what “pet safe” really means, how to protect paws and plants, and six products sold by Amazon.com that help.

    Dog walking on a snowy path, choosing the best pet-safe ice melt
    Winter walks mean salty paws. Photo: Billie Grace Ward, CC BY 2.0, via Wikimedia Commons.

    The short answer

    No ice melt is completely harmless to pets. Pet Poison Helpline says every type can cause problems if a pet eats enough. “Pet-friendly” products, usually based on urea or magnesium chloride, are less likely to cause serious harm than rock salt or calcium chloride. For an Iowa or Midwest winter, a magnesium chloride melter with the EPA Safer Choice label is a good balance of gentleness and cold-weather performance. Shovel first, use a thin scatter, and wipe your dog’s paws after every walk.

    Ice melt ingredients compared

    Common ice melt ingredients: pets, plants and lowest working temperature
    IngredientPets (Pet Poison Helpline)Plants and lawnWorks to about
    Sodium chloride (rock salt)Large amounts can cause dangerous sodium poisoningDamages soil, plants and metal12°F
    Calcium chlorideMost irritating to mouth, stomach and pawsUsually fine in small amounts; can harm roots-25°F
    Potassium chlorideStrong stomach irritantCan injure foliage and roots25°F
    Magnesium chlorideStomach upset; serious problems unlikelyGentler if used as directedAbout 5°F
    UreaUsually the “pet safe” choice; drooling and mild upsetCan add nitrates to water21°F
    Calcium magnesium acetate (CMA)Calcium salt, can irritateLittle effect on plants or concrete20°F

    Temperatures are typical figures from extension sources and vary by product; follow the rating on the label.

    What “pet safe” really means on the label

    “Pet safe” and “pet friendly” are marketing terms. No agency regulates them, so a product can carry the words and still contain salts that irritate paws. Two things are more useful:

    • The ingredient list. Look for magnesium chloride, urea or CMA, and avoid products that are mostly rock salt or calcium chloride if your dog licks its feet.
    • The EPA Safer Choice label. Ice melts with this label have had every ingredient screened by the EPA. Trade reports note the standard also requires the product to work below 0°F and to cut sodium and chloride by at least 30 percent.

    How to protect your dog’s paws

    1. Use less. Shovel or push the snow first, then scatter a thin layer only where people walk.
    2. Wipe paws after every walk, including between the toes, so your dog does not lick off salt from your walk or the neighbors’.
    3. Moisturize dry pads with a paw balm, and consider dog boots for long walks on salted sidewalks.
    4. Store the bag high and sealed. The serious poisonings usually happen when a dog gets into the bag, not from walking on a treated step.
    5. Know the signs. Vomiting, drooling, diarrhea, weakness or tremors after contact with ice melt mean it is time to call for help.

    If your pet eats ice melt, call your veterinarian, the ASPCA Animal Poison Control Center at 888-426-4435, or Pet Poison Helpline at 855-764-7661. Both hotlines charge a fee.

    How to protect your lawn and garden

    • Shovel early and often. The less snow and ice you leave, the less melter you need.
    • Keep it off the beds. Do not pile salty snow on lawns, perennials or the raised beds you just winterized, and keep spreaders aimed at the pavement.
    • Choose gentler ingredients near plants. Extension specialists rate CMA as having little effect on plants, and rock salt as the most damaging.
    • Use sand for grip. Sand or other abrasives do not melt ice, but they add traction without salt, though they need sweeping up in spring.
    • Flush in spring. Water beds along walks and driveways well in spring to wash salts below the root zone.

    Pet-safe ice melts and paw care

    All six were listed as sold by Amazon.com at the time of writing. Check the label and current listing before you buy.

    Best overall: Safe Step Sure Paws Ice Melter, 8 lb Jug

    Product pick

    Safe Step Sure Paws Ice Melter, 8 lb Jug

    Gloved hand scattering pet-friendly ice melt on an icy step, illustrative AI image

    Illustrative image (AI-generated), not the exact product.

    See current photos and price on Amazon →

    Sure Paws is a magnesium chloride ice melter that the U.S. EPA lists as a Safer Choice product, and its maker rates it to about -15°F. That is a good fit for an Iowa winter, where many gentler melters stop working well. The listing describes it as safe for paws, skin, lawns and shrubs when used as directed. Remember that magnesium chloride can still upset a dog’s stomach if eaten, so use only a thin scatter and wipe paws after walks.

    Long-time pet favorite: Pestell Paw Thaw Pet Friendly Ice Melter, 12 lb

    Product pick

    Pestell Paw Thaw Pet Friendly Ice Melter, 12 lb

    Thin layer of ice melt pellets on an icy sidewalk by a lawn, illustrative AI image

    Illustrative image (AI-generated), not the exact product.

    See current photos and price on Amazon →

    A 12 lb jug from a pet bedding and litter maker, sold as a pet-friendly, biodegradable alternative to rock salt that will not harm pets or vegetation when used as directed. The listing says it leaves no slimy residue and will not damage floors or footwear. It does not name its main ingredient on the product page, so read the label before you buy if you want to avoid a specific salt.

    Chloride-free pick: North Pro Nature Sub Zero Ice Melter, 8 lb

    Product pick

    North Pro Nature Sub Zero Ice Melter, 8 lb

    Light scatter of ice melt on a brick walkway beside snowy shrubs, illustrative AI image

    Illustrative image (AI-generated), not the exact product.

    See current photos and price on Amazon →

    If you want to keep chlorides off your lawn, shrubs and new plantings, this Minnesota-made melter is 100 percent chloride-free and rated for sub-zero temperatures. The maker says it uses about 35 percent less product than standard ice melt and includes corrosion inhibitors. It has fewer reviews than the other two, so treat it as a promising option rather than a proven favorite.

    To use less product: Chapin 64 oz Hand Shaker Spreader

    Product pick

    Chapin 64 oz Hand Shaker Spreader

    Gloved hand sprinkling ice melt from a shaker onto icy stairs, illustrative AI image

    Illustrative image (AI-generated), not the exact product.

    See current photos and price on Amazon →

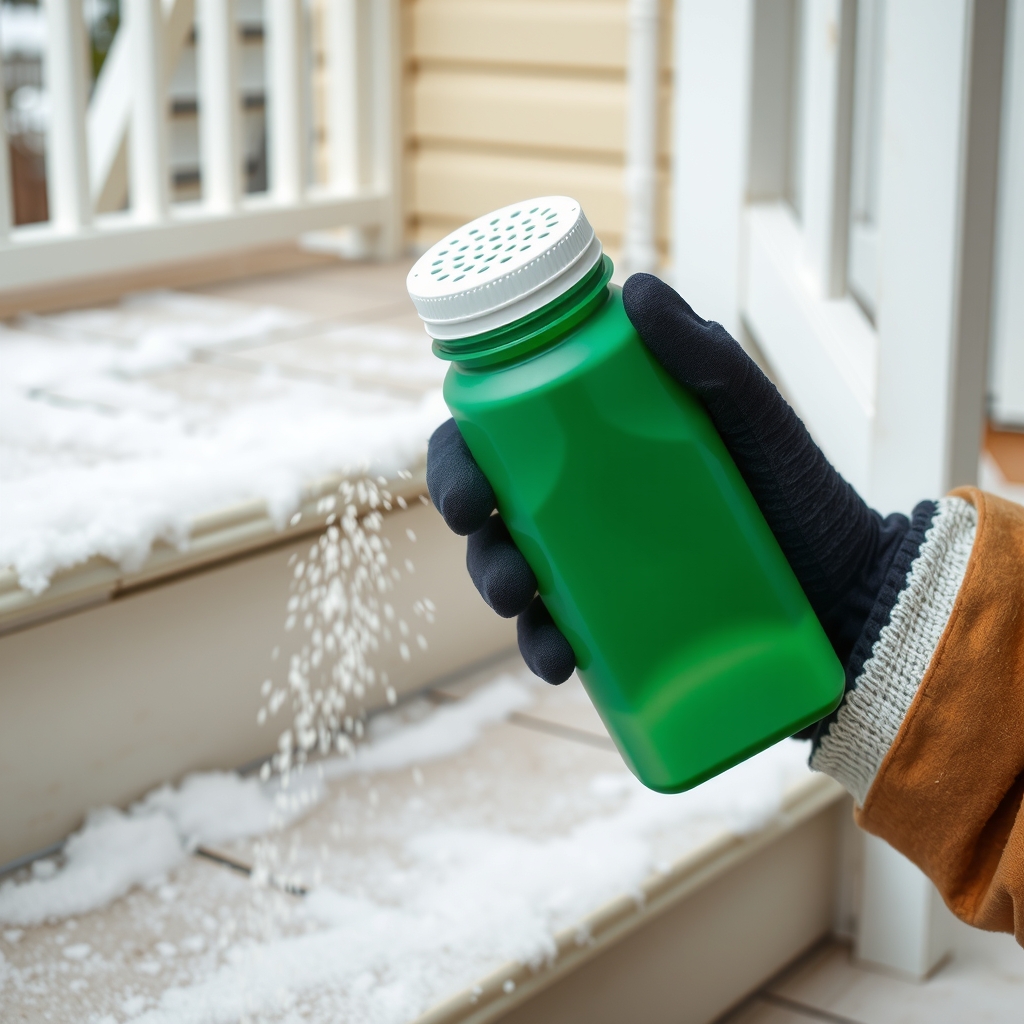
    The best way to protect pets and plants is to use less ice melt, and a shaker makes that easy. This 64 oz bottle has a lid with three opening sizes, so you can sprinkle a thin, even layer on steps and short paths instead of dumping handfuls. In spring it works for grass seed and fertilizer too.

    For dry, cracked paw pads: Palmer’s for Pets Cocoa Butter Paw Balm, 3.5 oz

    Product pick

    Palmer’s for Pets Cocoa Butter Paw Balm, 3.5 oz

    Person applying balm to a dog's paw pads after a winter walk, illustrative AI image

    Illustrative image (AI-generated), not the exact product.

    See current photos and price on Amazon →

    Cold, dry air and de-icing salts can leave paw pads rough and cracked. This fragrance-free cocoa butter and vitamin E balm helps soften pads and noses. Rub a thin layer in after you wipe your dog’s paws, and let it soak in before your dog licks it off.

    For wiping paws at the door: Wags & Wiggles Fragrance-Free Dog Wipes, 100 Count

    Product pick

    Wags & Wiggles Fragrance-Free Dog Wipes, 100 Count

    Person wiping a dog's snowy paw with a wipe at the door, illustrative AI image

    Illustrative image (AI-generated), not the exact product.

    See current photos and price on Amazon →

    Veterinary poison services agree that wiping paws after a walk is the simplest way to stop dogs licking off ice melt. These hypoallergenic, fragrance-free wipes are thick enough for snowy, salty feet. Keep a pack by the door so it becomes part of every winter walk.

    Conclusion

    The best pet-safe ice melt is the least ice melt that keeps your steps safe. Shovel first, choose a gentler formula such as a Safer Choice magnesium chloride melter for cold Midwest days, and spread it thinly with a shaker. Keep melter off lawns and beds, store the bag out of reach, and wipe and moisturize your dog’s paws after every winter walk.

    FAQs

    Is any ice melt completely safe for pets?
    No. Pet Poison Helpline notes that all ice melts can be hazardous if a pet eats enough. Products labeled pet-friendly, usually urea or magnesium chloride based, are less likely to cause serious problems but can still upset a pet’s stomach.

    What does pet-safe ice melt mean on the label?
    The term is not regulated, so any brand can use it. Check the ingredient list instead, and look for the EPA Safer Choice label, which requires a product to meet EPA safer-ingredient criteria.

    What ice melt is safest for lawns and plants?
    Calcium magnesium acetate (CMA) has little effect on plants, according to extension specialists. Rock salt (sodium chloride) is the most damaging. Whatever you use, shovel first and apply as little as possible.

    Does pet-safe ice melt work in very cold weather?
    Some do. Magnesium chloride products are often rated to around 0°F or below, while urea and CMA lose effectiveness around 20°F. Check the temperature rating on the label.

    What should I do if my dog eats ice melt?
    Call your veterinarian, the ASPCA Animal Poison Control Center (888-426-4435) or Pet Poison Helpline (855-764-7661). Both hotlines charge a consultation fee.

    How do I protect my dog’s paws from ice melt?
    Wipe paws after every walk, use a paw balm for dry pads, consider dog boots, and keep ice melt bags closed and out of reach.

    Sources and review scope

    This guide was prepared on October 28, 2026 from the following sources and from the product listings on Amazon.com. Homingwell did not perform hands-on testing. Sellers were checked on Amazon.com on the same date.

    Explore more Lawn & Garden buying guides.
  • When to Plant Garlic in Iowa: Dates, Depth and Winter Care

    When to Plant Garlic in Iowa: Dates, Depth and Winter Care

    Skip to content

    Lawn & Garden • Iowa guide • Updated October 28, 2026

    When to Plant Garlic in Iowa: Dates, Depth and Winter Care

    Explore related guides: Gardening in Iowa: all guides · Pet-safe ice melt · Raised beds for Iowa · Winterize raised beds · Fall garden cleanup · When to plant tulip bulbs in Iowa.

    Garlic is the one crop Iowa gardeners plant as everything else is winding down. Knowing when to plant garlic in Iowa is simple: put cloves in the ground in October or early November, mulch them in November, and dig fat bulbs the next July. This guide covers Iowa State University Extension’s timing, planting depth and spacing, the best varieties for Iowa, and how to get garlic through winter.

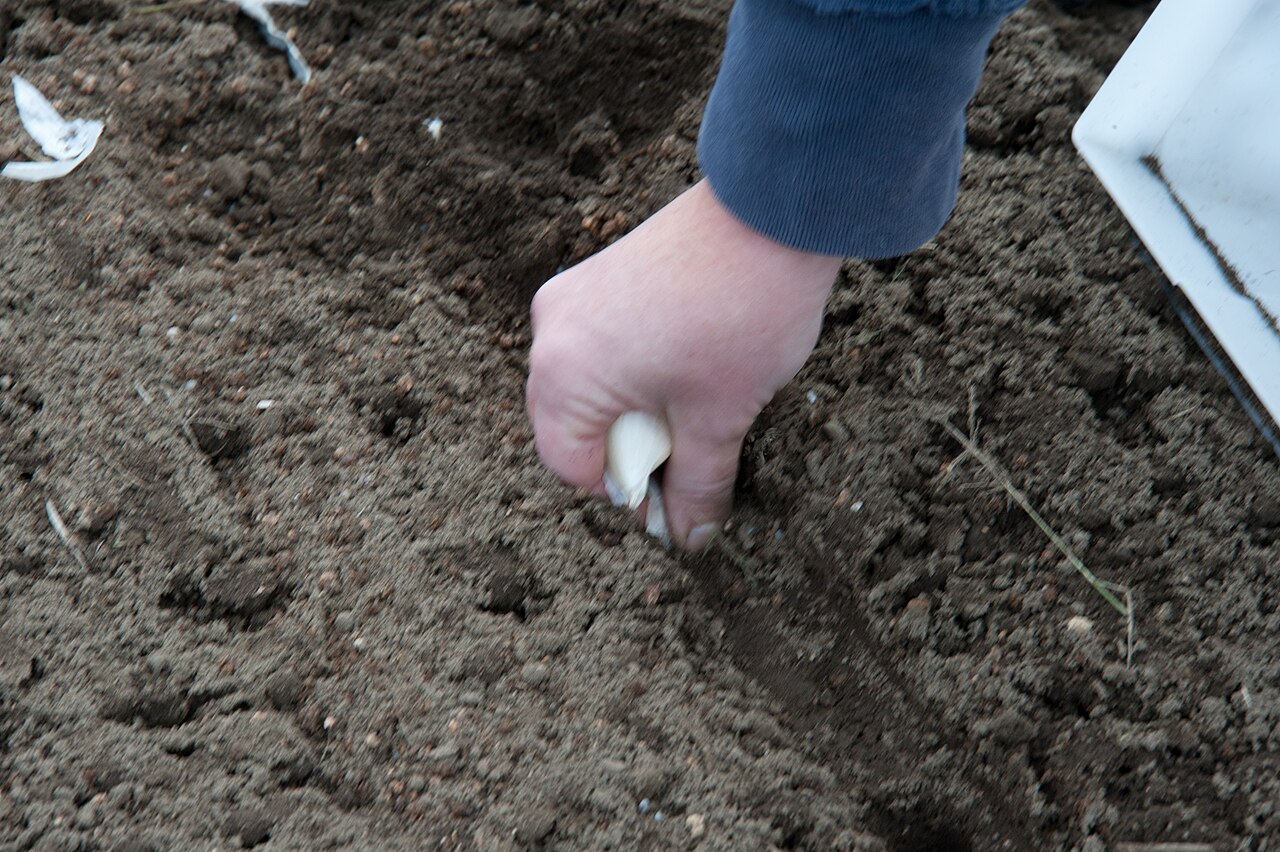
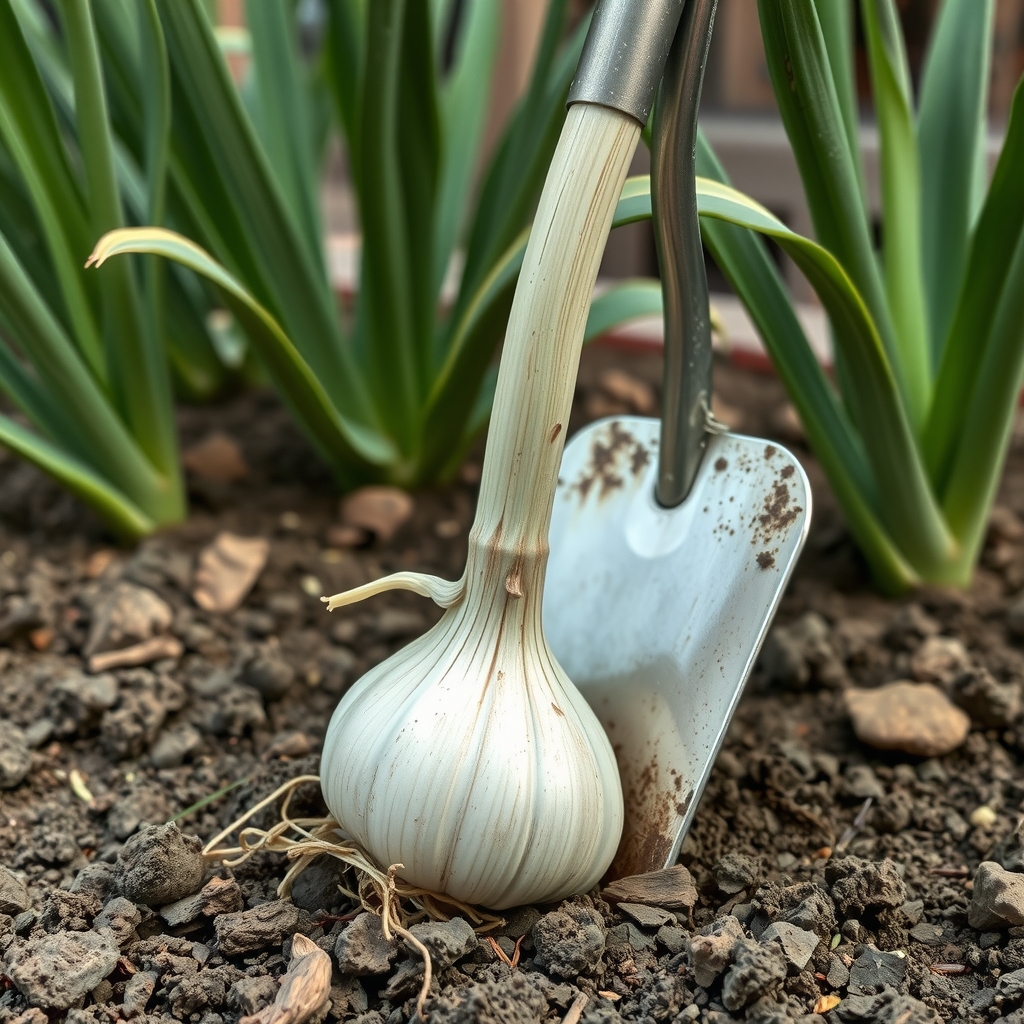
    Planting garlic cloves in a prepared garden bed, when to plant garlic in Iowa
    Planting garlic cloves in fall. Photo: Dwight Sipler, CC BY 2.0, via Wikimedia Commons.

    When to plant garlic in Iowa: the short answer

    ISU Extension says October to early November is the time to plant garlic in Iowa. A good rule is to plant after the first fall frost and a few weeks before the ground freezes hard, so the cloves can grow roots but not leaves. For most of Iowa that means mid-October to the first week of November. Plant cloves 1 to 1.5 inches deep and 3 to 5 inches apart, then mulch with straw in November.

    The Iowa garlic year at a glance

    Garlic timing in Iowa (ISU Extension)
    WhenWhat to do
    Before plantingWork compost and 1 to 2 lb of 10-10-10 fertilizer per 100 sq ft into the bed
    October to early NovemberPlant cloves 1 to 1.5 in deep, pointed end up
    NovemberCover with 4 to 6 in of weed-free straw
    Early springPull the straw back between the rows
    3 to 4 weeks after shoots appearSide-dress with fertilizer
    Mid to late MayCut hardneck scapes
    Late JulyStop watering
    July or AugustHarvest when 4 to 5 lower leaves are dry

    Hardneck or softneck garlic for Iowa?

    Hardneck garlic is the usual choice for Iowa. It handles cold winters well, has fewer but larger cloves, and sends up a curly flower stalk called a scape in late spring. It does not keep as long as softneck. ISU lists ‘Asian Tempest’, ‘German Red’, ‘Merrifield Rocambole’, ‘Music’ and ‘Spanish Roja Rocambole’ as good hardneck choices for Iowa.

    Softneck garlic stores longer and is the type sold in most grocery stores. ISU’s Iowa-suited softneck picks are ‘Inchellium Red’, ‘New York White’ and ‘Susanville’.

    Whichever you choose, buy seed garlic from a garden center or mail-order supplier. ISU warns against planting grocery-store garlic, which is usually a softneck grown in warmer regions and not adapted to Iowa’s climate.

    How to plant garlic

    1. Pick a sunny, well-drained spot. Garlic needs full sun and fertile soil high in organic matter. In heavy clay, bulbs come out misshapen, so work in compost or well-rotted manure. A raised bed is ideal because it drains well over winter.
    2. Feed the bed. ISU says garlic needs more fertilizer than many vegetables: work in 1 to 2 pounds of an all-purpose garden fertilizer such as 10-10-10 per 100 square feet before planting.
    3. Split the bulbs just before planting. Break bulbs into cloves and plant the largest ones. Big cloves grow big bulbs.
    4. Plant pointed end up. Set each clove 1 to 1.5 inches deep. Cloves planted upside down tend to make misshapen bulbs.
    5. Space them out. Leave 3 to 5 inches between cloves and 18 to 24 inches between rows.
    6. Water once if the soil is dry, so the cloves start rooting.

    Mulch and winter care

    ISU recommends covering fall-planted garlic in November with a 4 to 6 inch layer of weed-seed-free straw to prevent winter injury. Our guide to winterizing raised beds covers the rest of the fall routine.

    Shoots up in February? A warm spell can bring garlic up early. ISU says to add extra mulch once normal cold returns, especially if there is little snow cover. Leaves are likely to be damaged below about 20°F, but the plants usually regrow, with somewhat smaller bulbs.

    Spring care and scapes

    • Move the straw: in early spring, pull it off the rows and leave it between them, where it keeps weeds down and holds moisture.
    • Side-dress: 3 to 4 weeks after the shoots come up, ISU suggests about 1 more pound of fertilizer per 100 feet of row, in a band about 4 inches from the plants.
    • Water: about 1 inch a week in dry weather, then stop watering in late July so the tops can die down.
    • Cut the scapes: hardneck scapes appear from mid to late May. Cut them once they curl, before the tip straightens and opens, as low as you can without removing leaves. The plant then puts its energy into the bulb, and the scapes are good to eat.

    Harvest, curing and storage

    In Iowa, garlic is usually ready in July or August. ISU’s sign is a plant with 4 to 5 dry lower leaves and 3 to 4 green upper leaves. Wait too long and the bulb wrappers break down, so the cloves do not store as well.

    1. Loosen the soil beside each plant and lift the bulb, rather than pulling it by the stem.
    2. Dry the bulbs in a warm, dry, well-ventilated spot on a raised screen or slotted tray, or braid them and hang them.
    3. Once the tops are dry, cut them 1 inch above the bulb, trim the roots and brush off loose soil.
    4. Store in a mesh bag or open crate at 32 to 40°F with 65 to 70 percent humidity. Stored this way, ISU says garlic keeps three to six months.

    Save a few of your biggest bulbs to plant again next October.

    Tools for planting and growing garlic

    Seed garlic itself is best bought from a garden center or a garlic grower, and weed-free straw from a farm store. These tools were listed as sold by Amazon.com at the time of writing.

    For planting at the right depth: Fiskars Bulb Transplanter with Depth Markings

    Product pick

    Fiskars Bulb Transplanter with Depth Markings

    Bulb planter tool in garden soil beside garlic cloves, illustrative AI image

    Illustrative image (AI-generated), not the exact product.

    See current photos and price on Amazon →

    ISU says to plant cloves 1 to 1.5 inches deep. This steel bulb planter has depth marks on the barrel, so every hole comes out the same, and a spring-loaded handle drops the soil plug back out. It cuts a 2.25 inch hole, which is plenty for a garlic clove, and it makes quick work of a bed with 30 or 40 cloves.

    For long planting sessions: Fiskars Garden Kneeling Pad, 11 x 18 in

    Product pick

    Fiskars Garden Kneeling Pad, 11 x 18 in

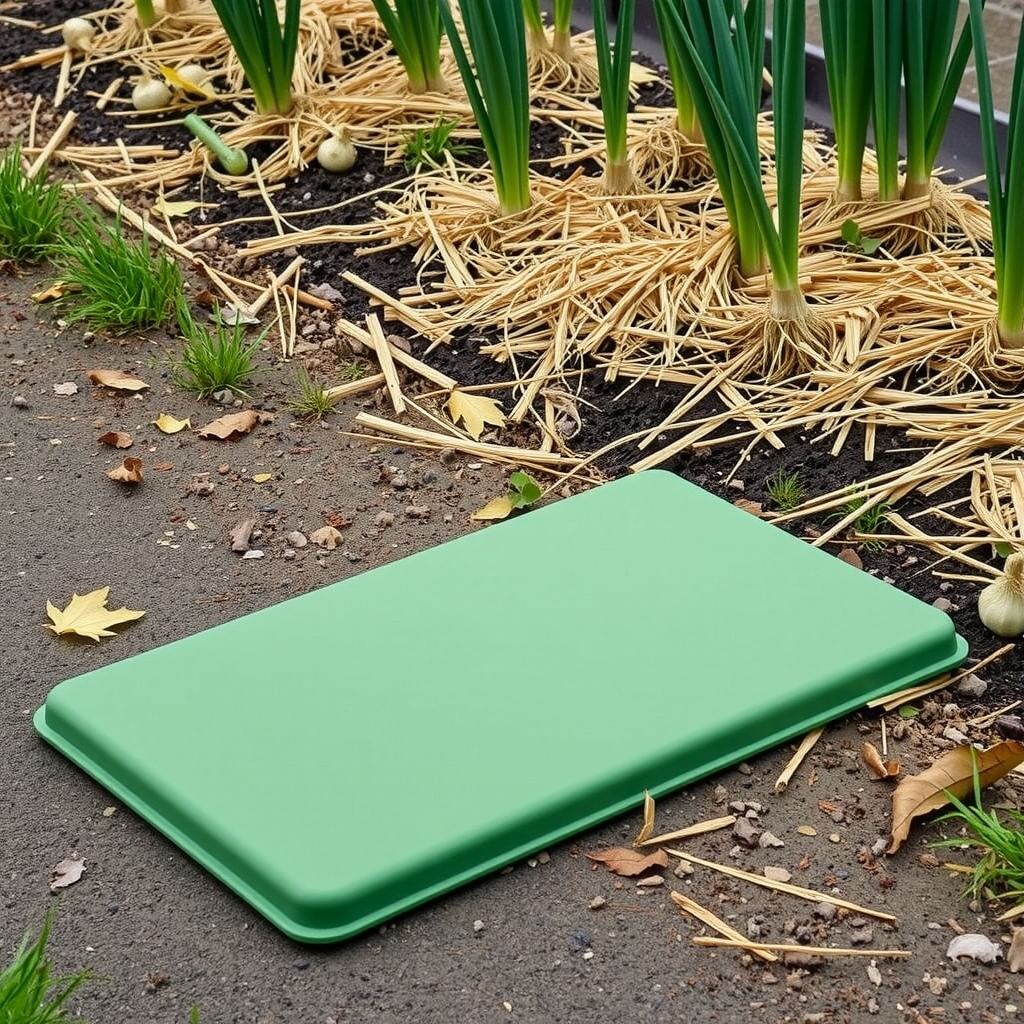
    Green foam kneeling pad beside a straw-mulched garlic bed, illustrative AI image

    Illustrative image (AI-generated), not the exact product.

    See current photos and price on Amazon →

    Garlic goes in on cold, damp October days, one clove at a time. This 3/4 inch foam pad keeps your knees dry and off rough, cold soil, does not soak up water, and has a handle so you can move it down the row.

    For cutting scapes in May: Fiskars Micro-Tip Pruning Snips

    Product pick

    Fiskars Micro-Tip Pruning Snips

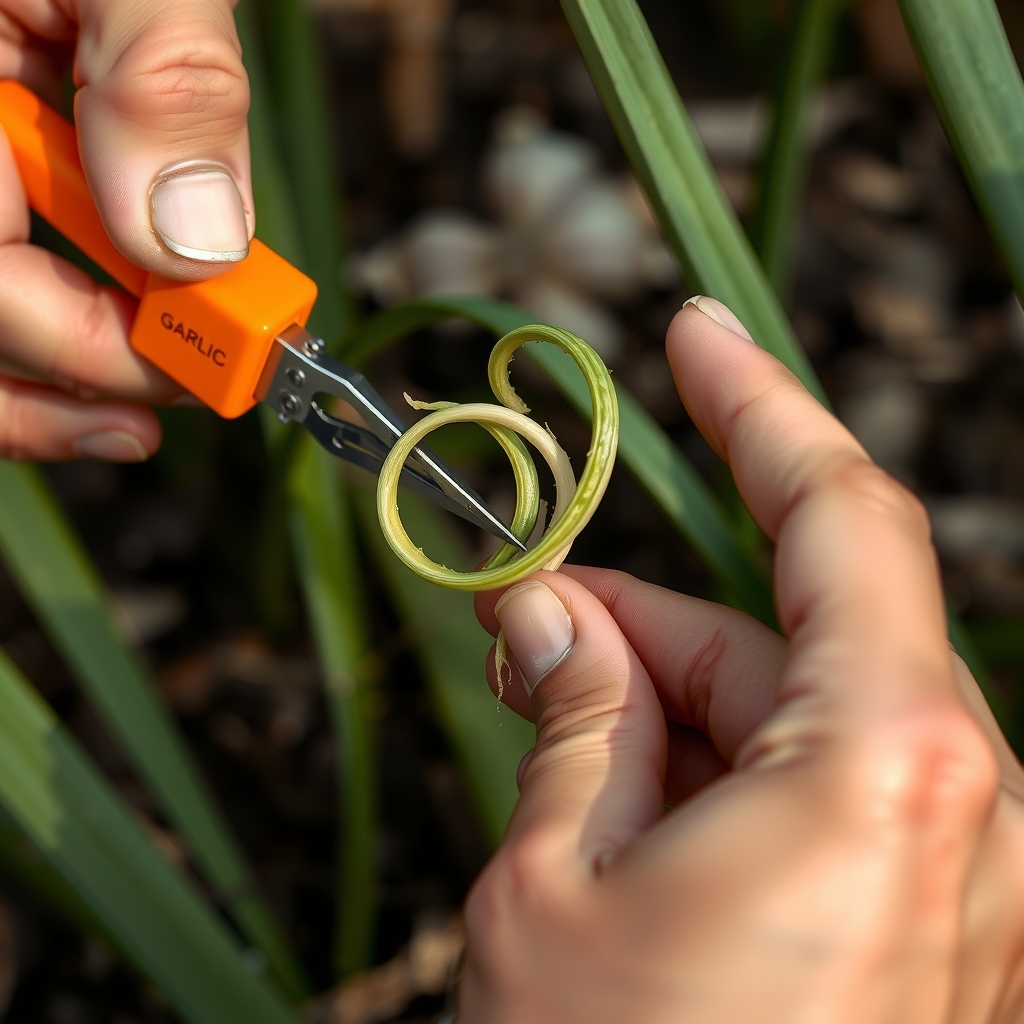
    Garden snips cutting a curly garlic scape, illustrative AI image

    Illustrative image (AI-generated), not the exact product.

    See current photos and price on Amazon →

    ISU recommends removing hardneck scapes in mid to late May, cutting as low as possible without taking any leaves. These small snips have narrow tips that reach in between the leaves cleanly, a non-stick coating and a sheath for storage.

    For digging and lifting bulbs: Fiskars Ergo Garden Trowel

    Product pick

    Fiskars Ergo Garden Trowel

    Hand trowel lifting a freshly dug garlic bulb, illustrative AI image

    Illustrative image (AI-generated), not the exact product.

    See current photos and price on Amazon →

    At harvest in July or August, loosen the soil beside each plant before you lift it, so the stem does not snap off the bulb. A cast-aluminum trowel like this handles firm Iowa soil, and it works for opening planting furrows in fall too.

    Conclusion

    So, when to plant garlic in Iowa? October to early November, after the first frost and before the ground freezes. Choose a hardneck variety such as ‘German Red’ or ‘Music’, plant large cloves 1 to 1.5 inches deep in rich, well-drained soil, and cover the bed with 4 to 6 inches of straw in November. Cut the scapes in May, stop watering in late July, and dig your bulbs in July or August.

    FAQs

    When should I plant garlic in Iowa?
    ISU Extension says October to early November. A practical rule is to plant after the first fall frost and a few weeks before the ground freezes, which in most of Iowa means mid-October to the first week of November.

    How deep do you plant garlic in Iowa?
    Plant large cloves 1 to 1.5 inches deep with the pointed end up, 3 to 5 inches apart, in rows 18 to 24 inches apart.

    Can I plant grocery store garlic?
    ISU advises against it. Grocery garlic is usually a softneck type from warmer regions that is not well adapted to Iowa winters. Buy seed garlic from a garden center or a mail-order supplier.

    Should I mulch garlic over winter?
    Yes. In November, cover the bed with 4 to 6 inches of weed-free straw. In early spring, pull the straw back between the rows so the shoots can come up.

    Is it too late to plant garlic in November?
    Early November usually still works if the ground is not frozen. Later plantings have less time to root. ISU also allows spring planting in late March or early April, but the bulbs will be smaller.

    When do you harvest garlic in Iowa?
    Usually in July or August, when a plant has 4 to 5 dry lower leaves and 3 to 4 green upper leaves.

    Sources and review scope

    This guide was prepared on October 28, 2026 from the following sources. Homingwell did not perform hands-on testing. Sellers were checked on Amazon.com on the same date.

    Explore more Lawn & Garden buying guides.
  • Solar Pathway Lights for Cold Climates: What Works in an Iowa Winter

    Solar Pathway Lights for Cold Climates: What Works in an Iowa Winter

    Skip to content

    Outdoor lighting • Iowa guide • Updated October 27, 2026

    Solar Pathway Lights for Cold Climates: What Works in an Iowa Winter

    Explore related guides: Gardening in Iowa: all guides · Pet-safe ice melt · Best solar pathway lights · Fall garden cleanup · Garden tool storage · Winterize raised beds · Gifts for gardeners.

    Most solar pathway lights look great in July and fade by December. In a cold climate like Iowa, the problem is not the light itself but the short days, the low sun, snow on the panel and cold batteries. This guide explains what actually happens to solar lights in winter, what to look for when you buy, how to place them, and four sets sold by Amazon.com that fit the job.

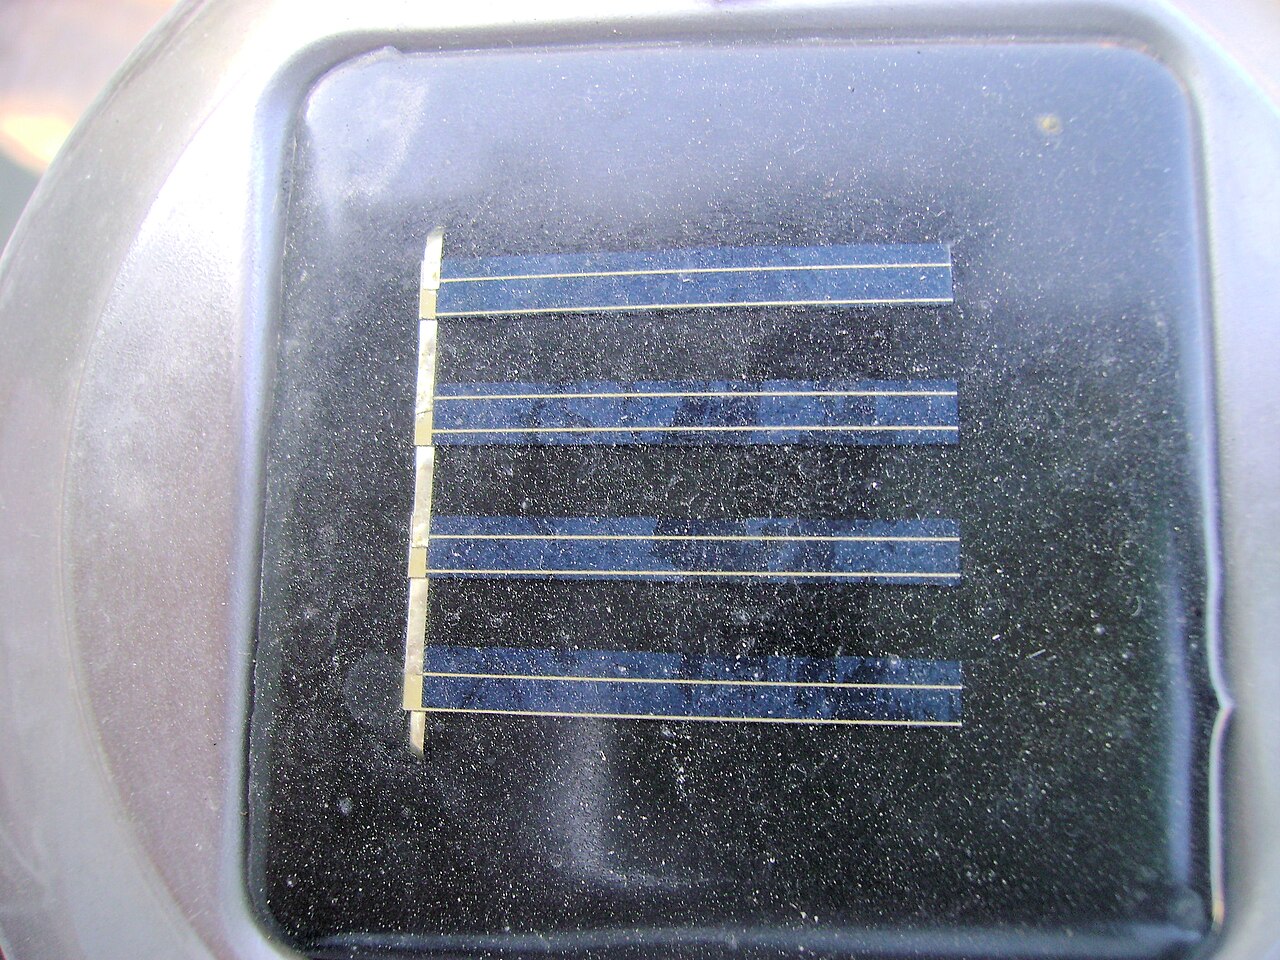
    Solar pathway lights for cold climates: the small solar panel on top of a garden light
    The small panel on top is all a solar path light has to charge with. Photo: Yousaf465, CC BY 3.0, via Wikimedia Commons.

    The short answer

    Yes, solar pathway lights work in an Iowa winter, but they give less light for fewer hours. Des Moines gets about 15 hours of daylight in late June and only about 9 hours in late December, and the sun sits much lower in the sky. Add snow on the panels and batteries that charge poorly near freezing, and a light that ran all night in summer may last only a few hours in January. Choose lights with a replaceable battery, a good weather rating and a panel you can aim at the sun, and put them where they get full winter sun.

    Why solar lights fade in winter

    • Short days. In Des Moines the shortest day, December 21, has about 9 hours 10 minutes of daylight, compared with about 15 hours 12 minutes on June 21. The earliest sunset is around 4:44 p.m. in early December, so the lights have to run longer on less charge.
    • Low sun. The winter sun stays low in the southern sky, so houses, fences and evergreens shade panels that were sunny in summer.
    • Snow and frost on the panel. Even a light dusting cuts charging, and a covered panel barely charges at all.
    • Cold batteries. Batteries charge slowly and hold less usable energy when they are cold, which shortens run time.

    Batteries and cold: what to know

    The battery is where cold climates hit solar lights hardest. Battery University, an educational resource on rechargeable batteries, gives these charging limits:

    Charging limits of common rechargeable batteries (Battery University)
    Battery typeNormal charge rangeBelow freezing
    NiCd32 to 113°FHardier than NiMH; can take a slow charge below freezing
    NiMH32 to 113°FOnly a very slow charge; fast charging limited above about 41°F
    Lithium-ion (consumer)32 to 113°FShould not be charged below 32°F; doing so can permanently damage the cell

    What this means in practice: on a sunny 20°F day, a solar light may barely charge, whatever the battery type. Lights with a standard AA or AAA rechargeable are the easiest to keep going, because you can replace a worn battery for a few dollars. Some lithium lights include a low-temperature cutoff that stops charging in deep cold; the manual or listing usually says so.

    What to look for in cold-climate solar path lights

    • A replaceable battery. AA or AAA NiMH or NiCd cells are cheap to replace when cold seasons wear them down.
    • A real weather rating. The IP code (IEC 60529) has two digits: the first for dust, the second for water. IP44 means splash-resistant, IP65 is dust-tight and protected against water jets, and IP67 can handle short immersion. For lights that sit in snowmelt, IP65 or higher is the safer choice.
    • A bigger or separate panel. A panel on a cable, or one that tilts, can be aimed at the low southern sun even if the light itself sits in shade.
    • Brightness you can lower. A low or motion-sensing mode stretches a short winter charge.
    • A listed operating range. If the listing gives a temperature range, check how it compares with Iowa winter nights, which often drop well below freezing and sometimes below zero.
    • Sturdy stakes and materials. Metal and glass hold up better than thin plastic, which gets brittle in the cold. Push stakes in firmly before the ground freezes.

    Where to put solar path lights in winter

    1. Face the panels south and check the spot at midday in November, when the sun is low, not in summer.
    2. Avoid the shadow of the house, garage, fences and evergreens. Gama Sonic, a solar lighting maker, says its lights need about 4 hours of direct sun to keep going through cloudy days.
    3. Stay out of the shovel and plow path. Set lights a foot or so back from the edge of the walk or driveway, where shoveled snow will not bury them.
    4. Go taller where snow piles up. Taller stake lights stay above shallow snow; short ones get buried.
    5. Light the steps first. If you only get a few hours of light in winter, put the brightest lights where people actually trip: steps, corners and the front entry.

    Winter care for solar lights

    • Brush snow off the panels after each snowfall. Gama Sonic suggests wiping snow, ice or debris away with a dry towel and no cleaning chemicals.
    • Use the lowest useful setting in December and January so the light lasts into the evening.
    • Bring decorative lights in if you do not need them through winter. Store them clean and dry with the switch off, alongside your other gear (see our garden tool storage guide).
    • Check the batteries in spring. If a light that gets full sun only runs for an hour or two, a fresh rechargeable battery usually fixes it.

    Doing a fall garden cleanup? It is a good time to check your lights, reset the stakes and clear any plants that will shade the panels.

    Solar pathway lights for cold climates

    All four were listed as sold by Amazon.com at the time of writing. Check current photos, specs and reviews on Amazon before you buy.

    Best basic set with a swappable battery: Pure Garden Stainless Steel Solar Path Lights (8 Pack)

    Product pick

    Pure Garden Stainless Steel Solar Path Lights (8 Pack)

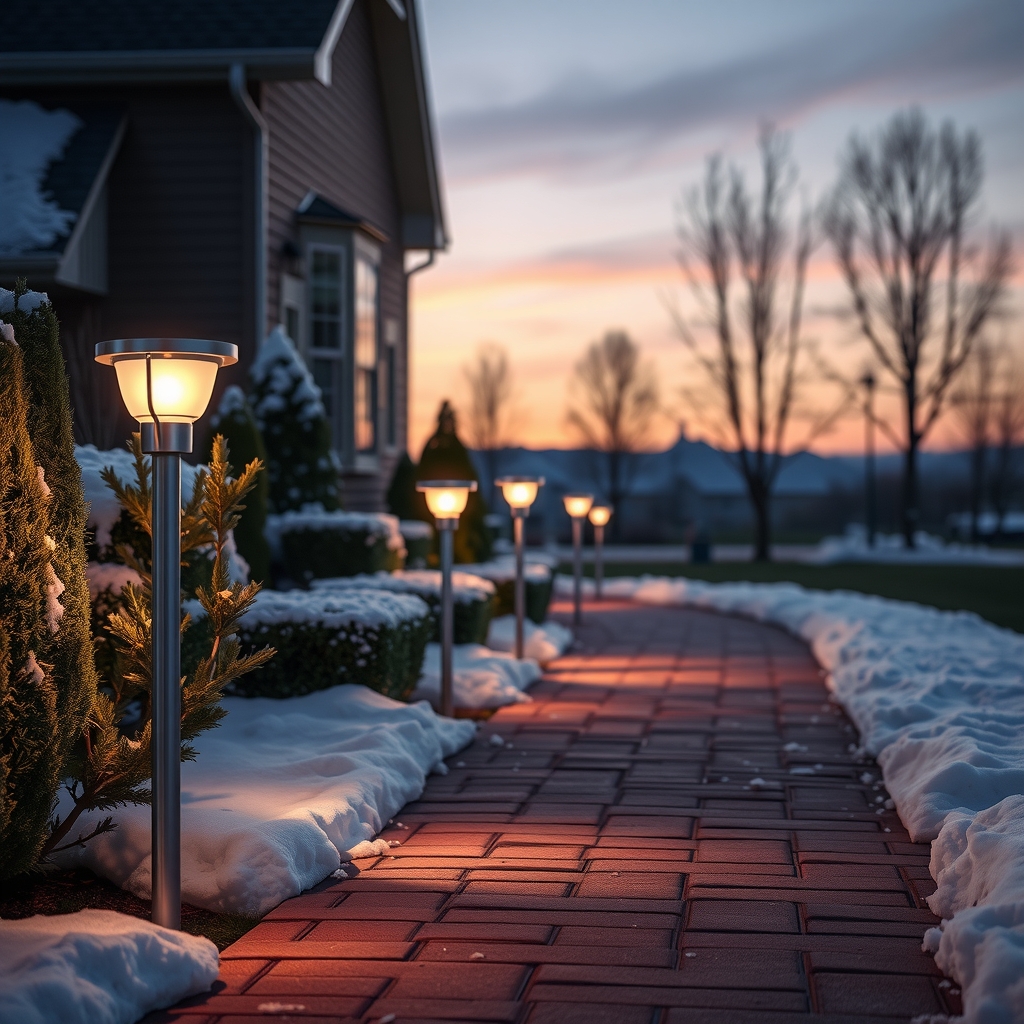
    Stainless steel solar path lights along a snowy walkway at dusk, illustrative AI image

    Illustrative image (AI-generated), not the exact product.

    See current photos and price on Amazon →

    Eight 16-inch stake lights in stainless steel with a copper finish. Each runs on a standard 1.2 V, 600 mAh NiMH AA rechargeable battery, which matters in a cold climate: when the battery tires after a few winters, you swap in a new AA instead of throwing the light away. The listing rates them at about 6 lumens for up to 6 hours, which is a soft marker glow, not a floodlight.

    Good to know: expect shorter run times in December and January. At 16 inches tall, they sit above a few inches of snow but will disappear in a big drift.

    Brightest path light: Philips Radii Solar LED Pathway Light

    Product pick

    Philips Radii Solar LED Pathway Light

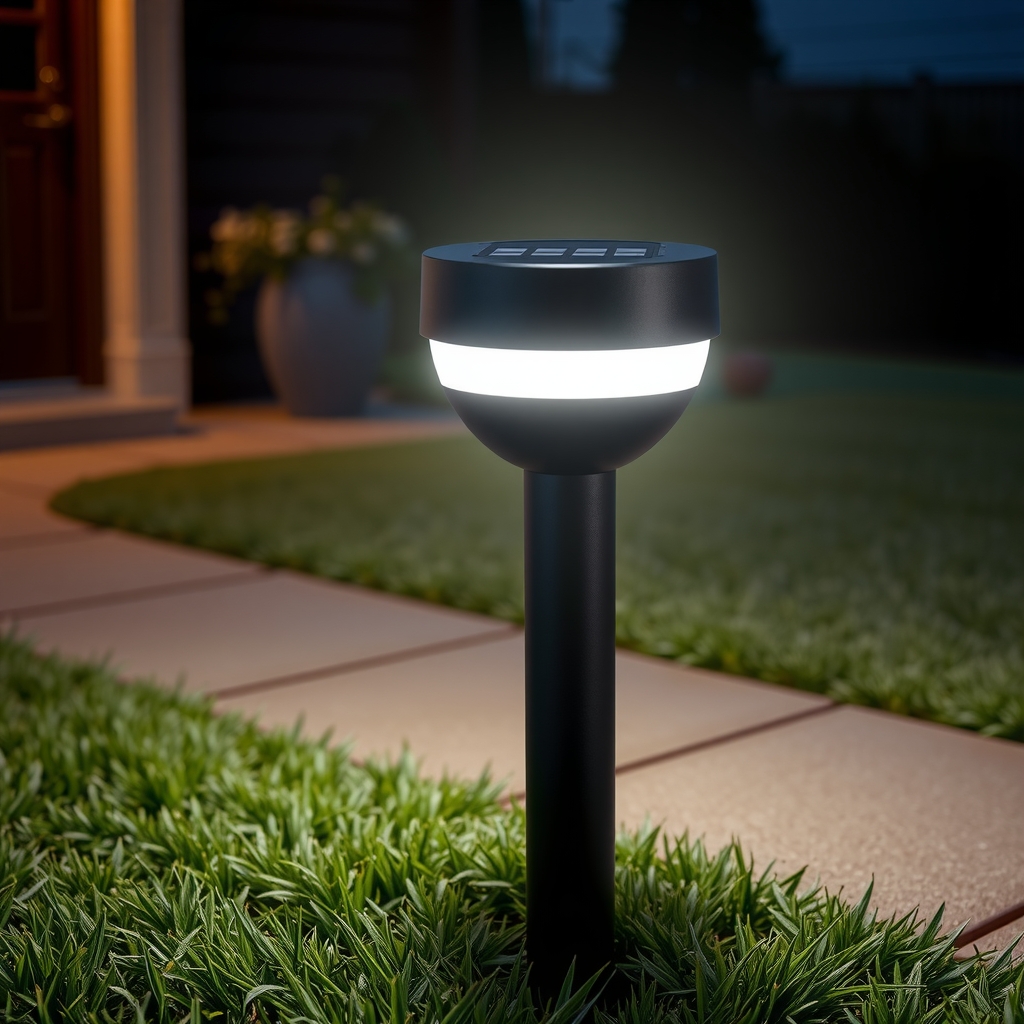
    Modern black solar path light glowing beside a walkway at night, illustrative AI image

    Illustrative image (AI-generated), not the exact product.

    See current photos and price on Amazon →

    Philips says its Ultra Efficient solar technology gives about five times more light per day of charge than other solar lights, and it adds a motion sensor and dusk-to-dawn switching. Motion sensing helps in winter because the light stays dim until someone walks by, so a short day’s charge goes further. Lights can be linked so a group turns on together.

    Good to know: it is sold as a single light and has an IP44 rating, which means splash-resistant rather than jet-proof. Place it where snowmelt does not pool, and expect a higher cost per light than multi-packs.

    Best for steps and entries: Consciot Tunable White Solar Spot Lights (4 Pack)

    Product pick

    Consciot Tunable White Solar Spot Lights (4 Pack)

    Black solar spotlight with tilted panel lighting porch steps at night, illustrative AI image

    Illustrative image (AI-generated), not the exact product.

    See current photos and price on Amazon →

    When a path needs real light rather than a glow, a solar spotlight aimed at steps or a walkway works better than small stake lights. These have 24 LEDs rated up to 600 lumens, three color temperatures (3000K, 5000K and 6500K) with three brightness levels, an IP65 rating and a panel that tilts to face the low winter sun.

    Good to know: the listing gives an operating range of -10 to 40°C (14 to 104°F). Iowa nights can drop below 14°F in January, so expect weaker performance in deep cold. Use the lower brightness setting in winter to stretch the charge.

    Best decorative pick: Pure Garden Mosaic Solar Path Lights (4 Pack)

    Product pick

    Pure Garden Mosaic Solar Path Lights (4 Pack)

    Stainless solar stake lights with mosaic glass glowing in a garden, illustrative AI image

    Illustrative image (AI-generated), not the exact product.

    See current photos and price on Amazon →

    Stainless steel stake lights with mosaic glass globes, made to mark a garden bed or path edge rather than to light it. Each uses a rechargeable AA Ni-Cd 600 mAh battery and is rated for up to 8 hours on a full charge. Battery University notes that NiCd cells tolerate cold charging better than NiMH or lithium-ion, which suits a Midwest winter.

    Good to know: the listing rates them at 1 lumen. They are accent lights, so pair them with brighter lights where people actually walk.

    Conclusion

    Solar pathway lights can light an Iowa walkway all year, as long as you expect less from them in winter and set them up for it. Pick lights with a replaceable AA or AAA battery, an IP65 rating where they sit in snowmelt, and a panel you can aim south. Place them in full winter sun, out of the shovel path, and brush the snow off after each storm. Put your brightest lights on steps and entries, and use dimmer markers for the rest of the path.

    FAQs

    Do solar pathway lights work in winter?
    Yes, but with less light. Shorter days, a low sun, snow on the panels and cold batteries all reduce charging, so expect shorter run times from November through February.

    Why do my solar lights stop working in winter?
    Usually because the panel is shaded or covered with snow, or the battery is cold or worn out. Clear the panel, move the light into full southern sun, and try a fresh rechargeable battery.

    Can solar lights stay out in the snow?
    Most stainless steel and IP65-rated lights can stay out all winter. Keep panels clear of snow and set lights back from where you shovel.

    What battery is best for solar lights in cold weather?
    NiCd cells tolerate cold charging best, followed by NiMH. Consumer lithium-ion cells should not be charged below 32°F. Replaceable AA or AAA cells are the easiest to maintain.

    What IP rating do outdoor solar lights need?
    IP65 or higher is a good choice for lights that sit in rain and snowmelt. IP44 lights resist splashes but are not protected against water jets.

    Should I bring solar lights inside for the winter?
    Decorative lights you do not need can be stored clean and dry with the switch off. Lights that mark steps or walkways are worth keeping out, as long as the panels get sun.

    Sources and review scope

    This guide was prepared on October 27, 2026 from the following sources and from the product listings on Amazon.com. Homingwell did not perform hands-on testing. Sellers were checked on Amazon.com on the same date.

    Explore more Lawn & Garden buying guides.
  • When to Plant Tomatoes in Iowa: Dates, Soil Temperature and Tips

    When to Plant Tomatoes in Iowa: Dates, Soil Temperature and Tips

    Skip to content

    Lawn & Garden • Iowa guide • Updated October 27, 2026

    When to Plant Tomatoes in Iowa: Dates, Soil Temperature and Tips

    Explore related guides: Gardening in Iowa: all guides · When to plant garlic in Iowa · When to start seeds in Iowa · Best raised beds for Iowa · Raised garden bed size · Best garden trowel · When to plant tomatoes in Minnesota · When to plant potatoes in Iowa · When to plant peppers in Iowa.

    Plant tomatoes too early in Iowa and a cold night or chilly soil can set them back for weeks. Plant too late and you lose part of a short season. Knowing when to plant tomatoes in Iowa comes down to two things: the frost-free date and a warm enough soil. This guide gives Iowa State University Extension’s dates by region, how to check the soil, and how to plant, support and water your tomatoes.

    Tomato plants in round wire cages, showing when to plant tomatoes in Iowa gardens
    Tomatoes in round wire cages. Photo: Forest and Kim Starr, CC BY 3.0 US, via Wikimedia Commons.

    When to plant tomatoes in Iowa: the short answer

    In central Iowa it is usually safe to plant tomatoes outdoors around May 10, says ISU Extension. Southern Iowa can plant about a week earlier and northern Iowa about a week later. Wait until the danger of frost has passed and the soil is around 60 degrees Fahrenheit. The last practical planting date for a good harvest is about June 20.

    Tomato planting dates by Iowa region

    When to plant tomato transplants outdoors in Iowa (ISU Extension)
    RegionTypical planting dateStart seeds indoorsLast practical date
    Southern IowaEarly May (about May 3)Mid to late MarchAbout June 20
    Central IowaAround May 10Late MarchAbout June 20
    Northern IowaMid-May (about May 17)Early AprilAbout June 20

    The indoor dates come from ISU’s advice to sow tomato seeds 5 to 6 weeks before transplanting. See our Iowa seed starting calendar for the full crop list.

    Check the soil temperature, not just the date

    Tomatoes are warm-season plants. Research at Iowa State by H.G. Taber and R. Gansemer found that tomatoes need soil above 60 degrees Fahrenheit for good shoot growth and flower development. In a cool, wet Iowa spring, the soil can still be in the 50s well after the frost-free date, and tomatoes planted into it just sit and wait.

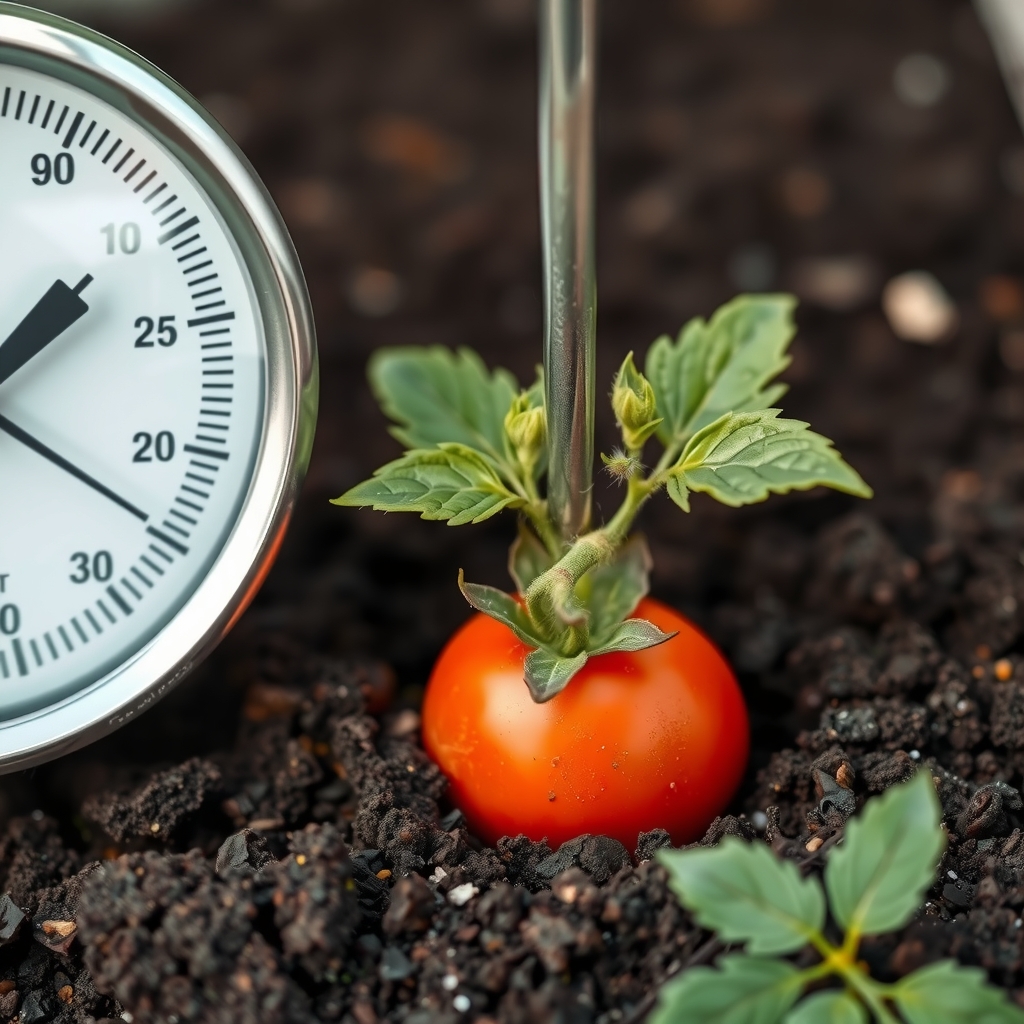
    • Measure in the morning. Push a soil thermometer about 4 inches deep, where the roots will be, early in the day when the soil is coolest.
    • Look for a streak. Plant after several days in a row at 60 degrees or more, with mild nights in the forecast.
    • Use raised beds. ISU notes that raised beds dry out and warm up earlier in spring. Our guide to raised garden beds for Iowa explains how to set one up.
    • Have a cover ready. If frost threatens after planting, cover the plants overnight with frost cloth or old sheets.

    How to plant tomatoes

    1. Harden off first. Give transplants 7 to 10 days outdoors, starting in a shady, sheltered spot, so they are used to sun and wind.
    2. Choose full sun. ISU says the site needs at least 6 hours of direct sun a day, in fertile, well-drained soil. Avoid heavy clay and wet spots.
    3. Rotate. To reduce leaf diseases such as Septoria leaf spot and early blight, do not plant tomatoes, peppers or potatoes in the same place for three or four years.
    4. Plant deep. Set plants so the soil covers the stem up to the first true leaves.
    5. Trench leggy plants. For tall, lanky transplants, strip the lower leaves, lay the plant on its side in a shallow trench, and bend the top up so a few inches stay above the soil. Roots will form along the buried stem.
    6. Handle pots right. Tear off the top edge of peat pots or bury it fully, or it will wick water away from the roots. Tap plants gently out of plastic pots and cell packs.
    7. Water in well. Soak each plant after planting.

    Tomato spacing

    How far apart to plant tomatoes (ISU Extension)
    Type and methodSpace between plants
    Indeterminate, in wire cages2.5 to 3 feet
    Indeterminate, staked1.5 to 2 feet
    Indeterminate, sprawling on the ground3 to 4 feet
    Determinate2 to 2.5 feet
    RowsAbout 4 feet apart

    Determinate or indeterminate? Determinate tomatoes are compact, stop at a set height and ripen most of their fruit over about four to six weeks. Indeterminate tomatoes keep growing and fruiting until the first fall frost, so they yield more over two to three months but need bigger support. No garden? ISU says tomatoes also grow well in 4 to 5 gallon containers on a sunny patio.

    Stakes, cages or the weave system

    Have your supports ready when you plant. ISU explains three ways to train tomatoes:

    • Single stake. Drive a 7 to 8 foot stake 1 to 2 feet deep, 3 to 4 inches from the plant, within two weeks of planting so you do not damage roots. Tie the stem loosely about every 12 inches. Staked plants ripen earlier but give a lower total yield, and are not recommended for determinate types.
    • Wire cage. A cage 20 to 24 inches across and 4 to 5 feet tall needs the least attention: no tying or pruning, just tuck stray stems back inside. Anchor it with one or two stakes so summer storms do not tip it over.
    • Weave system. Set 6 to 7 foot posts every two plants and weave twine along both sides of the row, starting 8 to 10 inches up when plants are 12 to 14 inches tall. It works well for determinate tomatoes.

    Water and mulch

    ISU says tomato plants need about 1 to 1.5 inches of water a week during the growing season. Water deeply once a week in dry weather rather than a little every day. Steady moisture is the best way to prevent blossom end rot, the dark sunken spot on the bottom of the fruit. In Iowa soils the cause is almost always uneven watering, not a lack of calcium, so extra calcium products rarely help.

    Mulch helps keep the moisture even. An old ISU planting guide suggests adding straw, hay or dried grass clippings around plants 4 to 5 weeks after planting, once the soil has warmed. Use clippings only from lawns not treated with broadleaf weed killers. Avoid heavy nitrogen fertilizer, which also makes blossom end rot worse.

    Products that help tomatoes get off to a good start

    These match ISU’s advice on soil warmth, support and watering. All five were listed as sold by Amazon.com at the time of writing.

    To know when soil is ready: Taylor Soil Thermometer

    Product pick

    Taylor Soil Thermometer

    Dial soil thermometer in garden soil beside a tomato seedling, illustrative AI image

    Illustrative image (AI-generated), not the exact product.

    See current photos and price on Amazon →

    The calendar tells you when frost is usually over; a soil thermometer tells you when the ground is actually warm enough. This one has a stainless steel probe that reads below the surface, a range of 20 to 180 degrees Fahrenheit, and a dial marked with planting ranges. Push it in about 4 inches deep in the morning, when soil is coolest, and wait for readings of 60 degrees or more.

    For a late cold snap: Amazon Basics Frost Protection Cover, 10 x 30 ft

    Product pick

    Amazon Basics Frost Protection Cover, 10 x 30 ft

    White frost cloth covering young tomato plants, illustrative AI image

    Illustrative image (AI-generated), not the exact product.

    See current photos and price on Amazon →

    Iowa often gets one more cold night after tomatoes go in. This lightweight non-woven cover (about 0.9 oz per square yard) lets light, air and water through and can be cut to fit a bed or row. Drape it over the plants in the evening when frost is forecast, weigh the edges down, and take it off in the morning. It is meant for light frost, not a hard freeze.

    For support: Happygrill Adjustable Tomato Cages, 60 in (3 Pack)

    Product pick

    Happygrill Adjustable Tomato Cages, 60 in (3 Pack)

    Young tomato plant inside a green metal support cage, illustrative AI image

    Illustrative image (AI-generated), not the exact product.

    See current photos and price on Amazon →

    ISU says to have your supports ready at planting time. These plastic-coated metal cages have rings you can set at 20, 40 or 60 inches, and come with zip ties and clips. They are about 14 inches across, narrower than the 20 to 24 inch wire cages ISU describes, so they suit determinate and compact tomatoes best. For big indeterminate plants, use a sturdier, wider cage or a stake.

    For tying to stakes: VELCRO Brand Adjustable Plant Ties, 75 ft

    Product pick

    VELCRO Brand Adjustable Plant Ties, 75 ft

    Tomato stem tied to a stake with a soft green garden tie, illustrative AI image

    Illustrative image (AI-generated), not the exact product.

    See current photos and price on Amazon →

    ISU recommends soft ties, such as stretch ties or strips of cloth, about every 12 inches up the stem, tied in a loose figure 8. These hook-and-loop ties have a soft side that does not cut into stems, can be cut to any length, and are reusable for several seasons.

    For steady watering: Gilmour 50 ft Flat Soaker Hose

    Product pick

    Gilmour 50 ft Flat Soaker Hose

    Flat black soaker hose along tomato plants under straw mulch, illustrative AI image

    Illustrative image (AI-generated), not the exact product.

    See current photos and price on Amazon →

    Tomatoes need about 1 to 1.5 inches of water a week, says ISU, and uneven watering is the main cause of blossom end rot. A soaker hose under the mulch puts water at the roots and keeps leaves dry. This flat vinyl hose has a fabric cover to resist clogging and can be linked to a second hose for longer rows.

    Conclusion

    So, when to plant tomatoes in Iowa? Around May 10 in central Iowa, a week earlier in the south and a week later in the north, once frost is past and the soil reaches about 60 degrees. Plant deep, space plants for the support you will use, and set stakes or cages at planting time. Then give them 1 to 1.5 inches of water a week and a layer of mulch. You can still plant up to about June 20, but the earlier warm-soil window gives you the longest harvest.

    FAQs

    Is it safe to plant tomatoes in Iowa in April?
    Usually not. Even in southern Iowa, ISU puts the safe date in early May. Plants set out in April risk frost and cold soil that stalls growth. If you plant early, be ready to cover them on cold nights.

    What soil temperature do tomatoes need?
    About 60 degrees Fahrenheit or warmer, according to Iowa State research. Measure about 4 inches deep in the morning.

    What is the latest I can plant tomatoes in Iowa?
    ISU gives about June 20 as the last practical date for good yields.

    How deep should I plant tomato transplants?
    Up to the first true leaves. Leggy plants can be laid sideways in a trench with just the top few inches above the soil.

    Should I use stakes or cages?
    Cages need the least work and suit most home gardens. Single stakes give an earlier crop but a smaller total harvest. Set either one within two weeks of planting.

    How often should I water tomatoes?
    Give about 1 to 1.5 inches of water a week, in one deep watering during dry weather, and mulch to keep the moisture steady.

    Sources and review scope

    This guide was prepared on October 27, 2026 from the following sources. Homingwell did not perform hands-on testing. Sellers were checked on Amazon.com on the same date.

    Explore more Lawn & Garden buying guides.

  • Best Raised Garden Beds for Iowa Gardens (Zone 5b–6a)

    Best Raised Garden Beds for Iowa Gardens (Zone 5b–6a)

    Skip to content

    Lawn & Garden • Iowa guide • Updated October 27, 2026

    Best Raised Garden Beds for Iowa Gardens (Zone 5b–6a)

    Explore related guides: Gardening in Iowa: all guides · When to plant garlic in Iowa · When to plant tomatoes in Iowa · Raised garden bed size · Winterize raised beds · When to start seeds in Iowa · Best garden cart · Gifts for gardeners · How much soil for a raised bed · What to plant in a raised bed in Iowa.

    Heavy, slow-draining soil and a short spring are two good reasons Iowa gardeners love raised garden beds. Iowa State University Extension says a raised bed drains better and warms up earlier in spring, so you can plant sooner. This guide to the best raised garden beds for Iowa explains what size, height and material work best, how to fill a bed, and which beds sold by Amazon.com are worth a look.

    Kale and cabbage growing in wooden raised garden beds for Iowa gardens
    Kale and cabbage in raised beds. Photo: Alabama Extension, CC0, via Wikimedia Commons.

    Quick picks

    Raised garden beds for Iowa, sold by Amazon.com at the time of writing
    PickSize (L x W x H)MaterialBest for
    Amazon Basics4 x 2 x 1 ftGalvanized steelA first bed
    YITAHOME 24 in8 x 2 x 2 ftGalvanized metalLess bending
    GIANTEX6 x 3 x 2 ftPowder-coated metalOne big bed
    Eclaron oval4 x 2 x 1 ftGalvanized steelPatio or path edges
    Back to the Roots3 cu ftFabricDecks and trying it out

    Why raised beds suit Iowa gardens

    ISU Extension lists the main benefits clearly:

    • Better drainage. A properly prepared raised bed improves wet, poorly drained sites, which helps plants grow and raises yields.
    • An earlier start. Raised beds dry out and warm up earlier in spring, so you can plant sooner. In a state where the frost-free date is in early to mid-May, a week or two matters.
    • Easier on your back. ISU notes that raised beds help older gardeners and anyone who has trouble bending to the ground.
    • Clean soil. You fill the bed yourself, which helps where the yard soil is poor, compacted or possibly contaminated.

    There are trade-offs. ISU says raised beds dry out faster and need watering more often in dry weather, and building them takes more effort and money than tilling a plot.

    What size and height to choose

    Width matters more than length. ISU’s guidance:

    • Reached from one side (against a fence or wall): 1.5 to 2 feet wide.
    • Reached from both sides: 3 to 4 feet wide, so you never step on the soil.
    • Height: usually 6 to 20 inches or more. About 11 inches is common because it matches two stacked 2×6 boards. Gardeners in wheelchairs do best with beds about 2 to 3 feet high.
    • Paths: about 3 feet between beds so a wheelbarrow or garden cart fits.
    • Headroom: leave 1 to 2 inches between the soil and the top edge for mulch.

    Not sure how many beds you need? Our raised garden bed size guide walks through layouts and soil volume.

    Metal, cedar or treated wood?

    ISU lists decay-resistant wood such as cedar or redwood, composite lumber, metal, concrete block, rock and brick as good wall materials. Here is how the common choices compare:

    Raised bed materials compared
    MaterialProsWatch out for
    Galvanized or coated metalLong-lasting, no rot, easy kitsSharp edges on cheap kits; ISU suggests a barrier liner for galvanized metal
    Cedar or redwoodNatural look, rot-resistant, safe for foodCosts more; even cedar eventually breaks down
    Modern treated lumberCheap, lasts yearsISU suggests lining the inside with woven geotextile fabric; never use old railroad ties or creosote
    Block, brick or stonePermanent, salvaged pieces are fineHeavy, more work to build

    About galvanized metal: ISU’s raised bed guide says galvanized metal may leach small amounts of lead or cadmium, so it recommends a barrier between the soil and the walls. A woven landscape fabric along the inside walls does the job while still letting water drain. Keeping your soil pH near 6.0 to 6.5, as ISU recommends anyway, also limits zinc leaching, which increases in acidic soil.

    About cedar: when this guide was written, we could not find a cedar raised bed kit sold directly by Amazon.com, so none is listed below. If you prefer wood, local lumberyards in Iowa often sell rough-cut cedar boards, and ISU’s 11-inch, two-board design is an easy weekend build.

    How to fill a raised bed

    ISU recommends a light, well-drained soil and gives two simple recipes:

    • Option 1: equal parts topsoil, organic matter (well-rotted manure, compost or peat) and coarse sand.
    • Option 2: about 70 percent topsoil and 30 percent compost.

    Steps that make a difference:

    1. Remove the sod and loosen the soil underneath.
    2. Add a few inches of mix at a time and work it into the native soil, so there is no sharp layer that blocks water.
    3. Work out how much you need by multiplying length x width x height. A 4 x 2 x 1 ft bed takes 8 cubic feet; an 8 x 2 x 2 ft bed takes 32.
    4. Have the soil tested. Aim for a pH of about 6.0 to 6.5, adding lime or sulfur as the test suggests, and a slow-release fertilizer if needed.

    Buying soil by the cubic yard from a local landscape supplier is usually much cheaper than bags, says the University of Minnesota Extension.

    Where to put your bed

    • Sun: at least six hours of full sun. Tomatoes, peppers and squash do better with 6 to 8.
    • Level ground: a flat site keeps water from running to one end.
    • Direction: ISU suggests running beds north to south for low-growing crops.
    • Close to water: raised beds dry out faster, so a nearby hose, or a drip line on a timer, saves a lot of trips.

    The best raised garden beds for Iowa gardens

    All five were listed as sold by Amazon.com at the time of writing. Check the size and photos on Amazon before you order.

    Best starter bed: Amazon Basics Galvanized Raised Garden Bed, 4 x 2 x 1 ft

    Product pick

    Amazon Basics Galvanized Raised Garden Bed, 4 x 2 x 1 ft

    Rectangular galvanized steel raised garden bed with lettuce, illustrative AI image

    Illustrative image (AI-generated), not the exact product.

    See current photos and price on Amazon →

    A simple open-bottom galvanized steel box, about 48 x 24 x 12 inches. Two feet wide means you can reach across it from one side, which fits ISU’s guidance for beds worked from a single side, and 12 inches of depth is plenty for lettuce, onions, herbs, peppers and bush beans. It is a good first bed if you want to see how raised-bed gardening works in your yard before you build more.

    Good to know: at 12 inches it is a low bed, so you still bend to work it. Set it on loosened soil so roots can grow down through the open base.

    Best for easy reach: YITAHOME 8 x 2 x 2 ft Metal Raised Bed, 24 in tall

    Product pick

    YITAHOME 8 x 2 x 2 ft Metal Raised Bed, 24 in tall

    Long 2 foot tall white metal raised garden bed with tomatoes, illustrative AI image

    Illustrative image (AI-generated), not the exact product.

    See current photos and price on Amazon →

    If bending is the problem, height is the answer. This galvanized metal kit is 2 feet tall and 8 feet long, holds about 239 gallons of soil according to the listing, and can be set up in 9 different shapes. It has rolled edges with a rubber strip on top and cross bars to stop the long sides from bowing out. At 2 feet wide, it is reachable from one side.

    Good to know: a 24 inch bed takes a lot of soil. You can fill the bottom third with logs, branches or leaves, then top it with good soil. Taller beds also dry out faster, so plan on a soaker hose or drip line.

    Best large bed: GIANTEX 6 x 3 x 2 ft Metal Raised Garden Bed

    Product pick

    GIANTEX 6 x 3 x 2 ft Metal Raised Garden Bed

    Large gray 6 by 3 foot metal raised garden bed with vegetables, illustrative AI image

    Illustrative image (AI-generated), not the exact product.

    See current photos and price on Amazon →

    A powder-coated metal bed, 72 x 36 x 24 inches, with two support bars across the middle, an open base, a rubber edge guard and four ground stakes. Three feet wide sits inside ISU’s 3 to 4 foot range for a bed you can reach from both sides, and the 2 foot depth gives tomatoes, potatoes and carrots plenty of room.

    Good to know: leave space to walk all the way around it. The ground stakes help in Iowa’s spring storms, so use them.

    Best oval bed: Eclaron Galvanized Raised Garden Bed, 4 x 2 x 1 ft

    Product pick

    Eclaron Galvanized Raised Garden Bed, 4 x 2 x 1 ft

    Oval galvanized corrugated raised garden bed with herbs, illustrative AI image

    Illustrative image (AI-generated), not the exact product.

    See current photos and price on Amazon →

    An oval galvanized steel bed that holds about 7 cubic feet of soil, assembled with clamps and bolts. Rounded ends have no sharp corners to catch a hose or a leg, and the oval shape looks tidy near a patio or along a path. Like the other metal beds here it is open at the bottom for drainage.

    Good to know: the listing describes it as thicker than standard beds, but check the current photos and size before you buy, because similar oval beds are sold under many names.

    Best for a patio or first year: Back to the Roots Fabric Raised Bed, 3 cu ft

    Product pick

    Back to the Roots Fabric Raised Bed, 3 cu ft

    Dark gray fabric raised garden bed with leafy greens on a deck, illustrative AI image

    Illustrative image (AI-generated), not the exact product.

    See current photos and price on Amazon →

    No tools, no assembly. This fabric bed holds 3 cubic feet of soil and folds flat for storage. Fabric walls breathe, so roots get air, and you can set it on a deck or driveway where you cannot dig. It is a cheap way to try a few salad greens, herbs or a pepper plant before you commit to a permanent bed.

    Good to know: fabric dries out faster than metal or wood. In a hot Iowa July, expect to water it often. The University of Minnesota also suggests treating grow bags more like containers than like raised beds.

    Raised beds and Iowa winters

    Soil in raised beds freezes faster and harder than soil in the ground. That does not matter for annual vegetables, but ISU warns it can stress the roots of perennials such as strawberries, asparagus and herbs. Its advice is to add an insulating layer of mulch in early to mid-November, when the ground starts to freeze, and remove it in mid to late March. Our guide on how to winterize raised garden beds in Iowa covers the full fall routine.

    The flip side comes in spring. Raised beds warm up first, so they are the place for your earliest crops. Start transplants indoors on time using our Iowa seed starting calendar, and they will be ready when the beds are.

    Conclusion

    When choosing raised garden beds for Iowa, the best one for most yards is one you can reach across without stepping in: 2 feet wide against a fence, or 3 to 4 feet wide in the open. Metal kits are the easiest to buy and last a long time; line galvanized walls with landscape fabric and keep the soil pH near 6.0 to 6.5. Choose a 2 foot tall bed if bending is hard, fill it with a topsoil and compost mix, and put it in full sun near water. You will be planting earlier in spring than your in-ground neighbors.

    FAQs

    How deep should a raised garden bed be in Iowa?
    ISU says typical beds are 6 to 20 inches or more, and about 11 inches is common. Twelve inches is enough for most vegetables. Go to 18 to 24 inches for deep crops or if you want less bending.

    Are galvanized raised beds safe for vegetables?
    They are widely used for vegetables. ISU’s raised bed guide notes galvanized metal may leach small amounts of lead or cadmium and suggests a barrier liner, plus a soil test. Keeping the pH near 6.0 to 6.5 also reduces leaching.

    Can I use pressure-treated wood?
    Modern treated lumber no longer uses the old CCA or creosote treatments. ISU suggests lining the inside with woven geotextile fabric so roots do not touch the wood. Never use old railroad ties.

    What soil should I put in a raised bed?
    ISU suggests equal parts topsoil, compost and coarse sand, or about 70 percent topsoil and 30 percent compost. Test the soil and adjust the pH to about 6.0 to 6.5.

    When can I plant in a raised bed in Iowa?
    Raised beds warm earlier, so cool-season crops like lettuce, peas and onions can often go in from early to mid-April. Wait until after the frost-free date, usually the first or second week of May, for tomatoes and peppers.

    Do raised beds need a bottom?
    No. An open bottom lets roots grow into the ground and lets water drain. Hardware cloth under the bed can keep voles and moles out.

    Sources and review scope

    This guide was prepared on October 27, 2026 from the following sources. Homingwell did not perform hands-on testing. Sellers were checked on Amazon.com on the same date.

    Explore more Lawn & Garden buying guides.
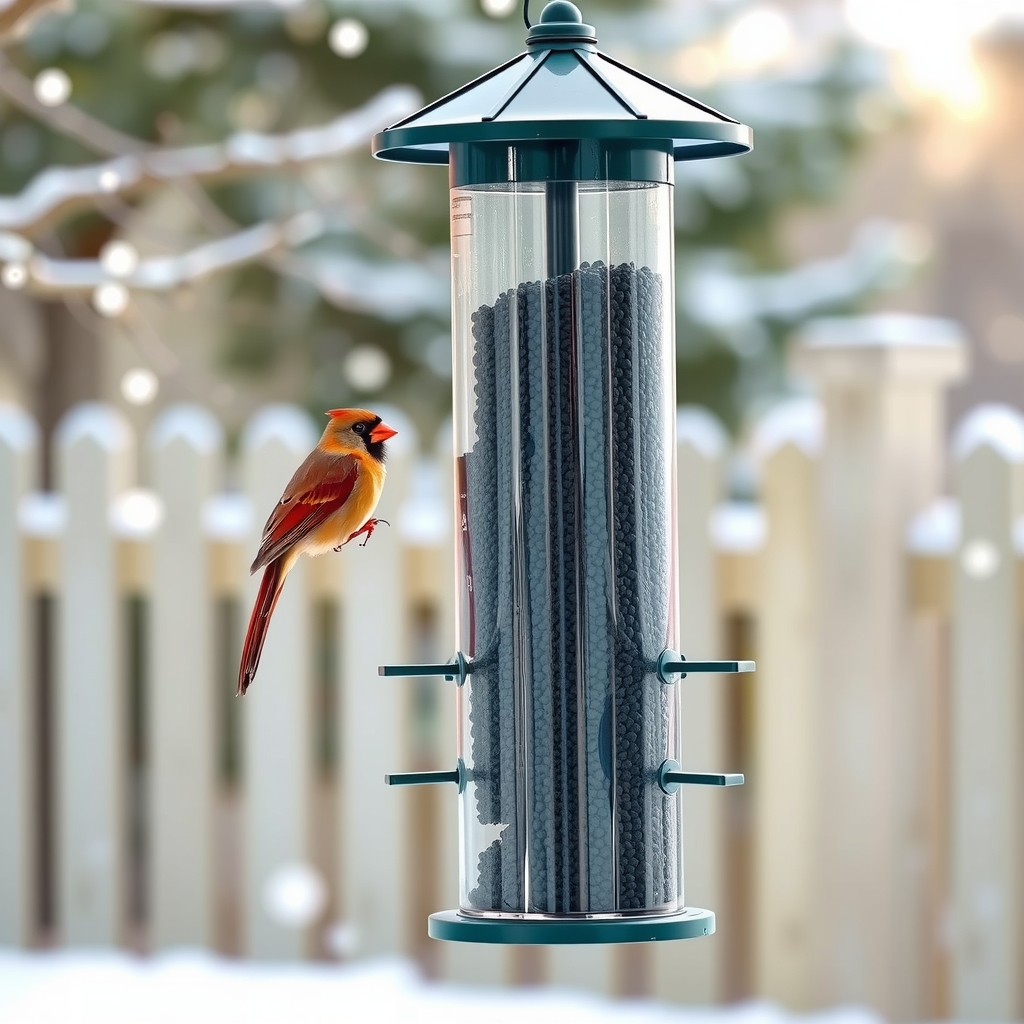
  • When to Start Seeds in Iowa: Indoor Sowing Calendar for Zone 5

    When to Start Seeds in Iowa: Indoor Sowing Calendar for Zone 5

    Skip to content

    Lawn & Garden • Iowa guide • Updated October 27, 2026

    When to Start Seeds in Iowa: Indoor Sowing Calendar for Zone 5

    Explore related guides: Gardening in Iowa: all guides · Last frost date in Iowa by city · When to start seeds in Minnesota · When to start seeds in Illinois · When to start seeds in Nebraska · Seed starting kits for beginners · When to plant garlic in Iowa · When to plant tomatoes in Iowa · Best raised beds for Iowa · Gifts for gardeners · Raised garden bed size · Winterize raised beds · Garden tool storage ideas · Best garden trowel.

    Every January, Iowa gardeners ask the same thing: can I start my seeds yet? Usually the answer is “not quite.” Knowing when to start seeds in Iowa comes down to one date, your average last spring frost, and a little counting backward. This guide uses Iowa State University Extension’s timing to give you a crop-by-crop sowing calendar, plus the setup you need indoors.

    Seedlings in plug trays, started on time for when to start seeds in Iowa
    Short, stocky seedlings in cell trays, the goal of good timing. Photo: Dwight Sipler, CC BY 2.0, via Wikimedia Commons.

    When to start seeds in Iowa: the short answer

    In most of Iowa the frost-free date falls in the first or second week of May. Count back the weeks each crop needs indoors, then add one to two weeks for hardening off. That puts peppers and eggplant in early March, tomatoes in late March, broccoli and cabbage in late February to early March, and cucumbers, melons and squash in early to mid-April. Southern Iowa can start about a week earlier and northern Iowa about a week later.

    How to count back from your frost date

    ISU Extension’s method is simple and works for any seed packet:

    1. Find your planting-out date. For tender crops (tomatoes, peppers, marigolds, impatiens) that is after the danger of frost, the first or second week of May in most of Iowa. Cool-season crops such as broccoli, cabbage, pansies and snapdragons tolerate light freezes and often go out around mid-April.
    2. Check the weeks indoors. Look on the seed packet for the number of weeks from sowing to transplanting.
    3. Add hardening off. Allow one to two extra weeks to get seedlings used to outdoor conditions.
    4. Count back on a calendar. ISU’s examples: crops needing 6 weeks (plus 1 for hardening off) are sown in the third week of March, 8 weeks in the first week of March, and 12 weeks in the first week of February.

    Write the dates down as a sowing schedule. ISU’s tip is that a schedule keeps you from planting too early, which is the most common mistake. Seedlings started too soon get tall and leggy before it is warm enough to plant them.

    Iowa indoor seed starting calendar

    The weeks indoors come from ISU Extension. The sowing windows assume central Iowa, a mid-April planting date for cool-season crops, early to mid-May for warm-season crops, and one week of hardening off.

    When to start seeds indoors in central Iowa (shift about a week earlier in southern Iowa, a week later in the north)
    CropWeeks indoors (ISU)Plant outsideSow indoors
    Geranium, wax begonia12 to 14After frost, mid-MayLate January to early February
    Petunia, impatiens8 to 10After frost, mid-MayLate February to early March
    Pepper, eggplant6 to 8After frost, mid-MayEarly to mid-March
    Marigold6 to 8After frost, mid-MayEarly to mid-March
    Broccoli, cabbage, cauliflower5 to 7Mid-AprilLate February to early March
    Tomato5 to 6After frost, MayLate March
    Cucumber, squash, melons3 to 4After frost, mid-MayEarly to mid-April

    Tomatoes are the crop people start too early most often. ISU says they grow quickly and the ideal transplant is short and stocky, so 5 to 6 weeks is enough. Cucumbers, squash and melons grow fast too, and many Iowa gardeners simply sow them directly in the garden once the soil is warm.

    Northern vs southern Iowa

    ISU’s vegetable planting chart is written for central Iowa and notes that southern Iowa can shift dates about one week earlier and northern Iowa about one week later. ISU also says southern Iowa gardeners can plant tomatoes outdoors in late April, while those in northern counties should wait until mid-May.

    For example, the Old Farmer’s Almanac puts the average last spring frost around May 3 in Creston in southwest Iowa and May 2 in Ames, based on a 30 percent chance of frost after that date. Frost dates are averages, so keep an eye on the forecast and be ready to cover plants. You can confirm your hardiness zone by ZIP code on the USDA map.

    Set up your indoor seed starting station

    ISU lists four essentials for quality transplants: seeds, containers, a growing medium and supplemental light. Here is what it recommends for each:

    • Containers with drainage. Flats, cell packs, pots, peat or coir pellets, or reused cups and cartons with holes punched in the bottom. Wash old containers in soapy water, then disinfect them in 1 part chlorine bleach to 9 parts water.
    • A light, sterile mix. Use a lightweight, porous, pathogen-free soilless mix for germination, and a well-drained potting mix when moving seedlings to bigger pots.
    • Warmth. Most seeds germinate best when the mix stays at 70 to 75 degrees Fahrenheit. A warm spot in the house often works; in cool rooms, ISU suggests heating mats or cables.
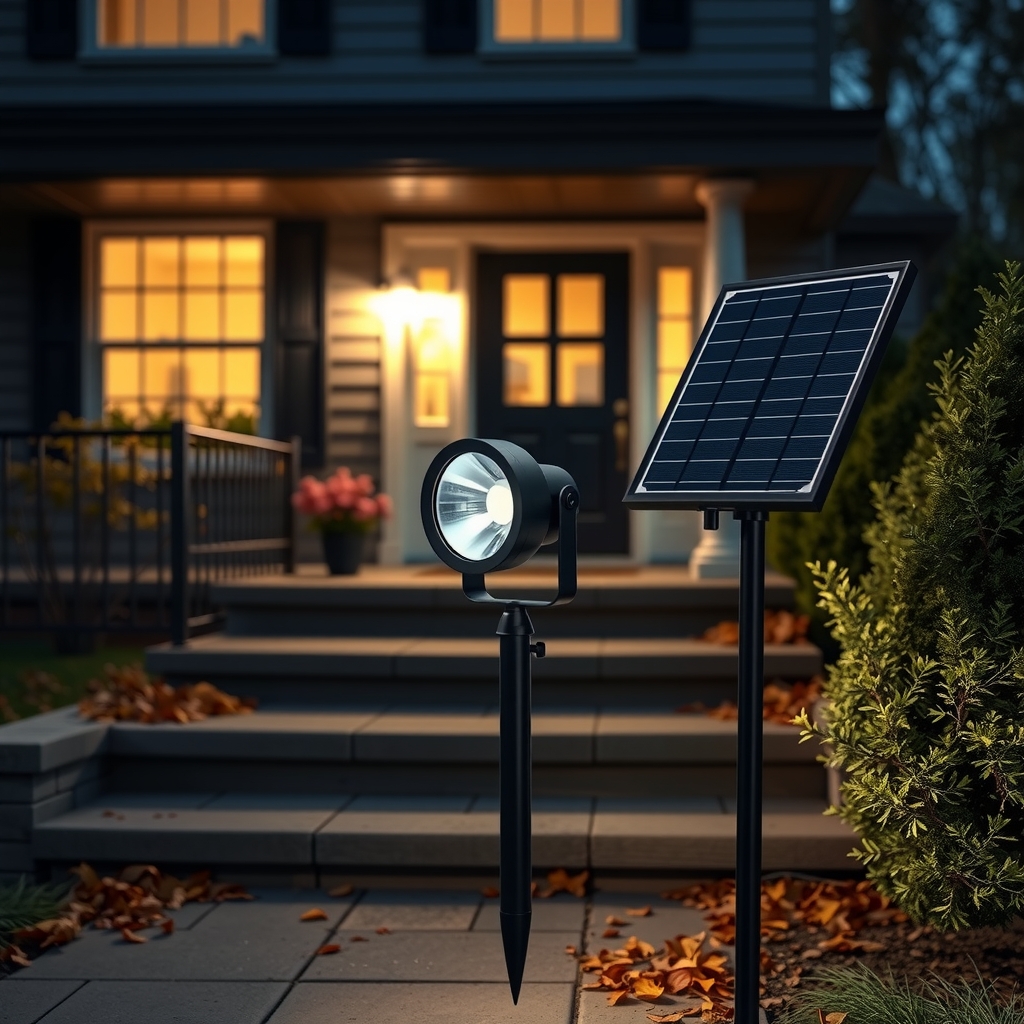
    • Bright, close light. A windowsill is rarely enough: seedlings stretch and lean toward the glass. ISU recommends a plug-in fluorescent or full-spectrum LED shop fixture (at least 3,000 lumens for LEDs). Keep fluorescent tubes 4 to 6 inches above the seedlings and LEDs about 8 to 12 inches, and raise the light as plants grow.
    • A timer. Run the lights 14 to 16 hours a day. Seedlings also need a dark period, so do not leave lights on around the clock.

    Harden off before planting out

    Seedlings grown indoors have never felt sun or wind. ISU’s hardening routine:

    1. Start with the plants in a shady, protected spot outdoors.
    2. Gradually give them longer periods of direct sun over several days.
    3. Check them once or twice a day and water when the surface is dry to the touch.
    4. Bring them inside if strong winds, a severe storm or an overnight frost threatens.
    5. After 7 to 10 days they are ready to plant.

    If you grow in raised beds, our raised garden bed size guide helps you plan how many transplants will fit.

    Products for starting seeds indoors

    These match the setup ISU describes. All were listed as sold by Amazon.com at the time of writing.

    For seeds: Burpee SuperSeed 36-Cell Seed Starting Tray

    Product pick

    Burpee SuperSeed 36-cell seed starting tray

    Seed starting tray with sprouts, illustrative AI image

    Illustrative image (AI-generated), not the exact product.

    See current photos and price on Amazon →

    A reusable tray with 36 soft silicone cells that flex so seedlings pop out with the root ball intact. Corner slots in each cell help drainage, which matters because ISU stresses containers that drain. Because it is reusable, wash and disinfect it each spring the way ISU suggests for old flats.

    Check the Burpee SuperSeed tray on Amazon

    For light: iPower LED Grow Light Stand, 2 ft

    Product pick

    iPower 2 ft LED grow light stand

    Grow light stand over seedlings, illustrative AI image

    Illustrative image (AI-generated), not the exact product.

    See current photos and price on Amazon →

    ISU says the light must be adjustable so it can rise with the seedlings, and that full-spectrum light is enough; special grow lights are not required. This iPower stand has a natural white full-spectrum LED with a height-adjustable arm and a 50 or 100 percent dimmer. Several units can be linked if you start more flats.

    Check the iPower grow light stand on Amazon

    For warmth: iPower 10 x 20 in Seedling Heat Mats (2 Pack)

    Product pick

    iPower 10 x 20 in seedling heat mats, 2 pack

    Seedling heat mat under a tray, illustrative AI image

    Illustrative image (AI-generated), not the exact product.

    See current photos and price on Amazon →

    Most seeds germinate best at a steady 70 to 75 degrees Fahrenheit, says ISU, and in a cool Iowa basement in February a heat mat is the easy way to get there. Each waterproof mat fits under a standard 10 x 20 tray and warms it 10 to 20 degrees above room temperature, according to the listing. Take trays off the mat once most seeds have sprouted.

    Check the iPower heat mats on Amazon

    For control: JumpStart Digital Thermostat for Heat Mats

    Product pick

    JumpStart digital thermostat controller

    Thermostat probe in a seed tray, illustrative AI image

    Illustrative image (AI-generated), not the exact product.

    See current photos and price on Amazon →

    A heat mat on its own just adds heat. A thermostat with a probe in the mix holds it at the temperature you set, so you can dial in the 70 to 75 degrees ISU recommends instead of guessing. This one has a digital readout, a 68 to 108 degree range and a 6 ft cord.

    Check the JumpStart thermostat on Amazon

    For timing: GE 24-Hour Plug-in Mechanical Timer

    Product pick

    GE 24-hour plug-in mechanical timer

    Outlet timer for grow lights, illustrative AI image

    Illustrative image (AI-generated), not the exact product.

    See current photos and price on Amazon →

    ISU suggests running seedling lights 14 to 16 hours a day on a timer. This simple push-pin timer handles it without Wi-Fi or apps, in 30-minute steps. Note that it has one polarized outlet for two-prong plugs; check that your light’s plug fits.

    Check the GE timer on Amazon

    For the growing medium, any bagged soilless seed starting mix from a garden center works. ISU’s own example of a commercial soilless mix is Jiffy Mix.

    Conclusion

    So, when to start seeds in Iowa? Later than most people think. Work back from a frost-free date in the first or second week of May, add a week or two for hardening off, and use the weeks on each seed packet. That means peppers in early March, tomatoes in late March and squash in April. Give seedlings 70 to 75 degree warmth to sprout, bright light close above them and a timer, and you will plant short, sturdy transplants instead of leggy ones.

    FAQs

    When should I start tomato seeds indoors in Iowa?
    About 5 to 6 weeks before you plan to plant outside, according to ISU. See when to plant tomatoes in Iowa for outdoor dates. For a mid-May planting in central Iowa that means sowing in late March. Southern Iowa can plant out in late April, so sow a week or two earlier.

    When should I start pepper seeds in Iowa?
    Peppers need 6 to 8 weeks indoors, so sow them in early to mid-March for planting out after the frost-free date in May.

    Is January too early to start seeds in Iowa?
    For most vegetables, yes. Only slow annuals such as geraniums, begonias and lisianthus, which need 12 or more weeks, should be sown in January or early February.

    Do I need a heat mat to start seeds?
    Not always. ISU says a warm spot in the house often works, but in cool rooms a heat mat helps keep the mix at the 70 to 75 degrees most seeds need.

    Can I start seeds on a windowsill?
    It rarely works well. Even the brightest window gives weak, one-sided light, so seedlings stretch and lean. A fluorescent or LED fixture close above the plants gives much stockier transplants.

    What is the last frost date in Iowa?
    In most of Iowa the frost-free date falls in the first or second week of May. Southern Iowa is about a week earlier and northern Iowa about a week later.

    Sources and review scope

    This guide was prepared on October 27, 2026 from the following sources. Homingwell did not perform hands-on testing. Sellers were checked on Amazon.com on the same date.

    Explore more Lawn & Garden buying guides.