
Category: Buying Guides

Practical buying guides, comparisons and how-to articles to help US homeowners and pet owners choose with confidence.

  • Raised Garden Bed Size Guide: Best Height, Width, Depth

    Raised Garden Bed Size Guide: Best Height, Width, Depth

    Skip to content

    Lawn & Garden • Buying guide • Updated October 23, 2026

    Raised Garden Bed Size Guide: Best Height, Width, Depth

    Explore related guides: When to plant tomatoes in Iowa · Best raised beds for Iowa · When to start seeds in Iowa · Fiskars Ergo trowel review · Fiskars bypass pruning shears · Raised garden bed review · Gorilla dump cart review · Denicmic solar lights review · How much soil for a raised bed.

    Ever built a bed only to find you cannot reach the middle, or the roots hit a hard floor? Choosing the right raised garden bed size before you build prevents both problems. A well-sized bed means easier planting, healthier roots and bigger harvests. Here are the dimensions that work for most U.S. gardens.

    Best raised garden bed size for most gardens

    Land Guard oval metal raised garden bed planted with vegetables and flowers
    Land Guard 12-inch-tall oval raised garden bed shown in a planted setting. Manufacturer image: Land Guard. Confirm the exact version and finish on the seller listing.

    These numbers suit most home vegetable gardens:

    • Width: Four feet or less. You can reach the center from either side without stepping in the soil.
    • Length: Any length that fits your yard. Eight feet is common and easy to build from standard lumber.
    • Height: Six to twelve inches works for most crops. Taller beds are easier on the back.
    • Depth of soil: At least eight inches for leafy greens and ten to twelve for deeper roots.

    How deep a raised garden bed should be by crop

    Crop typeSuggested soil depth
    Lettuce, spinach, herbs6 to 8 inches
    Beans, peppers, cucumbers8 to 12 inches
    Tomatoes, squash12 to 18 inches
    Carrots, potatoes, parsnips12 inches or more

    If your native soil is loose, roots can grow below the bed. In clay or compacted ground, build higher.

    When to build and how long it lasts

    Build a few weeks before planting so the soil can settle. Early spring and early fall are ideal. Allow a weekend for assembly and a day for filling. Cedar and metal beds last a decade or more, while untreated pine may need replacing sooner.

    How to choose your raised garden bed size, step by step

    1. Measure your space. Mark the area with string and check sun exposure first.
    2. Plan your paths. Leave two to three feet between beds for a cart or wheelbarrow.
    3. Pick the width. Stay at four feet or less. Narrow to three feet if you have limited reach.
    4. Choose the height. Go taller if you want less bending.
    5. Estimate the soil. Multiply length, width and depth in feet to get cubic feet of soil.

    Our Land Guard raised garden bed review shows one ready-made option in real use.

    Silver oval Land Guard raised bed filled with leafy vegetables
    A planted oval raised bed offers a visual example when planning growing space and access. Manufacturer image: Land Guard. Confirm the exact version and finish on the seller listing.

    Filling the bed and moving soil

    A large bed holds a lot of soil. A sturdy cart makes the job much easier, as shown in our Gorilla dump cart review. Mix topsoil, compost and a little aeration material for good drainage and fertility.

    Common Mistakes to Avoid With raised garden bed size

    • Making the bed too wide. You will end up stepping on the soil.
    • Building too shallow. Roots dry out quickly and plants struggle.
    • Forgetting the paths. Tight spacing makes weeding hard.
    • Placing it in shade. Most vegetables need six to eight hours of sun.

    Care and Maintenance Tips

    A few habits keep your raised garden bed size choice working for years. Top up the soil each spring with compost because it settles. Water deeply and mulch to hold moisture. Rotate crops each year to reduce pests. For local planting dates and soil advice, check the University of Minnesota Extension garden guidance.

    Conclusion

    The ideal raised garden bed size is simple: four feet wide, any length, and at least eight to twelve inches deep. Match the depth to your crops, leave room for paths, and your garden will be easier to work and more productive. Explore our garden tool reviews to finish your setup.

    FAQs

    What is the best raised garden bed size for beginners?
    A four by eight foot bed, about ten to twelve inches deep, is a reliable starting point.

    How wide can a raised bed be?
    Four feet is the usual maximum if you can reach from both sides. Use three feet if you can only reach from one side.

    Is a six inch raised bed deep enough?
    It works for lettuce and herbs, but most vegetables do better with eight to twelve inches.

    How much soil does a raised bed need?
    Multiply length by width by depth in feet. A four by eight bed at one foot deep needs about 32 cubic feet.

    Should I put anything under the bed?
    Cardboard or landscape fabric blocks weeds. Leave the bottom open so roots and worms can move freely.
  • Fiskars Bypass Pruning Shears: How They Compare with Anvil Pruners

    Fiskars Bypass Pruning Shears: How They Compare with Anvil Pruners

    Skip to content

    Lawn & Garden • Buying guide • Updated October 24, 2026

    Fiskars Bypass Pruning Shears: How They Compare with Anvil Pruners

    Explore related guides: Gifts for gardeners · Fiskars Ergo trowel review · Fiskars bypass pruning shears · Raised garden bed review · Gorilla dump cart review · Denicmic solar lights review · Best loppers for trees and shrubs · Best pruning shears.

    Considering Fiskars bypass pruning shears for your garden? Ever squeezed a pair of pruners and watched the stem tear instead of cut? The wrong blade style crushes plant tissue and slows healing. Understanding bypass vs anvil pruning shears takes a few minutes and saves your plants, your wrists and your money. Here is how each type works and which one fits your garden.

    Research-based guidance: This guide compares published features and general pruning practice. We have not run side-by-side cutting tests. As an Amazon Associate I earn from qualifying purchases. Product links on this page are affiliate links.

    How Fiskars bypass pruning shears work

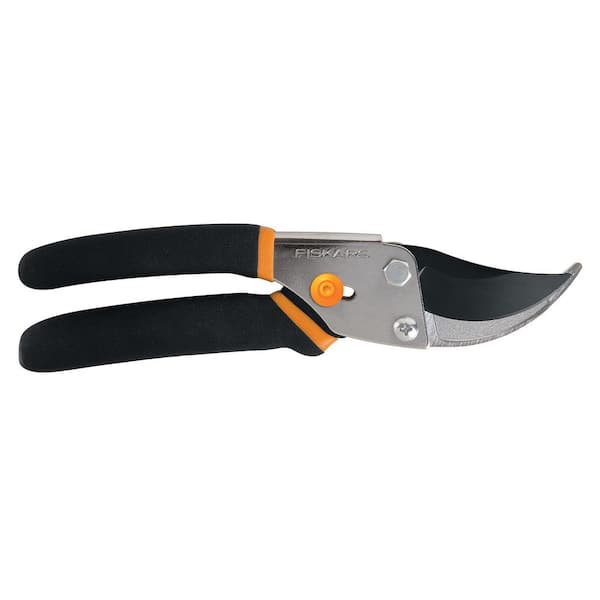
    Fiskars Classic bypass pruning shears
    Fiskars Classic bypass hand pruner, shown as an example of the bypass design. Product image: The Home Depot listing. Check the exact version on Amazon before buying.

    The two designs cut in completely different ways:

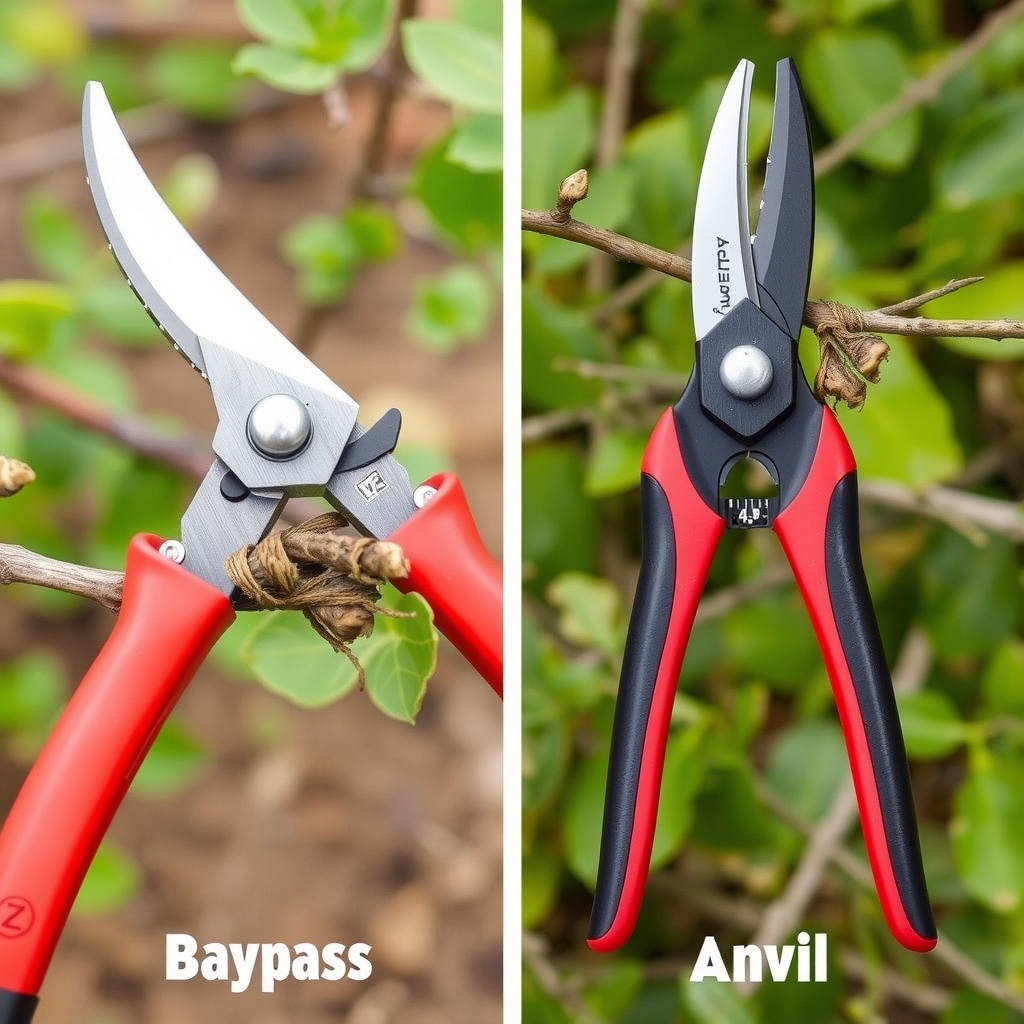
    • Bypass pruners: Two curved blades pass each other like scissors. One blade slices while the other holds the stem steady.
    • Anvil pruners: One sharp blade closes onto a flat, soft surface called the anvil. The motion is closer to a knife on a cutting board.

    Both styles come in hand-held sizes. The blade design is what changes the result on the plant.

    Fiskars bypass pruning shears for live stems

    This is the most useful rule to remember.

    • Live, green stems: Choose bypass. The scissor action makes a clean cut that heals quickly.
    • Dead or dry wood: Choose anvil. The crushing action handles brittle material well.
    • Roses, shrubs and flowers: Bypass is the safer choice for most ornamental pruning.
    • Thick branches: Pruners of either type struggle past about three quarters of an inch. Use loppers or a saw instead.

    Pros and cons of each pruner type

    FeatureBypassAnvil
    Cut quality on live stemsClean and preciseCan crush stems
    Dead woodCan bind or twistWorks well
    Blade upkeepNeeds sharpening and alignmentAnvil may need replacing
    Reach into tight spotsNarrow blade, easy accessWider head

    5 checks before choosing Fiskars bypass pruning shears

    Fiskars bypass pruning shears product details
    Fiskars product detail visual from The Home Depot listing. Confirm the selected model and its specifications before purchase.
    1. List your main jobs. Mostly flowers and shrubs points to bypass. Mostly cleanup of old branches points to anvil.
    2. Check the hand fit. Handles should open and close without strain. Small hands benefit from a ratchet or compact model.
    3. Look at the blade. Coated or high-carbon steel stays sharp longer and resists sap.
    4. Test the lock. A safety latch you can use one-handed prevents accidents.
    5. Read the warranty. Replaceable blades extend the life of the tool.

    If you are unsure, start with a quality bypass pair. It covers most home garden work.

    Match Fiskars bypass pruning shears to your garden

    • Rose and flower beds: Bypass, with a slim tip for tight spots.
    • Vegetable gardens: Bypass for tomato and pepper stems, since clean cuts reduce disease risk.
    • Orchard and fruit trees: Bypass for live wood, plus loppers for branches.
    • Overgrown yards: A second anvil pair for dead wood saves your good blades.

    Our Fiskars bypass pruning shears review explains the identified model’s published features, limits and buying considerations. We have not personally tested it.

    Common Mistakes to Avoid With bypass vs anvil pruning shears

    • Using anvil pruners on green stems. The crushing cut invites rot.
    • Forcing thick branches. It bends the blades and strains your hand.
    • Skipping cleaning. Dirty blades spread plant disease from one plant to the next.
    • Cutting at the wrong angle. Cut just above a bud at a slight slant.

    Fiskars bypass pruning shears: care and maintenance

    A few habits keep your bypass vs anvil pruning shears choice working for years. Wipe the blades after each session with a damp cloth. Remove sap with a little rubbing alcohol. Oil the pivot every few weeks and sharpen the blade once or twice a season. Store the pruners closed and dry. For clear, practical pruning guidance, see the Arbor Day Foundation tree care tips.

    Check Fiskars bypass pruning shears before buying

    Our Fiskars bypass pruning shears review covers one identified model, its published 5/8-inch cutting limit and the buying checks to run first. Read those checks before opening the product link. We don’t claim it suits every hand or every job.

    Check the shears on Amazon → Read the buying checks

    Amazon link is an affiliate link: as an Amazon Associate I earn from qualifying purchases, at no extra cost to you. Check the current price, size and details on Amazon before buying.

    Conclusion

    Choosing between bypass vs anvil pruning shears is simple once you know the rule: bypass for live growth, anvil for dead wood. Pick a comfortable, well-built pair, keep it clean and sharp, and your plants will thank you every season. Browse our related garden tool reviews for more help.

    FAQs

    Are bypass or anvil pruners better for beginners?
    Bypass pruners. They suit most plants and make cleaner cuts on living stems.

    Can I use Fiskars bypass pruning shears on dead wood?
    Yes, for thin dead stems. For hard, dry wood an anvil pair or a saw is easier.

    How thick can Fiskars bypass pruning shears cut?
    The Classic model discussed here lists a 5/8-inch capacity. Check the exact selected model and use an appropriate lopper or saw for material beyond its stated capacity.

    How often should I sharpen pruners?
    Once or twice a season, or whenever cuts start to look ragged.

    Do I need both types?
    Not necessarily. One good bypass pair covers most gardens. Add an anvil pair for lots of dead wood.

  • Best Garden Trowels: What to Look For Before You Buy

    Best Garden Trowels: What to Look For Before You Buy

    Skip to content

    Lawn & Garden • Buying guide • Updated October 23, 2026

    Best Garden Trowels: What to Look For Before You Buy

    Explore related guides: Gifts for gardeners · Fiskars Ergo trowel review · Fiskars bypass pruning shears · Raised garden bed review · Gorilla dump cart review.

    Ever finished an afternoon of planting with sore wrists and a bent blade? The wrong tool turns a relaxing hobby into a chore. Choosing the best garden trowel makes planting faster, easier on your joints, and more precise. A good trowel is the most-used tool in a home gardener's kit, so it's worth getting right before you buy.

    What to look for in the best garden trowel

    Best garden trowel types and materials compared

    Before comparing models, know the parts that matter:

    • Blade material: Stainless steel resists rust and slices through soil cleanly. Carbon steel is strong but needs drying after use. Aluminum is light but can bend in clay.
    • Blade shape: A pointed, scooped blade suits general digging. Narrow blades work for bulbs and tight spaces.
    • Handle: Look for rubberized, cushioned, or wood grips. A university extension planting advice should feel balanced, not top-heavy.
    • Ergonomics: An tool care and soil guidance keeps your wrist neutral and reduces strain, which matters for arthritis or long sessions.
    • Depth markings (optional): Etched measurements help you plant bulbs and seedlings at the correct depth.
    • Companion tools (optional): Pruning shears, such as these pruning shears companion picks, a kneeling pad, and gloves.

    When to buy and how long a trowel lasts

    Shopping takes about an hour of research. Allow a week to test the trowel during real planting. Spring and fall are peak planting seasons, so buy two to four weeks ahead to avoid rushed choices. A quality trowel lasts 5 to 10 years or more, while budget versions may bend within one or two seasons. Spending a bit more upfront usually costs less over time.

    How to choose the best garden trowel, step by step

    Choosing the best garden trowel step by step
    1. Define your tasks. Transplanting seedlings, dividing perennials, and planting bulbs each favor different blade widths. Tip: Write down your top three jobs first.
    2. Set a budget. Decide what you want to spend before you compare. Tip: Avoid the flimsiest, cheapest options; a thin blade or loose handle will not last.
    3. Check the construction. The blade and handle should be one solid piece or tightly welded. Tip: Skip trowels with a thin hollow socket joint, which is a common failure point.
    4. Test the grip. Hold it as if digging. Tip: Wear your gardening gloves when testing, since they change the fit.
    5. Read reviews and warranties. Lifetime warranties signal confidence in the tool.
    6. Test it in soil. Dig a few holes in your own beds and note any hand fatigue or bending.

    Why the right trowel matters

    The best garden trowel won't feed you directly, but it supports a healthier garden and body:

    • Less wrist and hand strain during long sessions
    • Cleaner planting holes that help roots establish, leading to stronger, more productive vegetables and herbs
    • Faster work, so you spend more time enjoying your garden
    • Less waste, because durable tools don't end up in landfills

    Tips for picking the best garden trowel for your soil

    • Container gardening: A short, narrow blade handles pots without disturbing roots.
    • Raised beds: Standard widths work well in loose soil.
    • Clay or rocky soil: Choose forged or thick stainless steel.
    • Small hands or limited strength: Pick lightweight models with cushioned grips.
    • Organic gardeners: Wood handles from sustainable sources are a good choice.
    • Left-handed gardeners: Symmetrical handles are more comfortable.

    Common Mistakes to Avoid

    • Choosing the best garden trowel on looks alone. Test the feel and balance.
    • Using a trowel as a pry bar. Use a garden fork or spade for heavy leverage.
    • Ignoring handle comfort. Poor grips cause blisters and fatigue.
    • Leaving it outside. Moisture damages even stainless steel over time.
    • Choosing too many gadgets. One solid trowel beats a drawer of cheap ones.

    Storage / Maintenance Tips

    Rinse soil off after each use and dry the blade thoroughly. Wipe it with a little oil in the off-season to prevent rust. Sharpen the edge once a year with a mill file for cleaner cuts. Store it in a dry shed or hang it on a hook. Check handle screws or rivets each spring. In freezing climates, bring wooden-handled tools indoors for winter.

    Conclusion

    The best garden trowel comes down to blade quality, a comfortable grip, and a fit for your soil and tasks. Take your time, test your options, and invest in a tool you'll reach for every season. Have a favorite trowel? Share it in the comments, and explore our related gardening tool reviews for more help.

    FAQs

    What is the best material for a garden trowel?
    Stainless steel is the best all-around choice because it resists rust and stays strong.

    How much should I spend on the best garden trowel?
    Spend enough for a solid, one-piece or tightly joined trowel with a comfortable grip; very cheap trowels often bend or break. Check the current price on the listing.

    Do ergonomic handles really help?
    Yes. They reduce wrist strain and are especially useful for longer sessions or joint discomfort.

    Can one trowel do everything?
    A mid-width, pointed trowel handles most tasks. Add a narrow one for bulbs if needed.

    How often should I replace my trowel?
    Replace it when the blade bends, the handle loosens, or rust pits the metal. A quality one can last a decade.

  • Reusable Pet Hair Remover vs Lint Roller: What to Compare

    Reusable Pet Hair Remover vs Lint Roller: What to Compare

    Skip to content

    Pet Products · Practical buying guide

    Reusable Pet Hair Remover vs Lint Roller: What to Compare

    A reusable pet hair remover and an adhesive lint roller can both belong in a cleaning kit, but they are not interchangeable on every surface. Start with the material you want to clean, the size of the job and the maintenance you are willing to do. Avoid choosing on a promise of universal hair removal.

    Research-based guidance: We have not performed a side-by-side pickup test. This guide compares buying considerations, not measured performance. As an Amazon Associate I earn from qualifying purchases. Linked product assessments contain affiliate links.

    Start with the surface

    Homingwell pet products guide: reusable pet hair remover vs lint roller

    For repeated furniture touch-ups, compare a reusable tool specifically approved for that upholstery. For a small clothing touch-up, compare an adhesive roller approved for the garment. Delicate fabrics, loose weaves and embellished surfaces need particular care: check the fabric instructions and the tool instructions before use.

    Quick recap: reusable pet hair remover vs lint roller

    When it comes to reusable pet hair remover vs lint roller, the best choice depends on your space, your budget and how you use it every day. Write down your key measurements, compare the features that matter to you, and choose the option that fits comfortably.

    Use this reusable pet hair remover vs lint roller guide as a checklist, and come back to it whenever your needs change. A short, honest comparison of reusable pet hair remover vs lint roller now saves you from a costly return later. Before you decide, review your reusable pet hair remover vs lint roller notes once more. Keep a simple reusable pet hair remover vs lint roller checklist next to your tape measure. A careful reusable pet hair remover vs lint roller routine takes minutes and prevents mistakes. Share this reusable pet hair remover vs lint roller guide with anyone helping you choose. Revisit the reusable pet hair remover vs lint roller steps above if your room or budget changes.

    For general background, see ASPCA pet care resources.

    These labels cover different designs

    “Reusable” can mean a directional fabric brush, a roller with a collection chamber or another construction entirely. Cleaning methods and suitable surfaces differ. An adhesive roller removes a sheet as it becomes covered; reusable tools generally need their collecting area emptied or cleaned according to their own instructions.

    Do not transfer care advice from one reusable design to another. A washable tool does not establish that a different model can be soaked. Check the manual for the exact version, including any drying requirements, instead of treating an online category description as a care label.

    Compare the full cleaning routine

    Homingwell pet products buying guide: reusable pet hair remover vs lint roller

    Check Reusable remover Adhesive lint roller
    Surface compatibility Verify the particular mechanism and approved fabrics. Verify the adhesive is suitable for the garment or upholstery.
    Ongoing supplies Inspect cleaning and replacement-part requirements. Check the correct replacement roll size and availability.
    After each job Allow time for emptying or cleaning. Remove used sheets and store the adhesive as directed.
    Large areas Consider grip, working width and repeated movement. Consider how many sheets the job uses.

    Furniture and clothing create different jobs

    A sofa cushion offers a different working surface from a loose shirt or blanket. Seams, folds and removable covers can affect access. Before buying, identify the actual problem area: a pet’s usual cushion, a car seat or the shoulders of a coat. Look for instructions that address that use.

    Check the fabric care label first, then follow the tool maker’s compatibility advice. Where both permit use, try a small inconspicuous area before treating a visible surface. Stop if the fabric catches, distorts or shows damage. More pressure is not a substitute for an appropriate cleaning tool.

    Work out cost from your own usage

    A reusable tool may avoid disposable adhesive sheets, but that alone does not establish a lower lifetime cost. Compare the purchase cost, any replacement components and how often you actually use it. For adhesive rollers, compare the number and size of usable sheets and the cost of compatible refills, rather than only the pack price.

    For a simple household record, note how many sheets you use in a typical week and the price of the replacement roll you actually buy. Keep the result specific to your routine. We have not calculated a universal break-even point or claimed a particular environmental saving.

    Think about handling and storage

    Check whether you can hold the handle comfortably through repeated strokes and open the collection compartment without difficulty. A tool that is awkward to empty may stay in a cupboard. For an adhesive roller, check whether the cover and handle are practical to store near the place you need it.

    Household hair-removal tools are not automatically grooming tools. Use them only as the manufacturer intends; do not assume a fabric roller should be used directly on a pet. Keep removable components and used adhesive sheets away from animals and children.

    Considering the ChomChom format?

    Our ChomChom Roller assessment covers one identified manual tool, its published features and buying limitations. Read those checks before opening the product link. We do not claim it is the best choice for every fabric.

    Read the ChomChom buying checks →

    Common questions: reusable pet hair remover vs lint roller

    Will either tool remove every pet hair?

    Do not assume complete removal. Results depend on the hair, fabric, tool and technique. This guide provides no tested pickup percentage.

    Does a hair remover replace washing or vacuuming?

    Choose the cleaning method your fabric and equipment instructions allow. A surface touch-up tool does not by itself establish that the whole item is clean.

  • Under-Sink Drawers vs Baskets: Which Storage Fits Your Cabinet?

    Under-Sink Drawers vs Baskets: Which Storage Fits Your Cabinet?

    Skip to content

    Home Improvement · Practical buying guide

    Under-Sink Drawers vs Baskets: Which Storage Fits Your Cabinet?

    Choosing between under-sink drawers and baskets comes down to access, pipe positions and what you actually store. A neat-looking organiser is only useful if you can reach the items, open the door and inspect the plumbing without dismantling everything.

    Editorial guidance: This is a planning comparison, not a hands-on product test. As an Amazon Associate I earn from qualifying purchases. Linked product assessments contain affiliate links.

    The quick choice

    Homingwell home improvement guide: under-sink drawers vs baskets

    Consider drawers when you need regular access to items at the back and have a clear pull-out path. Consider removable baskets when pipework breaks the space into awkward sections or you want to lift a small group of supplies out together. Neither format is automatically the better fit.

    Quick recap: under-sink drawers vs baskets

    When it comes to under-sink drawers vs baskets, the best choice depends on your space, your budget and how you use it every day. Write down your key measurements, compare the features that matter to you, and choose the option that fits comfortably.

    Use this under-sink drawers vs baskets guide as a checklist, and come back to it whenever your needs change. A short, honest comparison of under-sink drawers vs baskets now saves you from a costly return later. Before you decide, review your under-sink drawers vs baskets notes once more. Keep a simple under-sink drawers vs baskets checklist next to your tape measure. A careful under-sink drawers vs baskets routine takes minutes and prevents mistakes. Share this under-sink drawers vs baskets guide with anyone helping you choose. Revisit the under-sink drawers vs baskets steps above if your room or budget changes.

    For general background, see U.S. Department of Energy.

    Compare the access you need

    A drawer brings its contents toward you, but the moving tray needs space inside and in front of the cabinet. A basket can be picked up and moved elsewhere, although a tall or heavy basket may be inconvenient to lift over the cabinet lip. Check the loaded arrangement rather than comparing empty product photographs.

    Put the items you use daily in a reachable zone. Keep occasional supplies farther back only if you can retrieve them without disturbing valves or hoses. If your normal routine requires carrying supplies to another room, a smaller basket with suitable handles may be worth comparing.

    Measure three separate spaces

    Homingwell home improvement buying guide: under-sink drawers vs baskets

    • Entry space: the narrowest door opening, including hinges and the central frame.
    • Storage space: the unobstructed area beside or below pipes, the basin and other fittings.
    • Access space: the route a drawer travels or the lifting space needed to remove a basket.

    Our under-sink measuring checklist explains how to record these constraints before buying. Do not treat the cabinet’s total width as one uninterrupted rectangle. Measure each usable section independently.

    Use this comparison before making a shortlist

    Decision Drawers Baskets
    Back-of-cabinet access Check full extension and door clearance. Check whether the whole basket must be removed.
    Awkward pipe layout Tray and frame must avoid every obstruction. Separate small baskets may fit individual gaps.
    Installation Some models need mounting; inspect the instructions. Freestanding versions may need no mounting.
    Cleaning underneath Check removal and access around the frame. A removable basket allows access once lifted out.

    Check the contents as carefully as the organiser

    Measure your tallest bottle with its cap or pump fitted. Look for usable internal dimensions, not only the organiser’s outer dimensions. For drawers, check the height beneath the upper tray and whether bottles remain accessible when the drawer is partly open. For baskets, verify the opening and handle position.

    A group of full bottles may be substantially heavier than an empty organiser. Follow the stated load limit and installation method for the exact model. Do not assume a stackable drawer remains stable with any number of units or that a freestanding basket is suitable for mounting on a door.

    Allow for maintenance and spills

    Keep shutoff valves and pipe connections accessible. Choose an arrangement you can remove easily if plumbing needs attention. An organiser does not repair leaks or make the cabinet waterproof; deal with water problems before adding storage.

    Follow the labels on cleaning products for storage and separation. A basket or drawer is not a child-resistant cabinet. Do not move hazardous products into an accessible location simply because an organiser creates more room.

    Separate furniture examples from your actual fit

    IKEA’s UTRUSTA under-sink organiser illustrates a two-tray layout. It is a design example, not proof that a different organiser fits your cabinet. Compare the exact product diagram and installation instructions.

    Ready to compare a drawer option?

    Read our Vtopmart stackable storage drawers assessment for the identified model’s features and limitations, then compare its current seller dimensions with your measurements. It is not a universal under-sink recommendation.

    See the drawer buying checks →

    Common questions: under-sink drawers vs baskets

    Are baskets always better for rental homes?

    No. A freestanding option can avoid mounting, but drawers can also be freestanding. Compare installation requirements and your rental agreement, rather than relying on the product category.

    Can I mix drawers and baskets?

    Yes, if each piece fits and remains accessible. A narrow drawer on one side and a removable basket on the other may suit an uneven cabinet better than one large unit.

  • Storage Ottoman vs Storage Bench for a Small Room

    Skip to content

    Furniture • Small-room buying guide

    Storage Ottoman vs Storage Bench for a Small Room

    A storage ottoman and a storage bench can both hide everyday clutter, but their labels tell you less than their dimensions and opening method. For a small room, compare the space each occupies while closed, while in use and while you access the contents. The right choice should solve a storage problem without creating a circulation problem.

    This guide offers planning advice, not a hands-on furniture test. As an Amazon Associate I earn from qualifying purchases. Reviews linked from this page contain affiliate links.

    Decide which job matters most

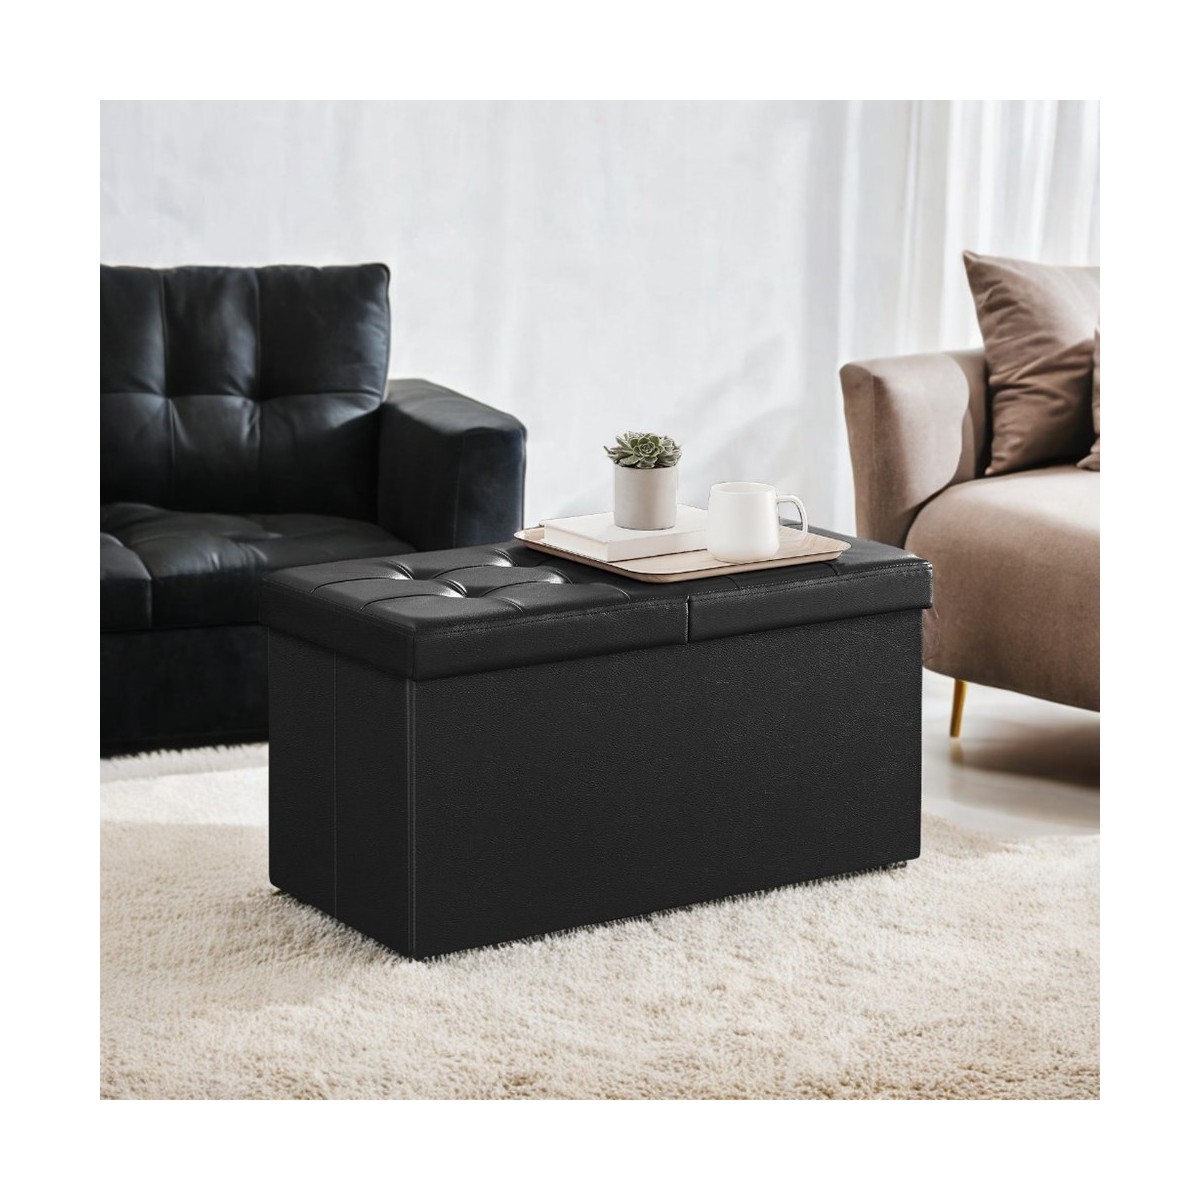
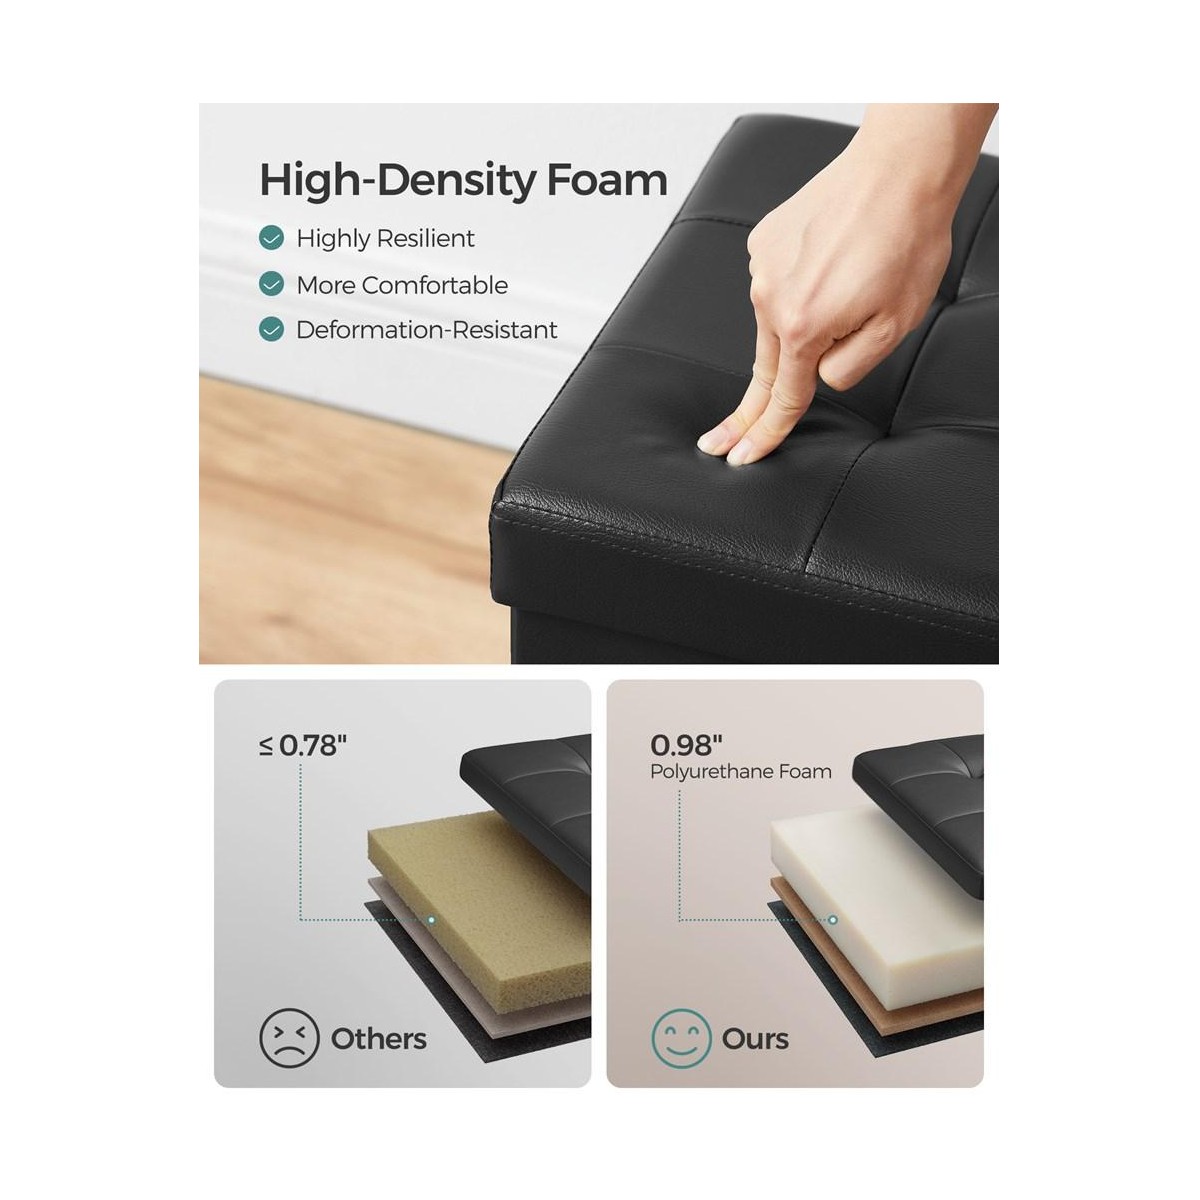
    SONGMICS black rectangular storage ottoman bench with padded lid
    A rectangular storage ottoman is one example of the overlap between ottoman and bench formats. Product image from the SONGMICS listing on Target. Check the exact model, dimensions and finish before buying.

    Write down the main purpose: storing blankets, resting your feet, sitting to put on shoes, or providing an occasional extra seat. These are different jobs. Do not assume a padded lid is approved for seating or that a bench is an appropriate step to reach a shelf. Check the exact product’s intended uses and load instructions.

    Quick recap: storage ottoman vs storage bench

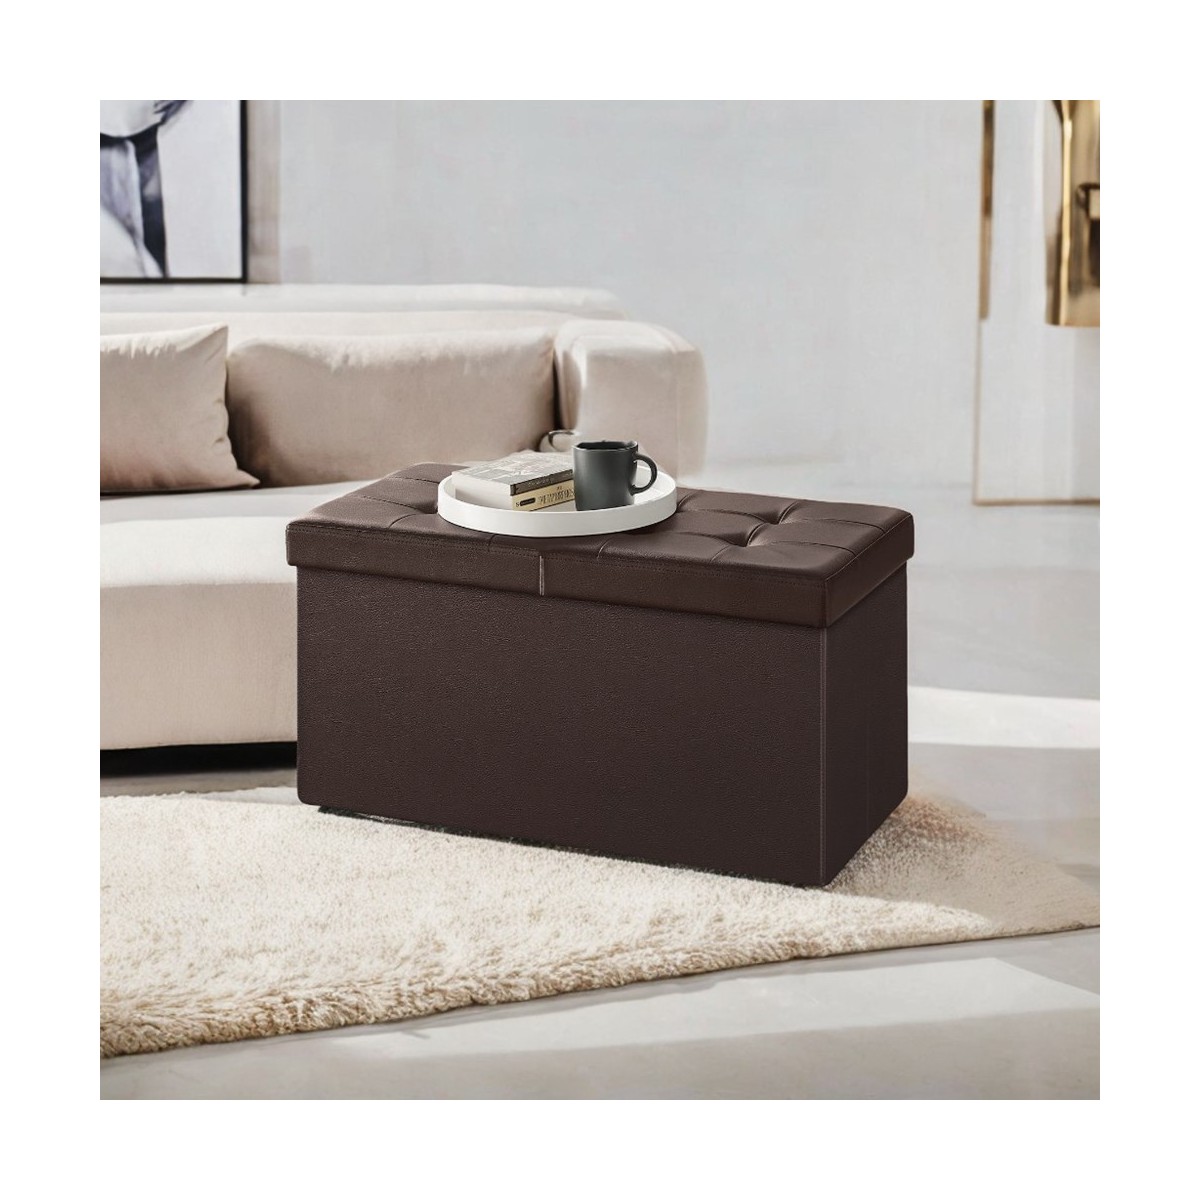
    SONGMICS brown folding storage ottoman bench
    Brown finish shown as another storage ottoman example. Product image: SONGMICS listing on Target. Models and finishes may vary.

    When it comes to storage ottoman vs storage bench, the best choice depends on your space, your budget and how you use it every day. Write down your key measurements, compare the features that matter to you, and choose the option that fits comfortably.

    Use this storage ottoman vs storage bench guide as a checklist, and come back to it whenever your needs change. A short, honest comparison of storage ottoman vs storage bench now saves you from a costly return later.

    Before you decide, review your storage ottoman vs storage bench notes once more. Keep a simple storage ottoman vs storage bench checklist next to your tape measure.

    A careful storage ottoman vs storage bench routine takes minutes and prevents mistakes. Share this storage ottoman vs storage bench guide with anyone helping you choose.

    Revisit the storage ottoman vs storage bench steps above if your room or budget changes. Small habits make storage ottoman vs storage bench decisions faster and easier.

    For general background, see U.S. Consumer Product Safety Commission.

    Next, list the items to store and how often you need them. Bedding accessed weekly may suit a different opening arrangement from shoes needed twice a day. If you must clear objects off the lid every time, the storage may be less convenient than an open shelf.

    Compare shape rather than product names

    Ottomans often appear in seating areas as footrests, while benches are often positioned along a wall or at the end of a bed. These are layout ideas, not fixed product definitions. Some ottomans are long and rectangular; some benches have upholstered lift-up storage.

    IKEA’s storage-bench collection and EKTORP storage footstool illustrate the overlap. Use actual measurements and opening details when comparing formats across brands.

    Mark the closed footprint on your floor

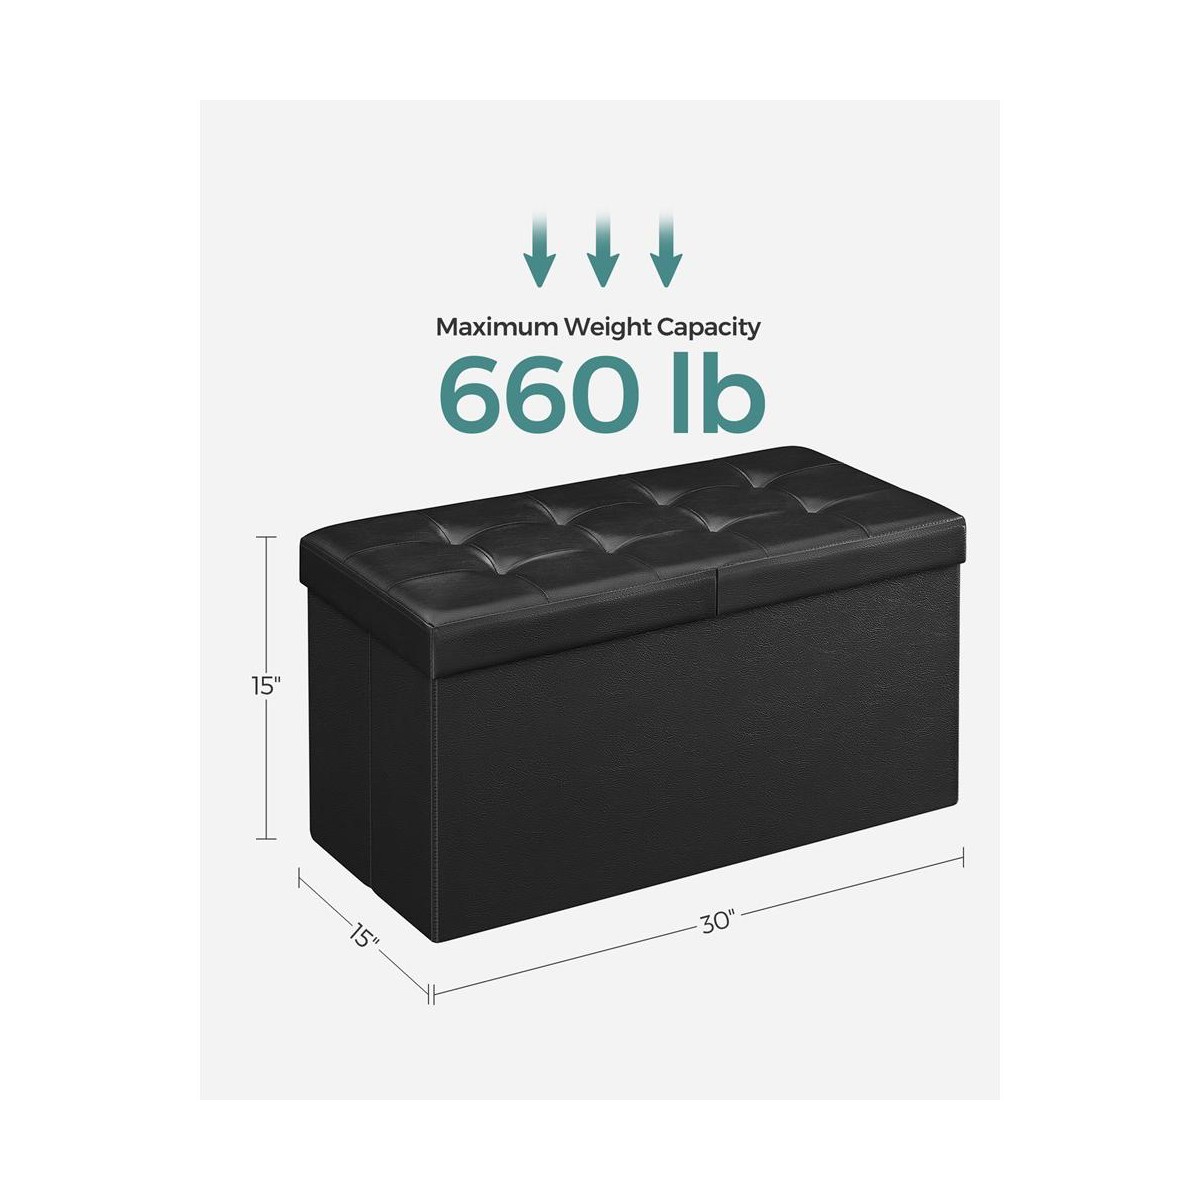
    SONGMICS storage ottoman product detail image
    Compare the exact model with your floor measurements and available clearance. Product image: SONGMICS listing on Target. Models and finishes may vary.

    Measure width and depth, then mark the proposed outline with paper or removable markers appropriate for your floor. Include any projecting feet or trim. Walk around the outline, open nearby doors and pull out drawers. Check the room in its normal occupied arrangement rather than with all other furniture pushed away.

    For a footrest, consider its height relative to your seat and your preferred posture. For a bench near a bed, check that you can still access bedding and pass around the end. There is no single clearance number in this guide: the usable space depends on your room, movement and furniture instructions.

    Measure the opening, not only the closed size

    SONGMICS folding storage ottoman bench product detail view
    Look at the product construction and opening arrangement as well as the closed footprint. Product image from the SONGMICS listing on Target. Check the exact model, dimensions and finish before buying.

    A hinged lid needs room to move. A removable top needs somewhere to rest, and an upholstered top may be inconvenient to handle repeatedly. Ask whether the lid stays supported as intended or requires you to hold it; never infer a safety mechanism from a product photograph.

    Consider who will access the contents. Follow the manufacturer’s warnings around hinges, lids and children. Furniture storage should not be treated as a play enclosure. If important opening or safety information is missing, obtain the instructions before purchase.

    Usable capacity is different from outside volume

    External measurements include the frame, padding, base and lid. Look for internal dimensions and the size of the access opening. A long compartment can still have an opening too narrow for the item you want to put inside.

    For a practical comparison, measure one folded blanket stack or the actual box you intend to store. Check whether internal dividers interfere with it. Avoid calculating a large storage figure from the outer dimensions and treating that as available capacity.

    Folding construction and fixed frames

    SONGMICS folding storage ottoman product view
    Check the product construction and assembly instructions before use. Product image: SONGMICS listing on Target. Models and finishes may vary.

    A folding design may be useful when you want to store the furniture itself, but check the assembly sequence and whether a separate base panel must be fitted before use. A fixed frame removes that particular setup step, yet may be harder to move through a doorway. Neither construction method alone proves durability or seating comfort.

    Compare cleaning instructions, removable covers, replacement parts and the surface your room requires. Light upholstery, pet hair and everyday footwear create different maintenance demands. Select a finish you can maintain using the approved method rather than assuming every fabric can be machine-washed.

    Before buying: resolve these five questions

    Does the closed footprint fit? Can the lid open fully? Do the actual contents pass through the opening? Is the furniture approved for your intended use? Can the delivered package reach the room, and can it be returned under the seller’s terms if unsuitable?

    For a specific folding example, read our SONGMICS storage ottoman review. It assesses one identified model; compare its current instructions and dimensions with your own measurements. If the project also includes a sitting area, our MAXYOYO accent chair assessment covers another piece to measure independently.

    Common questions: storage ottoman vs storage bench

    Can every storage ottoman be used as a seat?

    No. Verify the intended use and load instructions for the exact product rather than relying on its padded appearance.

    Which format saves more space?

    The one that fits your layout and access needs. Compare the full footprint, lid movement and usable capacity; the name does not establish a winner.

    Explore the Furniture buying guides for more room-planning advice.

  • Rechargeable vs Plug in Under Cabinet Lights: Which to Choose

    Home improvement • Cabinet lighting

    Rechargeable vs Plug-In Under-Cabinet Lights

    The useful question is not which power source is best in every kitchen. It is whether you want occasional light without a visible power lead or regular lighting with a practical route to an outlet. Rechargeable and plug-in under-cabinet lights solve different installation and maintenance problems.

    Research-based buying guidance; no hands-on brightness or battery testing is claimed. As an Amazon Associate I earn from qualifying purchases. Linked product reviews contain affiliate links.

    Quick choice: match the light to your routine

    Consider rechargeable lights when the location has no convenient outlet, use is occasional and you can easily remove the unit for charging. Check that the mounting system is intended to support repeated removal.

    Quick recap: rechargeable vs plug in under cabinet lights

    When it comes to rechargeable vs plug in under cabinet lights, the best choice depends on your space, your budget and how you use it every day. Write down your key measurements, compare the features that matter to you, and choose the option that fits comfortably.

    Use this rechargeable vs plug in under cabinet lights guide as a checklist, and come back to it whenever your needs change. A short, honest comparison of rechargeable vs plug in under cabinet lights now saves you from a costly return later.

    Before you decide, review your rechargeable vs plug in under cabinet lights notes once more. Keep a simple rechargeable vs plug in under cabinet lights checklist next to your tape measure.

    A careful rechargeable vs plug in under cabinet lights routine takes minutes and prevents mistakes. Share this rechargeable vs plug in under cabinet lights guide with anyone helping you choose.

    Revisit the rechargeable vs plug in under cabinet lights steps above if your room or budget changes. Small habits make rechargeable vs plug in under cabinet lights decisions faster and easier.

    For general background, see U.S. Department of Energy.

    Consider plug-in lights when you use the area regularly and can route the correct power lead safely to a suitable outlet. A plug-in design avoids a recharge routine while connected, but introduces cable length, adapter placement and outlet-access questions.

    Neither choice establishes brightness, light quality or suitability for your surface. Those depend on the exact model. Home Depot’s under-cabinet lighting guide provides an overview of lighting formats; compare individual specifications before buying.

    Check charging access before choosing a rechargeable unit

    Imagine removing the light when its charge runs low. Can you reach it without moving kitchen equipment? Is the charging port accessible? Will a charging cable and adapter be supplied, or does the listing require you to provide compatible equipment?

    Read battery-runtime claims alongside the selected brightness, operating mode and test conditions. A figure for short motion-triggered activations does not establish continuous runtime. When the listing does not explain its conditions, treat the advertised duration as an unresolved comparison point rather than a promise for your routine.

    With multiple units, consider where all of them will charge and how you will identify a depleted light. Convenience depends on maintenance you will actually perform. Avoid choosing a permanently awkward location just because installation initially looks cable-free.

    Plan the whole cable route for a plug-in light

    Measure from the light’s intended position to the outlet along the proposed cable route, including corners. Account for the adapter’s shape and access to switches. Check whether linking leads and power supplies are included and whether the system permits the number of units you want.

    Keep the plan within the manufacturer’s installation instructions. Do not assume any cabinet light is suitable near water, heat or cooking equipment. Check its location rating and restrictions. If the project requires fixed wiring or changes to an electrical circuit, it is a different installation task from simply selecting a plug-in product.

    Compare illumination, not just the power source

    Look for the stated light output, dimensions, colour temperature and dimming options. A long bar and a small puck distribute light differently, even when both are described as bright. Think about where your hands, cabinet lip and countertop objects will cast shadows.

    Check whether the diffuser or LEDs are visible from your normal seated position. For task lighting, consider the entire work area rather than a decorative glow in a seller photograph. Photos cannot establish how the selected light will look in your room, especially when the listing does not identify camera or exposure conditions.

    Motion sensors and mounting need their own checks

    Confirm which modes are available: constant-on, motion activation, darkness-only activation or a manual switch. A sensor hidden behind a cabinet edge may not see the movement you expect. Conversely, a busy route may trigger more activations than your intended task requires.

    For mounting, identify the actual fixing method and approved surface. A magnetic attachment may depend on an included metal plate; adhesive plates still have preparation and surface requirements. Check how the light releases, whether replacement fixings are available, and whether the landlord permits the installation.

    A five-point buying check

    Before ordering, record your power route or charging plan, the intended lit area, preferred controls, mounting surface and installation restrictions. Compare the exact selected pack, accessories and return policy. Do not transfer specifications between visually similar versions.

    Our MCGOR rechargeable under-cabinet lights review examines one identified rechargeable package and its limitations. Use it as a model-specific follow-up, rather than evidence that rechargeable lighting wins every comparison.

    Common questions: rechargeable vs plug in under cabinet lights

    Does rechargeable mean motion-sensing?

    No. Power source and control mode are separate specifications. Confirm both on the selected product.

    Are plug-in lights automatically brighter?

    No. Compare the listed output and light distribution of the actual models. The connection type alone does not answer that question.

    Planning the cabinet itself? Start with our under-sink storage measuring guide and browse the Home Improvement section.

  • Under Sink Storage: How to Measure Before You Buy

    Home improvement • Cabinet storage

    Under-Sink Storage: How to Measure Before You Buy

    Choosing the organiser format? Compare under-sink drawers vs baskets after recording your cabinet measurements.

    A storage organiser can fit inside a cabinet and still be awkward to use. Pipes may interrupt the top shelf, a door hinge may block a drawer, or a tall bottle may prevent a tray from sliding. When choosing under-sink storage, measure the usable space and its access route before comparing product photos.

    This is a planning guide, not a hands-on product test. As an Amazon Associate I earn from qualifying purchases. Product reviews linked below contain affiliate links.

    Start with the items you actually need to store

    Empty the cabinet and group the items you intend to put back. Keep products in their original labelled containers and follow their storage instructions. Measure your tallest bottle and widest container; an organiser’s outside height does not tell you whether either will fit inside its compartments.

    Quick recap: under sink storage

    When it comes to under sink storage, the best choice depends on your space, your budget and how you use it every day. Write down your key measurements, compare the features that matter to you, and choose the option that fits comfortably.

    Use this under sink storage guide as a checklist, and come back to it whenever your needs change. A short, honest comparison of under sink storage now saves you from a costly return later.

    Before you decide, review your under sink storage notes once more. Keep a simple under sink storage checklist next to your tape measure.

    A careful under sink storage routine takes minutes and prevents mistakes. Share this under sink storage guide with anyone helping you choose.

    Revisit the under sink storage steps above if your room or budget changes. Small habits make under sink storage decisions faster and easier.

    For general background, see U.S. Department of Energy.

    Separate everyday items from occasional supplies. Frequently used bottles need easy access, while spare sponges may suit a smaller drawer. Decide whether you need a pull-out basket, a removable caddy or enclosed drawers before shopping. Buying several identical boxes first can leave the pipework surrounded by storage you cannot open.

    Record four different measurements

    1. The door opening

    Measure the clear opening with the door in its normal open position. Include hinges and any centre divider. A unit narrower than the inside of the cabinet may still be too wide to pass through the entrance. Check whether the organiser arrives assembled and whether the instructions permit assembly inside the cabinet.

    2. The usable floor area

    Measure width and depth at the position where the organiser will stand. Note raised edges, uneven bases and hardware. Use a sheet of paper or cardboard to mark the proposed footprint. This simple mock-up helps reveal whether two organisers will compete for the same space.

    3. The pipe-free height

    Measure beneath the lowest obstruction at several points. A drain trap creates a different shape from a straight vertical pipe. Sketch its location instead of recording only one maximum cabinet height. Preserve access to valves and fittings rather than designing storage around covering them.

    4. The open-drawer space

    Check how far a drawer or basket must travel to become useful. Measure outside the cabinet as well as inside it. A bin, nearby appliance or half-open door may interrupt that movement. For a fixed shelf, consider whether you can remove the back item without unloading everything in front.

    Compare dimensions in a useful order

    Start with the manufacturer’s assembled external dimensions, then check internal compartment sizes, opening clearances and installation requirements. Confirm whether a quoted height includes handles or an upper basket. Do not assume two stackable units have exactly twice the height of one; connectors and overlapping edges can change the assembled measurement.

    For example, a cabinet opening measuring 40 cm across does not establish that a 39 cm unit will work. Hinges, an angled insertion path or a projecting handle may consume the remaining clearance. This is an illustrative fit problem, not a universal minimum-clearance rule.

    Drawers, baskets or a portable caddy?

    Drawers separate small items and make contents easier to group, but need enough space to open. Open baskets can accommodate varied shapes, although small items may need another container. A portable caddy suits supplies you carry elsewhere, provided the full load is manageable for you. Choose around the access problem you have, rather than the storage capacity shown in a staged photo.

    IKEA’s UTRUSTA under-sink organiser illustrates another format: side-mounted storage. Its installation and dimensions are specific to that product; check compatibility rather than treating the example as a recommendation for every cabinet.

    Before you place an order

    Save your opening width, usable depth, pipe sketch, tallest-item height and required drawer travel. Compare those with the exact selected variant, mounting method, supplied hardware and return terms. Resolve unclear dimensions with the seller before ordering.

    For one drawer-based option, read our Vtopmart storage drawers review. It explains the identified package and buying limitations; this guide does not establish that those drawers fit beneath your sink. For awkward corners that need cleaning before organising, see the OXO brush set assessment.

    Common questions: under sink storage

    Should I measure with the cabinet door open?

    Yes. Check the opening and movement with the door in the position you will actually use. Include hinge projections and a centre divider.

    Can I stack drawers around the drain?

    Only when the product allows that configuration and the assembled stack fits without obstructing access. Check the actual stacked dimensions and stability instructions.

    Explore more Home Improvement buying guides, or compare rechargeable and plug-in cabinet lighting for another small-space project.

  • Mesh vs Padded Office Chairs for Small Spaces: What to Compare

    Furniture • Chair materials

    Mesh vs Padded Office Chairs for Small Spaces

    Independent buying guide. Mesh vs Padded Office Chairs for Small Spaces is easier to evaluate when you start with your room measurements and the product’s published specifications. This guide explains what to check before you buy; it does not claim hands-on testing.

    Affiliate disclosure: As an Amazon Associate I earn from qualifying purchases. This article may link to product reviews containing affiliate links.

    Material alone does not decide comfort

    Mesh and padded office chairs can both work in a compact home office. Comfort depends on fit, support design, seat shape and individual preference—not a single material label. Without hands-on testing, product descriptions cannot establish how a particular chair will feel after hours of use.

    Quick recap: mesh vs padded office chairs

    When it comes to mesh vs padded office chairs, the best choice depends on your space, your budget and how you use it every day. Write down your key measurements, compare the features that matter to you, and choose the option that fits comfortably.

    Use this mesh vs padded office chairs guide as a checklist, and come back to it whenever your needs change. A short, honest comparison of mesh vs padded office chairs now saves you from a costly return later.

    Before you decide, review your mesh vs padded office chairs notes once more. Keep a simple mesh vs padded office chairs checklist next to your tape measure.

    A careful mesh vs padded office chairs routine takes minutes and prevents mistakes.

    For general background, see OSHA ergonomics guidance.

    Compare the seat, not just the back

    A chair may have a mesh back with a foam seat, a mesh seat and back, or upholstered padding throughout. Read the exact construction details. Pay attention to the front seat edge, available seat depth and how the material is supported.

    Think about temperature and maintenance

    Open mesh may allow more airflow than some upholstered surfaces, but results depend on the design and room conditions. Fabric and padded surfaces may require different cleaning methods. Follow the manufacturer’s care instructions instead of assuming one type is maintenance-free.

    Small-space measurements matter more

    For a small office, measure base width, armrest width, chair depth and the distance needed to roll back. Mesh is not automatically slimmer, and padded chairs are not automatically bulkier. Compare complete product dimensions for the exact variant.

    Check adjustment features

    Compare seat height, back tilt, lumbar adjustment and armrest movement only when the manufacturer specifies them. A feature described as ergonomic is not proof of comfort or health benefit. Check how adjustments interact with your desk height and sitting habits.

    Choose for your actual routine

    If you sit for short periods, ease of storage and movement may matter most. For longer sessions, prioritize fit, posture changes and the option to try or return the chair. Consider your room temperature, cleaning preferences and the type of clothing you usually wear.

    What to verify before buying

    Confirm the material combination, overall dimensions, seat-height range, armrest clearance, cleaning instructions, warranty details and return policy. Treat customer anecdotes as individual experiences rather than universal results.

    More buying advice: 9 small-space chair fit checks and TRALT chair dimensions review.

    Decision matrix: which chair material suits your setup?

    PriorityMesh considerationsPadded considerations
    AirflowOpen-backed designs may improve ventilationFabric and foam construction varies by model
    Seat feelCheck whether the seat itself is mesh or foamCheck foam firmness, shape and upholstery
    CleaningInspect the mesh care instructions and frame edgesInspect upholstery cleaning instructions and seams
    SpaceMeasure arms, base and back tilt clearanceMeasure arms, base and back tilt clearance
    Long sessionsPrioritize fit and adjustable features over materialPrioritize fit and adjustable features over material

    Questions to ask before ordering

    • Is the seat mesh, upholstered foam or another construction?
    • What are the minimum and maximum seat heights, and will the armrests clear your desk?
    • Is the listed overall width measured at the armrests or the wheelbase?
    • What cleaning methods does the manufacturer permit?
    • Can you return the assembled chair if the fit is uncomfortable, and who pays return shipping?

    Avoid these misleading shortcuts

    “Breathable” does not mean cool in every room; “thick padding” does not guarantee support; and “ergonomic” is not a substitute for published adjustment ranges. If you cannot test a chair, compare detailed specifications and confirm the current return policy for the exact listing.

    Bottom line on mesh vs padded office chairs

    Measure first, compare verified specifications second, and use return terms to manage uncertainty. No chair style or marketing label can guarantee a good fit for every room or person.

    Related Homingwell guides: Office Chairs for Small Spaces: 9 Fit Checks · TRALT Office Chair Review · Furinno Computer Desk Review.

  • Measure Small Home Office Desk Chair Fit: A Simple Guide

    Furniture • Measuring guide

    How to Measure a Small Home Office for a Desk Chair

    Independent buying guide. How to Measure a Small Home Office for a Desk Chair is easier to evaluate when you start with your room measurements and the product’s published specifications. This guide explains what to check before you buy; it does not claim hands-on testing.

    Affiliate disclosure: As an Amazon Associate I earn from qualifying purchases. This article may link to product reviews containing affiliate links.

    Start with a simple room sketch

    Draw the desk, doorway, drawers, shelves and any furniture the chair must pass. Note fixed obstructions such as radiators and baseboards. You do not need architectural precision; the goal is to identify where the chair can move.

    Quick recap: measure small home office desk chair

    If you remember one thing about how to measure small home office desk chair, remember to measure before you buy. Write down your key measurements, compare the features that matter to you, and choose the option that fits comfortably.

    Use this guide on how to measure small home office desk chair as a checklist, and come back to it whenever your needs change. A short, honest comparison of measure small home office desk chair now saves you from a costly return later.

    Before you decide, review your measure small home office desk chair notes once more. Keep a simple measure small home office desk chair checklist next to your tape measure.

    A careful measure small home office desk chair routine takes minutes and prevents mistakes. Share this measure small home office desk chair guide with anyone helping you choose.

    Revisit the measure small home office desk chair steps above if your room or budget changes. Small habits make measure small home office desk chair decisions faster and easier.

    For general background, see OSHA ergonomics guidance.

    Measure under the desk

    Record the distance from floor to the underside of the desk or keyboard tray. Measure the width between desk legs and the depth available for knees. Compare those numbers with the chair’s seat-height and armrest ranges; a chair can be narrow enough but still too tall to tuck in.

    Check the chair’s widest dimension

    A chair’s advertised seat width is not the same as its overall width. Armrests and the rolling base can extend beyond the seat. Look for a full dimension diagram for the exact variant. If measurements conflict, ask the seller before ordering.

    Allow space to sit down and stand up

    Position a temporary box or tape outline where the chair will go, then rehearse how you would approach the desk and stand. Make sure drawers can open and doors can swing without hitting the chair. The amount of clearance you need depends on the room and the user, so test it rather than relying on a universal number.

    Consider flooring and casters

    Check the manufacturer’s guidance for the casters and your floor surface. Rugs and mats can change rolling behavior and add height. Measure with any planned mat in place, and avoid assuming all wheels are suitable for hardwood or carpet.

    Check the delivery and return path

    Measure narrow doors and turns along the delivery route. Review assembly requirements, packaging size if supplied, and return conditions. Bulky returns can be inconvenient even when a return is allowed.

    Copy this desk-chair measurement record

    Keep this short record beside the seller’s dimension diagram. Use the same unit throughout. The blanks are for your measurements, not recommended dimensions.

    • Desk underside height: ___; narrowest opening width: ___; usable knee depth: ___.
    • Available floor footprint: width ___ × depth ___; space available to roll back: ___.
    • Selected chair: exact model/variant ___; maximum base or arm width ___; overall depth ___.
    • Adjustments: seat-height range ___; armrest height/range ___; which dimensions change when adjusted ___.
    • Access and returns: narrowest delivery opening ___; package size ___; return deadline, collection method and cost ___.

    Illustrative example: if a chair base fits the floor outline but its arms cannot clear your desk, it may remain in the walking route when not in use. Recheck the layout with the chair outside the desk rather than assuming it will tuck away. If the seller gives conflicting measurements, leave the relevant blank unresolved and ask for clarification before ordering.

    A final five-minute fit test

    Recheck desk underside height, the chair’s maximum overall width, the pull-back area, door and drawer clearance, and the intended floor surface. Save your measurements and compare them with the latest seller specification sheet.

    More buying advice: 9 small-space chair fit checks and TRALT chair dimensions review.

    Printable measurement worksheet

    Write down measurements in inches, then check the seller’s diagram for the exact chair version. Leave a blank rather than guessing when a dimension is missing.

    MeasurementYour spaceChair specification
    Clear width between desk legs_____ in_____ in overall chair width
    Height below desk or keyboard tray_____ in_____ in armrest height range
    Space available behind desk_____ in_____ in chair depth
    Clear width at doorway or passage_____ in_____ in widest assembled dimension
    Seated desk height and seat height_____ in_____ in seat-height range

    Common measurement mistakes

    • Using seat width as total width: arms and the wheelbase may extend farther than the cushion.
    • Ignoring desk hardware: drawers, crossbars and keyboard trays can block an otherwise suitable chair.
    • Forgetting the occupied position: measure how far the chair needs to move when you sit down and stand up.
    • Assuming dimensions are consistent: colors, sizes and model revisions may have different published specifications.

    Example: If the gap between desk legs is 25 inches and a chair is listed as 26 inches wide overall, it cannot fit fully between those legs as specified. If the chair listing gives only seat width, you do not yet have enough information to decide.

    Bottom line on measure small home office desk chair

    Measure first, compare verified specifications second, and use return terms to manage uncertainty. No chair style or marketing label can guarantee a good fit for every room or person.

    Related Homingwell guides: Office Chairs for Small Spaces: 9 Fit Checks · TRALT Office Chair Review · Furinno Computer Desk Review.