Category: Lawn & Garden

Helpful lawn and garden product reviews, ideas, and maintenance tips.

  • When to Start Seeds in Illinois: Indoor Seed Starting Calendar

    When to Start Seeds in Illinois: Indoor Seed Starting Calendar

    Skip to content

    Lawn & Garden • Illinois Planting Dates • Updated October 29, 2026

    When to Start Seeds in Illinois: Indoor Seed Starting Calendar

    Explore related guides: When to start seeds in Minnesota · When to start seeds in Iowa · Grow lights for seedlings · Seedling heat mats · When to start seeds in Wisconsin · When to plant tomatoes in Illinois.

    Illinois stretches nearly 400 miles from the Wisconsin line to Cairo, so a seed starting date that is perfect in Springfield is two weeks off in Rockford or Carbondale. This guide explains when to start seeds in Illinois using the University of Illinois Extension calendar, with frost dates for northern, central and southern Illinois and the supplies that make indoor seed starting easier.
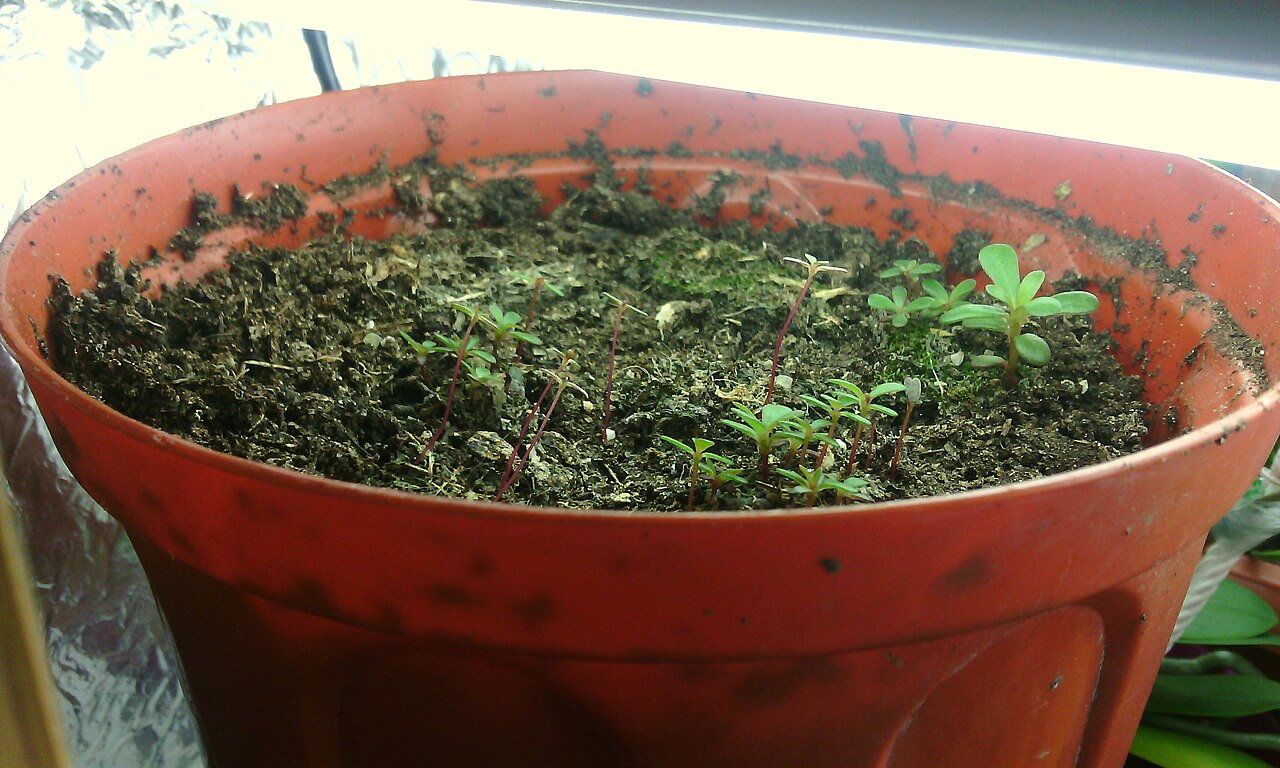
    Seedlings growing under lights to start seeds indoors in Illinois
    Seedlings growing under artificial lights. Photo: Huskita, CC BY-SA 4.0, via Wikimedia Commons.

    When to start seeds in Illinois: the short answer

    In central Illinois, Illinois Extension suggests starting onions, leeks and celery in February, broccoli, cabbage and eggplant in early to mid-March, tomatoes, peppers and basil in mid to late March, and cucumbers, squash and melons in mid to late April. In northern Illinois, start about two weeks later; in southern Illinois, about two weeks earlier.

    Illinois frost dates by region

    Median last spring 32°F freeze, Illinois Extension and State Climatologist
    Region Example cities Median last freeze Plant tender crops out
    Northern Illinois Rockford, Chicago, DeKalb April 8 to 29 Mid to late May
    Central Illinois Peoria, Springfield, Champaign April 8 to 15 Around Mother’s Day, mid-May
    Southern Illinois Carbondale, Mount Vernon April 1 to 8 Late April to early May

    The Illinois State Climatologist recommends adding about two weeks to the average last frost date before planting tender plants. Illinois Extension notes a common central Illinois rule: it is safe to plant after Mother’s Day. Cold air settles in low spots, while yards near buildings stay warmer, so your yard can differ from the regional date.

    Illinois indoor seed starting calendar

    When to sow indoors in central Illinois (Illinois Extension). Northern IL: about 2 weeks later. Southern IL: about 2 weeks earlier.
    When to sow Vegetables and herbs Flowers
    February Celery, leek, onion, parsley, rosemary, thyme Dianthus, foxglove, pansy and viola, verbena, lavender
    Early to mid-March Broccoli, cabbage, cauliflower, eggplant, kale, lettuce, oregano Impatiens, petunia, salvia, snapdragon, hollyhock
    Mid to late March Tomato, pepper, basil, Swiss chard Marigold, cosmos, celosia, Chinese aster
    Early to mid-April Okra Amaranth, hyacinth bean, Mexican sunflower
    Mid to late April Cucumber, melons, pumpkin, squash Zinnia

    Another Illinois Extension example: to plant tomatoes in central Illinois around May 15, start the seeds indoors between about March 20 and April 3, giving them 6 to 8 weeks inside. Peas, spinach, radishes, carrots, beets and beans are best sown directly in the garden.

    Northern vs central vs southern Illinois

    • Northern Illinois (Chicago area, Rockford): start every crop about two weeks later than the table. Near Lake Michigan, cool spring air can slow soil warming.
    • Central Illinois (Peoria, Springfield, Champaign-Urbana): use the table as written.
    • Southern Illinois (Carbondale and south): start about two weeks earlier, and enjoy about two extra weeks of harvest in fall.

    Set up a simple seed starting station

    1. Use clean cells and a sterile seed starting mix.
    2. Cover trays with a clear lid or plastic to hold humidity, and remove it once seeds sprout, as Illinois Extension suggests.
    3. Add bottom heat for peppers, eggplant and tomatoes, which sprout faster in warm mix. See our heat mat guide.
    4. Give strong light right away, with LEDs a few inches above seedlings for about 14 to 16 hours a day on a timer. More in our grow lights guide.
    5. Harden off for 7 to 10 days before planting out, starting in shade and gradually adding sun.

    Supplies for starting seeds indoors

    All five were listed as sold by Amazon.com when checked on October 29, 2026. Check the current listing before you buy.

    For seeds: Burpee SuperSeed 36-Cell Seed Starting Tray

    Product pick

    Burpee SuperSeed 36-Cell Reusable Seed Starting Tray
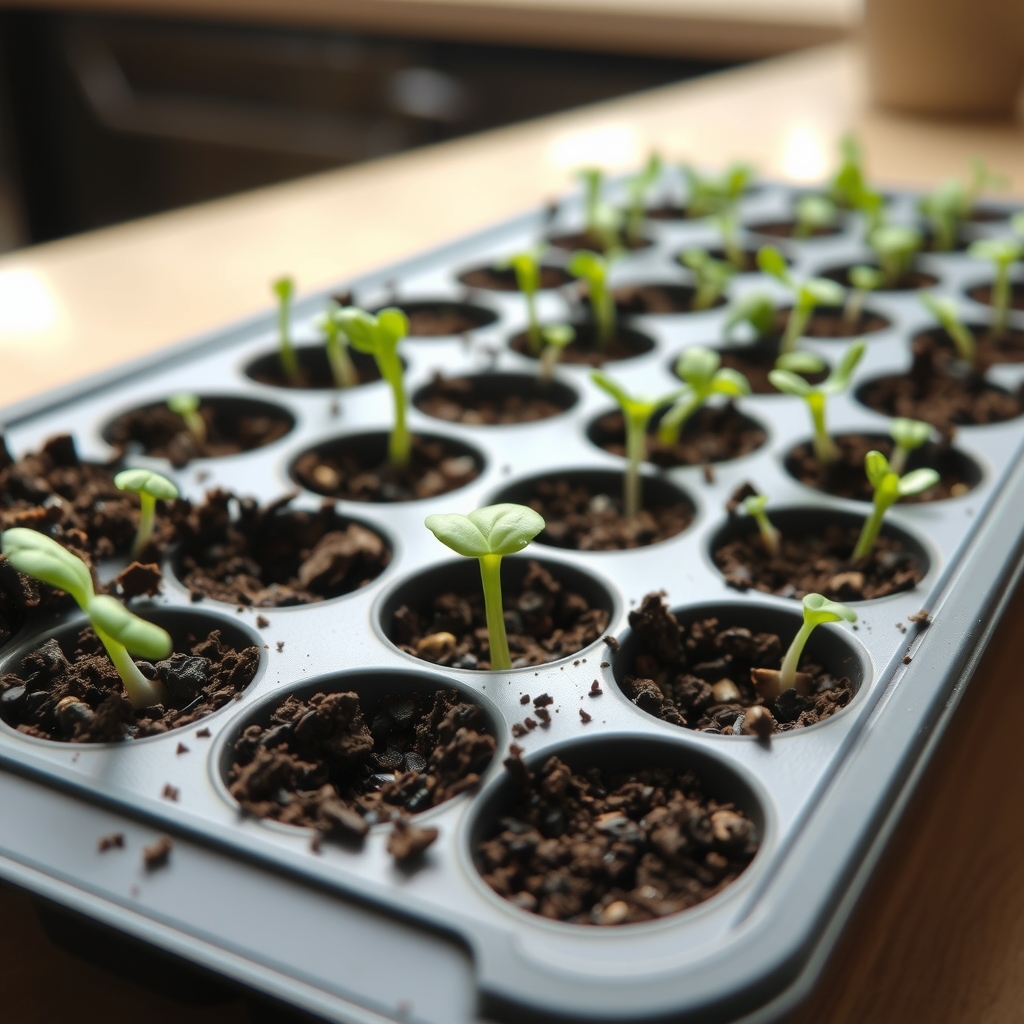
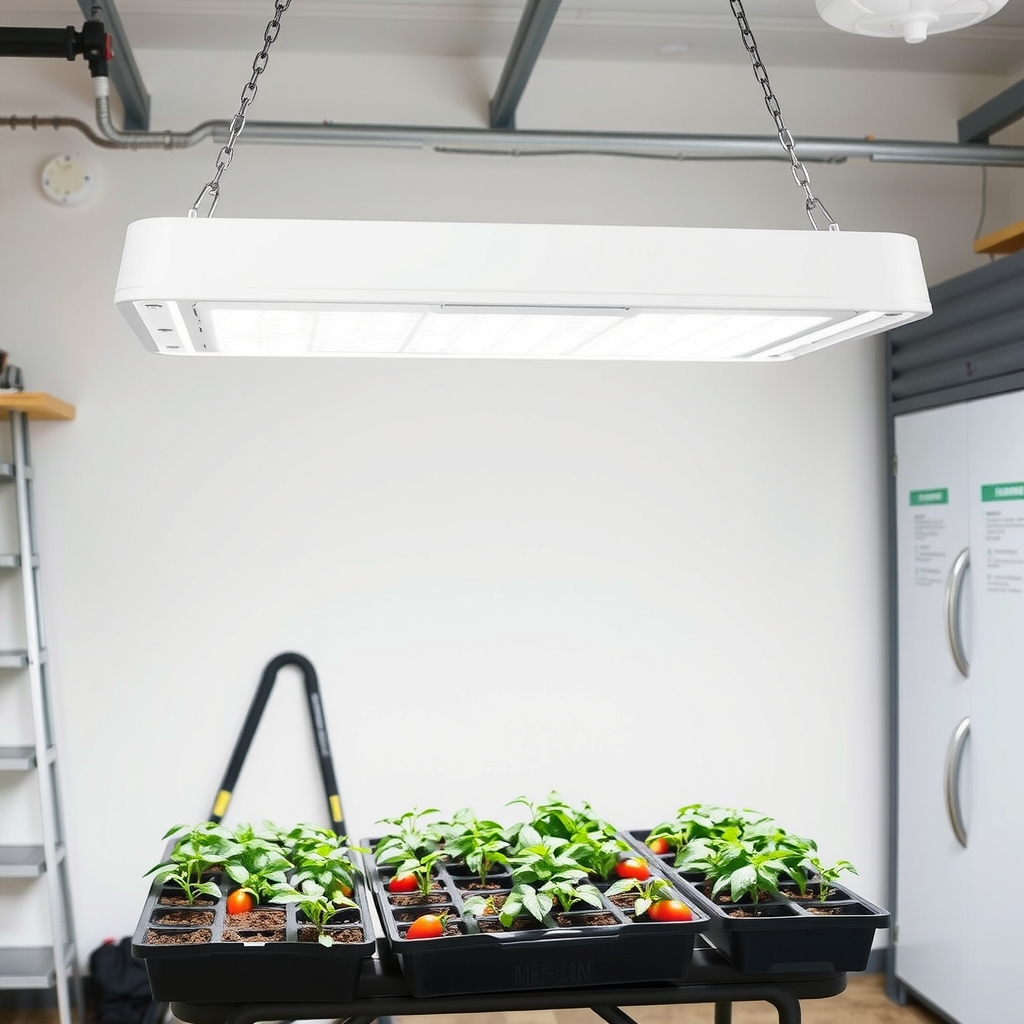
    Seed starting tray with sprouts, illustrative AI image

    Illustrative image (AI-generated), not the exact product.

    See current photos and price on Amazon →

    A reusable 36-cell tray with roomy cells for tomatoes, peppers and brassicas. It washes clean between seasons, so it pays for itself over a few springs.

    For light: iPower LED Grow Light Stand

    Product pick

    iPower LED Grow Light Stand, Full Spectrum
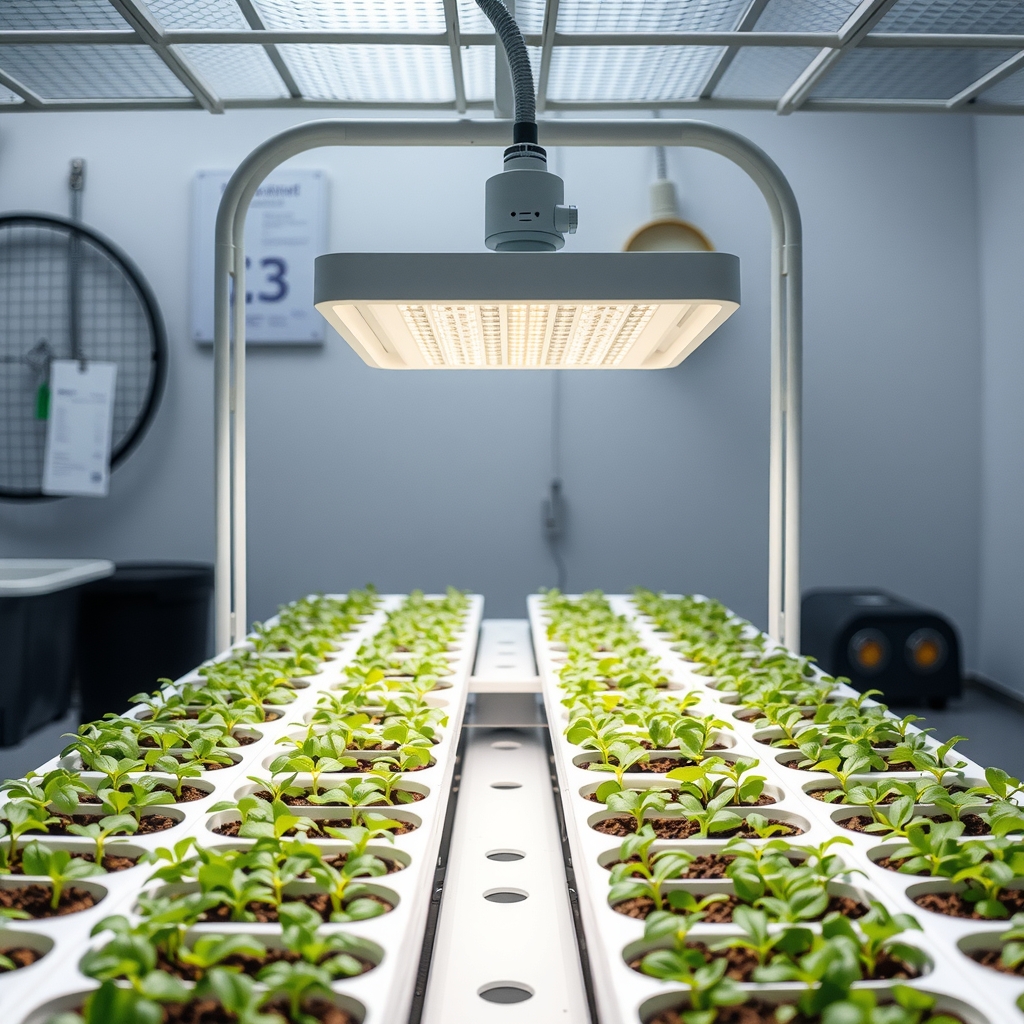
    Grow light stand over seedlings, illustrative AI image

    Illustrative image (AI-generated), not the exact product.

    See current photos and price on Amazon →

    An adjustable stand with full-spectrum LEDs that you can keep just above the seedlings and raise as they grow. Strong light is what keeps March-sown tomatoes and peppers stocky.

    For warmth: iPower 10 x 20 in Seedling Heat Mat

    Product pick

    iPower 10 x 20 in Waterproof Seedling Heat Mat
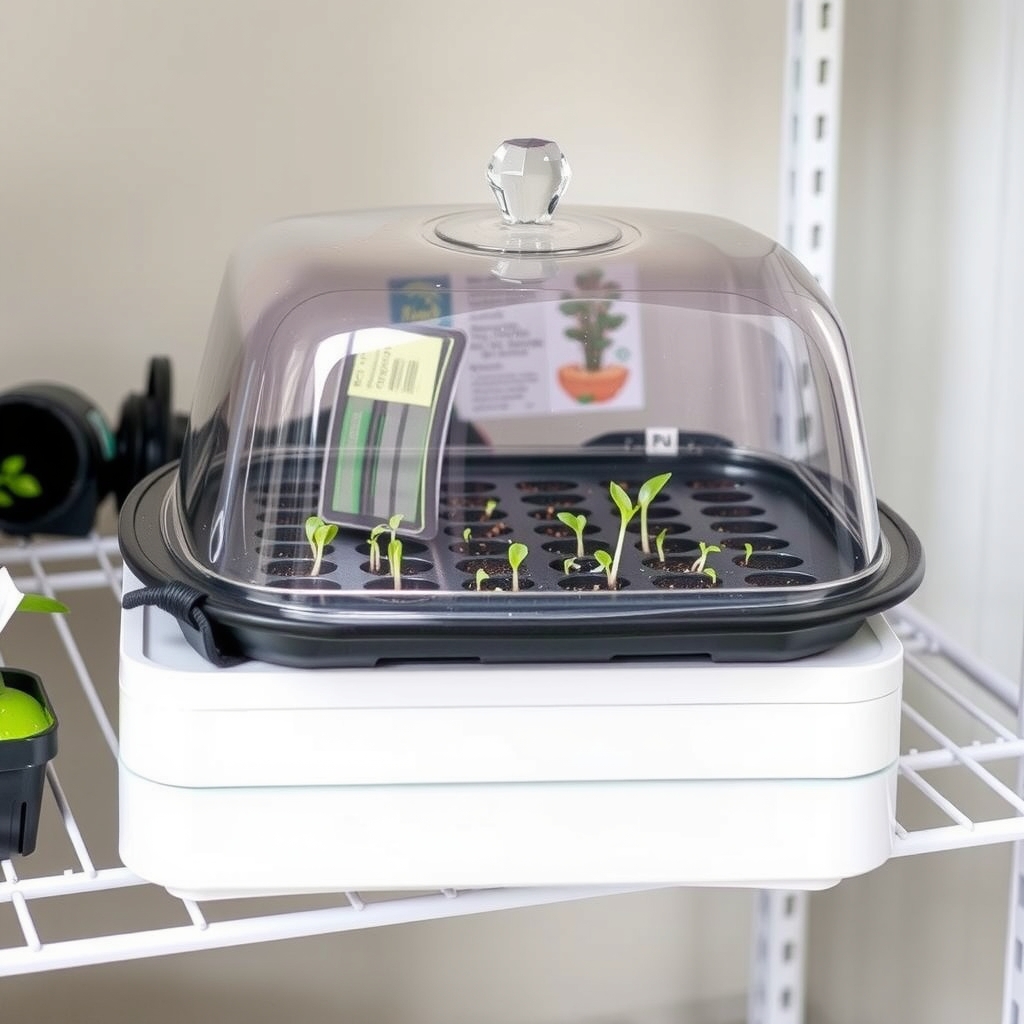
    Seedling heat mat under a tray, illustrative AI image

    Illustrative image (AI-generated), not the exact product.

    See current photos and price on Amazon →

    Fits under a standard 10 by 20 inch flat and warms the root zone so warm-season seeds sprout faster and more evenly. Move trays off the mat once most seeds are up.

    For control: JumpStart Digital Thermostat for Heat Mats

    Product pick

    JumpStart Digital Thermostat Controller for Heat Mats
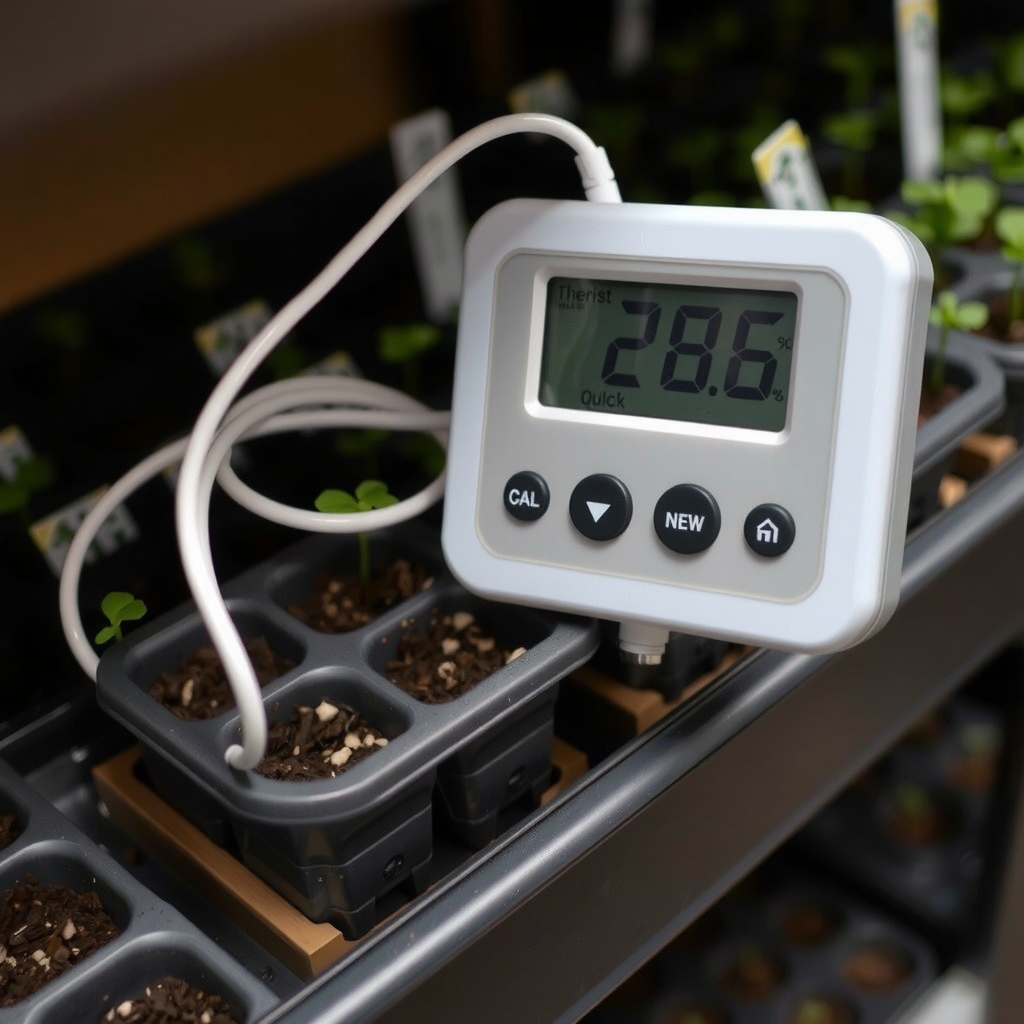
    Thermostat probe in a seed tray, illustrative AI image

    Illustrative image (AI-generated), not the exact product.

    See current photos and price on Amazon →

    A probe thermostat that cycles the mat to hold the temperature you set, so trays never overheat in a warm room. Set it to the temperature on the seed packet.

    For timing: GE 24-Hour Plug-in Mechanical Timer

    Product pick

    GE 24-Hour Plug-in Mechanical Timer
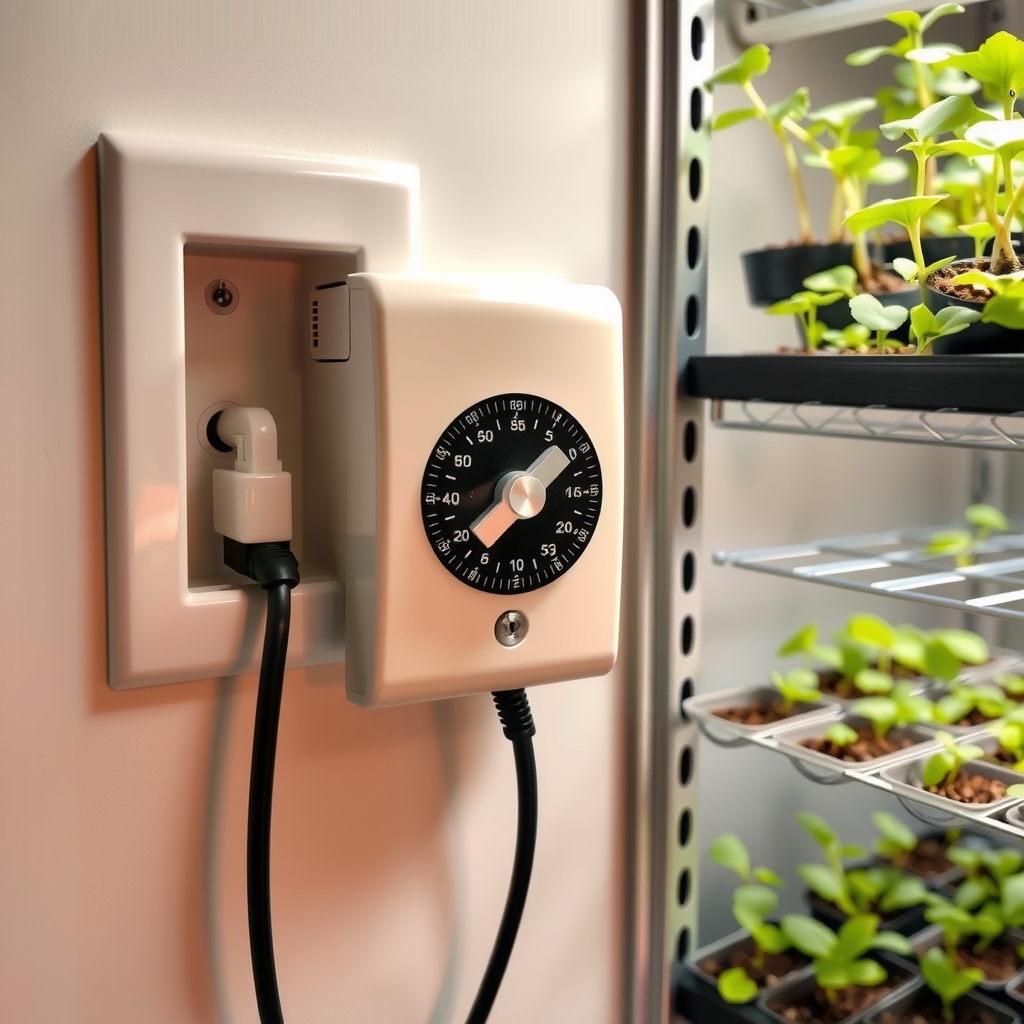
    Outlet timer for grow lights, illustrative AI image

    Illustrative image (AI-generated), not the exact product.

    See current photos and price on Amazon →

    A simple timer that switches grow lights on and off at the same time every day, so seedlings get steady light without you remembering.

    Conclusion

    To start seeds in Illinois, use the Illinois Extension calendar for central Illinois and shift it two weeks later in the north or two weeks earlier in the south. Onions and celery go in first in February, tomatoes and peppers in mid to late March, and cucurbits in late April. Give seedlings strong light, harden them off, and plant tender crops about two weeks after your average last frost.

    FAQs

    When should I start tomato seeds in Illinois?
    Mid to late March in central Illinois, about two weeks later in northern Illinois and two weeks earlier in southern Illinois. Illinois Extension’s example: start between March 20 and April 3 to plant around May 15 in central Illinois.

    When is the last frost in Illinois?
    Illinois Extension lists median last 32°F freeze dates of April 1 to 8 in southern Illinois, April 8 to 15 in central Illinois and April 8 to 29 in northern Illinois.

    When should I start pepper seeds in Illinois?
    Mid to late March in central Illinois, along with tomatoes and basil. Peppers sprout best with bottom heat.

    When can I plant tomatoes outside in Illinois?
    About two weeks after your average last frost: around mid-May (after Mother’s Day) in central Illinois, mid to late May in the north, and late April to early May in the south.

    When should I start seeds in Chicago?
    Northern Illinois gardeners should start about two weeks later than the central Illinois calendar: tomatoes and peppers around early April, cucurbits in early May.

    Do I need grow lights to start seeds?
    They are strongly recommended. Late-winter window light is rarely enough, and seedlings grown without lights tend to stretch and weaken.

    Sources and review scope

    This guide was prepared on October 29, 2026 from the following sources and from the product listings on Amazon.com. Homingwell did not perform hands-on testing.

    Explore more Lawn & Garden guides.
  • When to Start Seeds in Minnesota: Indoor Seed Starting Calendar

    When to Start Seeds in Minnesota: Indoor Seed Starting Calendar

    Skip to content

    Lawn & Garden • Minnesota Planting Dates • Updated October 29, 2026

    When to Start Seeds in Minnesota: Indoor Seed Starting Calendar

    Explore related guides: Seed starting kits · Grow lights for seedlings · Seedling heat mats · When to start seeds in Iowa · When to start seeds in Illinois · When to start seeds in Wisconsin · When to plant tomatoes in Minnesota.

    Minnesota’s growing season is short, so starting seeds indoors gives tomatoes, peppers and flowers the head start they need. But start too early and you get tall, weak seedlings waiting weeks for the ground to warm. Here is when to start seeds in Minnesota, crop by crop, with frost dates for the Twin Cities, central and northern Minnesota, and the supplies that make it easier.

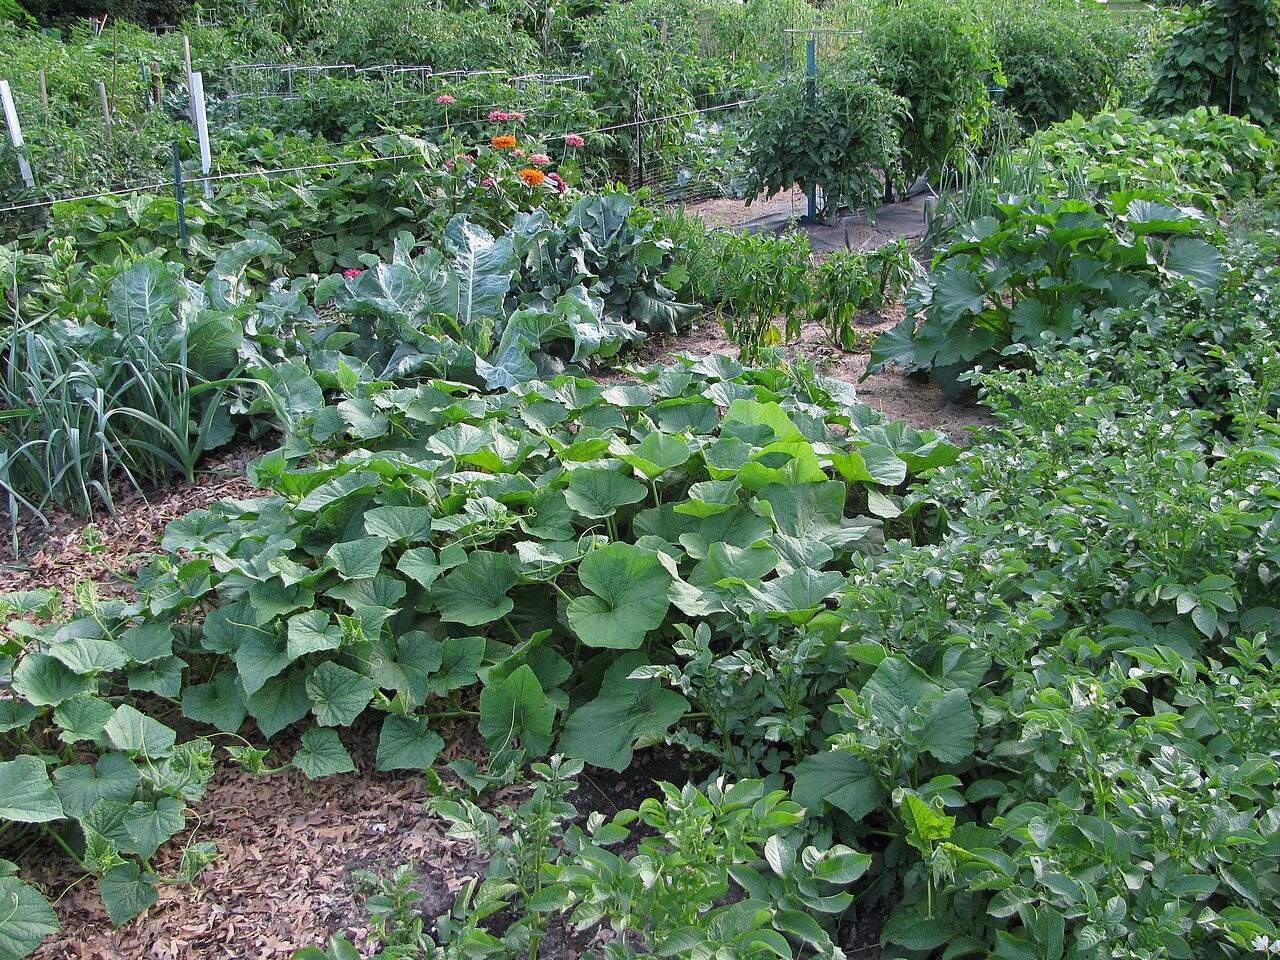
    Summer vegetable garden in Minnesota grown from seeds started indoors
    A summer vegetable garden in Roseville, Minnesota. Photo: Buddy431, CC BY-SA 3.0, via Wikimedia Commons.

    When to start seeds in Minnesota: the short answer

    In the Twin Cities and southern Minnesota, start onions, leeks and celery in late February, peppers, eggplant and cabbage-family crops in March, tomatoes in early April, and cucumbers, squash and melons in late April to early May. Plant tender crops outside in late May. In central Minnesota shift everything about a week later, and in northern Minnesota about two weeks later.

    Minnesota frost dates by region

    Last spring 32°F freeze, Minnesota DNR climate data
    Region Median last spring freeze Plant tender crops out
    Twin Cities metro April 24 to 27 Mid to late May (90% of years are freeze-free after about May 10)
    Southern Minnesota (Rochester, Mankato) Late April to early May Mid to late May
    Central Minnesota (St. Cloud, Brainerd) Mid-May Late May to early June
    Northern Minnesota (Duluth, Bemidji) May 16 to 21 Early to mid-June

    A median date still means a 50 percent chance of a later freeze, so plan your seed starting from a date one to two weeks later than the median. The Minnesota State Horticultural Society notes that for much of the state, planning around a last frost of about May 10 works well, earlier in the south and later in the north.

    Minnesota indoor seed starting calendar

    When to sow indoors in the Twin Cities and southern Minnesota (add 1 week for central MN, 2 weeks for northern MN)
    Crop Weeks indoors Sow indoors Plant outside
    Onions, leeks, celery 10 to 12 Late February Early to mid-May
    Peppers, eggplant 8 to 10 Mid to late March Late May, once nights stay above 50°F
    Broccoli, cabbage, cauliflower 6 to 8 Early to mid-March Late April to early May
    Petunias, snapdragons, coleus 10 to 12 Early March Late May
    Tomatoes 6 to 8 Early April Late May to early June
    Basil, marigolds, zinnias 4 to 6 Mid-April Late May
    Cucumbers, squash, melons 2 to 4 Late April to early May Late May to early June

    Why wait until April for tomatoes? The Minnesota State Horticultural Society, citing University of Minnesota advice, recommends holding off: later-started tomatoes go into the garden in late May or early June as stocky, strong plants instead of leggy ones that sat indoors too long.

    Peas, spinach, lettuce, radishes, carrots, beets and beans grow best sown directly in the garden; no indoor start needed.

    Northern vs southern Minnesota

    • Southern Minnesota and the metro: use the calendar above. The urban heat island means many city yards warm earlier than rural ones nearby.
    • Central Minnesota: start each crop about one week later than the table.
    • Northern Minnesota and the Arrowhead: start about two weeks later, and choose short-season varieties. Frost is still common through May and even into early June up north.
    • Low spots: valleys and low ground collect cold air, so wait an extra week before setting out tender plants.

    Set up a simple seed starting station

    1. Use clean cells or trays and a sterile seed starting mix.
    2. Provide bottom heat for slow sprouters. Peppers, eggplant and tomatoes germinate fastest in warm mix; a heat mat with a thermostat helps in cool Minnesota basements. See our seedling heat mat guide.
    3. Light as soon as seeds sprout. A window is rarely enough in March. Keep LED or fluorescent lights a few inches above seedlings and run them about 14 to 16 hours a day on a timer. More in our grow lights guide.
    4. Water from below and keep the mix moist, not soggy.
    5. Pot up tomatoes and peppers into larger containers once they have a few true leaves.

    Harden off before planting out

    About 7 to 10 days before planting, set seedlings outside in a sheltered, shady spot for an hour or two, then gradually increase sun and time each day. Bring them in on cold nights. Hardened-off plants handle Minnesota’s wind and bright late-May sun far better.

    Supplies for starting seeds indoors

    All five were listed as sold by Amazon.com at the time of writing. Check the current listing before you buy.

    For seeds: Burpee SuperSeed 36-Cell Seed Starting Tray

    Product pick

    Burpee SuperSeed 36-Cell Reusable Seed Starting Tray

    Seed starting tray with sprouts, illustrative AI image

    Illustrative image (AI-generated), not the exact product.

    See current photos and price on Amazon →

    A reusable tray with 36 roomy cells, a good size for tomatoes, peppers and brassicas. Reusable trays save money over several Minnesota springs and are easy to wash between seasons.

    For light: iPower LED Grow Light Stand

    Product pick

    iPower LED Grow Light Stand, Full Spectrum

    Grow light stand over seedlings, illustrative AI image

    Illustrative image (AI-generated), not the exact product.

    See current photos and price on Amazon →

    An adjustable stand with full-spectrum LED lights you can keep just above the seedlings and raise as they grow. Low light is the number one cause of leggy seedlings during gray Minnesota Marches.

    For warmth: iPower 10 x 20 in Seedling Heat Mat

    Product pick

    iPower 10 x 20 in Waterproof Seedling Heat Mat

    Seedling heat mat under a tray, illustrative AI image

    Illustrative image (AI-generated), not the exact product.

    See current photos and price on Amazon →

    Fits under a standard 10 by 20 inch flat and warms the root zone so peppers and tomatoes sprout faster and more evenly in a cool basement. Remove trays from the mat once most seeds are up.

    For control: JumpStart Digital Thermostat for Heat Mats

    Product pick

    JumpStart Digital Thermostat Controller for Heat Mats

    Thermostat probe in a seed tray, illustrative AI image

    Illustrative image (AI-generated), not the exact product.

    See current photos and price on Amazon →

    A probe thermostat that turns the mat on and off to hold the temperature you set, so a warm room never overheats your trays. Set it to the temperature on the seed packet.

    For timing: GE 24-Hour Plug-in Mechanical Timer

    Product pick

    GE 24-Hour Plug-in Mechanical Timer

    Outlet timer for grow lights, illustrative AI image

    Illustrative image (AI-generated), not the exact product.

    See current photos and price on Amazon →

    A simple plug-in timer that switches grow lights on and off at the same time every day, so seedlings get steady hours of light even when you forget.

    Conclusion

    Start seeds in Minnesota by counting back from your region’s safe planting date, not the calendar alone: onions and celery in late February, peppers and brassicas in March, tomatoes in early April, and cucurbits in late April or early May for the metro and south. Add a week for central Minnesota and two for the north, give seedlings strong light, and harden them off before planting out.

    FAQs

    When should I start tomato seeds in Minnesota?
    In early April for the Twin Cities and southern Minnesota, about a week later in central Minnesota and two weeks later up north. That gives 6 to 8 week old plants for late May or early June planting.

    When is the last frost in Minnesota?
    Minnesota DNR data puts the median last spring freeze at April 24 to 27 in the Twin Cities metro and May 16 to 21 in northern Minnesota.

    When should I start pepper seeds in Minnesota?
    Mid to late March in the metro and south. Peppers are slow and need 8 to 10 weeks indoors plus bottom heat to sprout well.

    Is it too early to start seeds in January in Minnesota?
    For most vegetables, yes. Only very slow crops like onions, leeks, celery and some flowers such as geraniums benefit from very early starts.

    Do I need grow lights to start seeds in Minnesota?
    Strongly recommended. Late-winter sun through a window is rarely enough, and seedlings grown without lights usually turn tall and weak.

    When can I plant tomatoes outside in Minnesota?
    Late May to early June in the south and metro, once nights stay above 50°F, and early to mid-June in northern Minnesota.

    Sources and review scope

    This guide was prepared on October 29, 2026 from the following sources and from the product listings on Amazon.com. Homingwell did not perform hands-on testing. Sellers were checked on Amazon.com on the same date.

    Explore more Lawn & Garden guides.
  • How to Overwinter Geraniums Indoors: 3 Easy Methods

    How to Overwinter Geraniums Indoors: 3 Easy Methods

    Skip to content

    Lawn & Garden • Winter Care • Updated October 29, 2026

    How to Overwinter Geraniums Indoors: 3 Easy Methods

    Explore related guides: Gardening in Iowa: all guides · Last frost date in Iowa · Grow lights · Protect shrubs in winter · Store dahlias and cannas over winter.

    A hard frost ends geraniums outdoors, but the plants themselves can live for years. If you overwinter geraniums indoors, you keep your favorite colors, save money every spring, and start May with big, blooming plants. Iowa State University Extension describes three ways to do it. Here is each method step by step, which one suits your house, and four simple tools sold by Amazon.com.

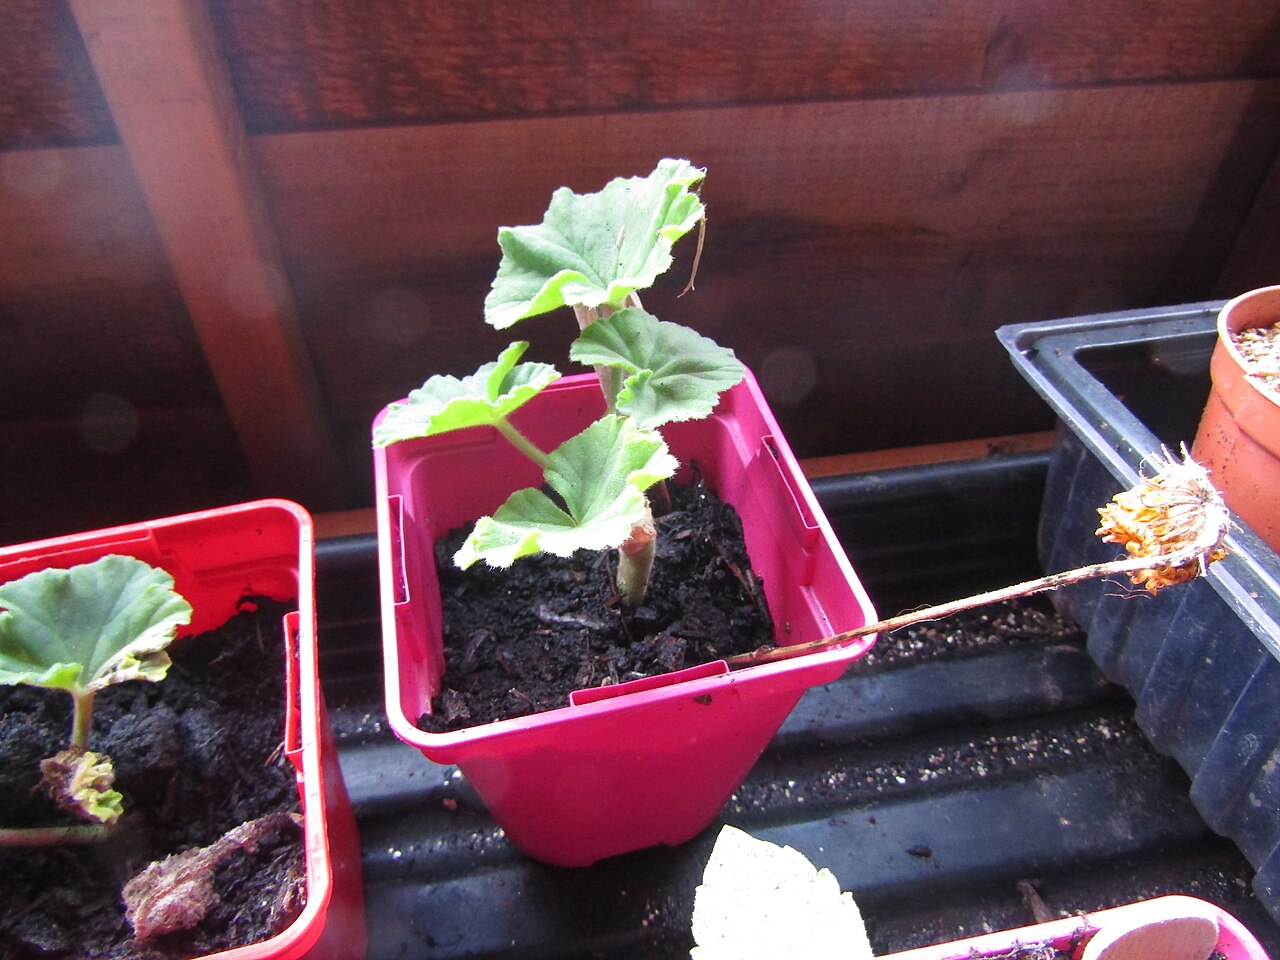
    Geranium cuttings rooting indoors to overwinter geraniums
    Geranium cuttings overwintering in November. Photo: Kolforn, CC BY-SA 4.0, via Wikimedia Commons.

    The short answer

    Bring geraniums in before the first frost, and only save healthy, disease-free plants. Then pick one method: pot them up and grow them in a bright, cool window; take 3 to 4 inch cuttings and root them; or shake off the soil and store the plants bare-root in a paper bag at 45 to 55°F. Potted and bare-root plants get cut back in March, and all three methods give you plants ready to go outside in May.

    3 ways to overwinter geraniums

    Which method fits your home?
    Method Space needed Light needed Best for
    Potted plants Most Sunny window or grow light A few favorite plants; easiest success
    Cuttings Least Bright, indirect light Many new plants from a few parents
    Bare root (paper bag) Very little None until March A cool, dry spot at 45 to 55°F

    Method 1: Overwinter geraniums as potted plants

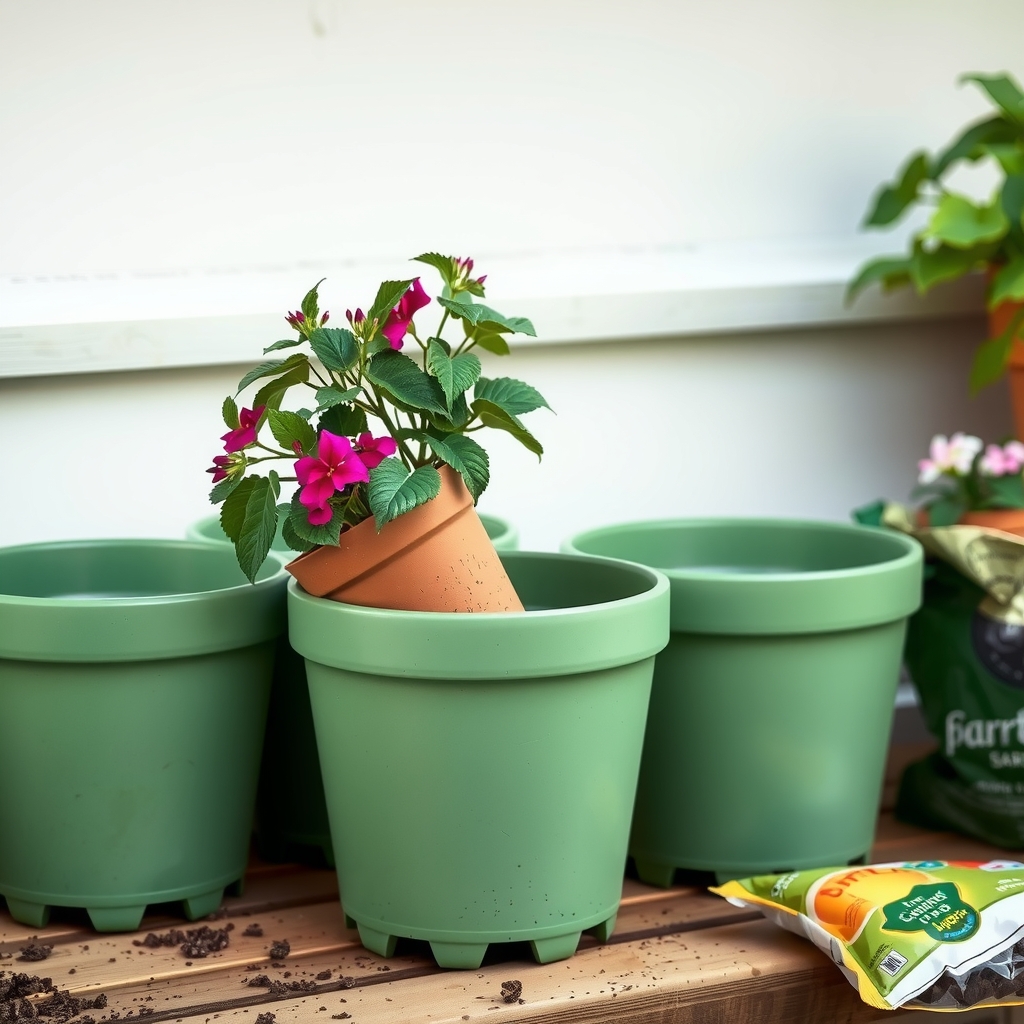
    1. Dig carefully before frost and set each plant in a 6 to 8 inch pot with potting mix. Plants already in containers can simply come inside.
    2. Cut back to one-half or one-third of the original height and water thoroughly.
    3. Give strong light. A bright, sunny window works, or ISU suggests fluorescent lights no more than 6 to 8 inches above the plants for 11 to 12 hours a day. A small LED grow light works the same way.
    4. Keep it cool. ISU recommends daytime temperatures around 65 to 70°F with slightly cooler nights. Warm, dim rooms make geraniums tall and spindly.
    5. Water when dry, and pinch tips now and then for bushier plants.
    6. Prune in March. By late winter plants are often lanky; cut them back by one-half to two-thirds and they will regrow quickly.

    Geraniums often turn paler and drop some leaves indoors. That is normal, and they recover once they go back outside.

    Method 2: Root geranium cuttings

    1. Cut 3 to 4 inch tips from the ends of healthy shoots with a sharp knife or snips.
    2. Strip the lower leaves and dip the cut end in rooting hormone.
    3. Stick them just deep enough to stand in a pot of coarse sand, perlite, vermiculite, or a sand and peat mix, in a container with drainage holes.
    4. Water, drain, then cover the pot with a clear plastic bag to keep cuttings from wilting.
    5. Place in bright light, not direct sun. ISU says cuttings root in about 6 to 8 weeks.
    6. Pot up each rooted cutting on its own and grow it in a sunny window, pinching tips to keep it compact.

    Method 3: Store geraniums bare root

    1. Dig the plants before frost and gently shake all the soil off the roots.
    2. Bag them: put one or two plants in a large brown paper bag, or hang them upside down.
    3. Store cool and dry at 45 to 55°F. ISU suggests an unheated bedroom or indoor porch.
    4. In mid-March, prune away shriveled, dead material back to firm, green stem.
    5. Pot up and water thoroughly, then move to a sunny window or under lights. They should leaf out within days.

    This method takes the least effort but is the least reliable, so it is worth trying alongside one of the other two the first year.

    Getting geraniums back outside in spring

    Geraniums are frost-tender. Harden them off for a week or two by setting them outside in shade for a few hours a day and gradually increasing sun and time, then plant out after your area’s safe frost date, usually in May in Iowa. Check your town in our last frost date in Iowa by city guide.

    Tools to overwinter geraniums

    All four were listed as sold by Amazon.com at the time of writing. Check the current listing before you buy.

    For digging up plants: Fiskars Ergo Garden Trowel

    Product pick

    Fiskars Ergo Garden Trowel

    Digging up a red geranium with a garden trowel before frost, illustrative AI image

    Illustrative image (AI-generated), not the exact product.

    See current photos and price on Amazon →

    A sturdy cast-aluminum trowel with an ergonomic handle that makes it easy to lift geraniums with a good root ball, even from heavy Iowa clay. It also handles the rest of the fall cleanup and spring planting.

    For cuttings and pruning: Fiskars 6-Inch Micro-Tip Pruning Snips

    Product pick

    Fiskars 6″ Steel Micro-Tip Pruning Snips

    Micro-tip garden snips cutting a geranium stem tip, illustrative AI image

    Illustrative image (AI-generated), not the exact product.

    See current photos and price on Amazon →

    Stainless steel blades that cut all the way to the tip, which makes clean cuts for 3 to 4 inch cuttings and for the March prune-back. Clean cuts heal faster and root better than torn stems.

    For winter light: LEOTER Clip-On LED Grow Light

    Product pick

    LEOTER Grow Light for Indoor Plants, 80 LED Full Spectrum with Timer

    Clip-on LED grow light over potted geraniums indoors in winter, illustrative AI image

    Illustrative image (AI-generated), not the exact product.

    See current photos and price on Amazon →

    Iowa winter days are short and gray, and low light is the main reason indoor geraniums get leggy. This clip-on light has 80 LEDs, 10 brightness levels and an automatic on/off timer, so it is easy to give potted geraniums the 11 to 12 hours ISU recommends. Keep it close to the plants. For bigger setups, see our grow lights guide.

    For potting up: Lifemaster Plastic Plant Pots with Drainage, 5-Pack

    Product pick

    Lifemaster Plastic Plant Pot Set with Drainage, 5-Pack (4.8 to 7 in)

    Plastic pots with drainage holes and a cut-back geranium, illustrative AI image

    Illustrative image (AI-generated), not the exact product.

    See current photos and price on Amazon →

    Five pots from 4.8 to 7 inches, each with drainage holes. The 6 and 7 inch pots fit dug-up geraniums, and the smaller sizes suit rooted cuttings and the bare-root plants you pot up in March.

    Conclusion

    To overwinter geraniums, act before the first frost and choose the method that fits your space: potted plants for a bright, cool window, cuttings for many plants in little room, or bare-root storage in a cool, dry spot. Prune back in March, harden off in spring, and plant out after your last frost date.

    FAQs

    When should I bring geraniums inside?
    Before the first frost. In much of Iowa the first fall freeze arrives in early to mid-October, so plan to dig or take cuttings by late September or early October.

    Can I store geraniums in a paper bag?
    Yes. Shake the soil off the roots, put one or two plants in a large brown paper bag, and keep it at 45 to 55°F. In mid-March, prune to green stems and pot them up.

    Why are my indoor geraniums leggy?
    Too little light and too much warmth. Move them to the brightest window or under a grow light, keep the room cooler, and cut them back in March.

    How long do geranium cuttings take to root?
    About 6 to 8 weeks in coarse sand, perlite or vermiculite, covered with a clear plastic bag in bright, indirect light.

    How often should I water overwintered geraniums?
    Water thoroughly only when the soil is dry. Geraniums indoors in winter need much less water than in summer.

    When can I put geraniums back outside in Iowa?
    After the last frost, usually in May, once they have been hardened off for a week or two.

    Sources and review scope

    This guide was prepared on October 29, 2026 from the following sources and from the product listings on Amazon.com. Homingwell did not perform hands-on testing. Sellers were checked on Amazon.com on the same date.

    Explore more Lawn & Garden guides.

  • Last Frost Date in Iowa by City: Average and Safe Planting Dates

    Last Frost Date in Iowa by City: Average and Safe Planting Dates

    Skip to content

    Lawn & Garden • Iowa Planting Dates • Updated October 29, 2026

    Last Frost Date in Iowa by City: Average and Safe Planting Dates

    Explore related guides: Gardening in Iowa: all guides · When to start seeds in Iowa · When to plant tomatoes in Iowa · When to plant garlic in Iowa · When to plant potatoes in Iowa.

    Almost every Iowa planting decision starts with one date: the last spring frost. It tells you when to start seeds indoors, when to plant peas and lettuce, and when it is finally safe to set out tomatoes. Here is the last frost date in Iowa for 18 cities, based on Iowa State University Extension data, with both the average date and a safer date for tender plants.

    Lettuce after a late frost, a reminder to check the last frost date in Iowa
    Lettuce after a late frost: the covered rows came through, the rest did not. Photo: Dwight Sipler, CC BY 2.0, via Wikimedia Commons.

    The short answer

    The average last spring freeze in Iowa runs from about April 13 in the far southeast (Keokuk) to about May 2 in the far northeast (Decorah). Central Iowa, including Des Moines and Ames, averages around April 22 to 25. An average date still means a 50 percent chance of a later freeze, so for tomatoes, peppers and other tender plants, use the “safe” date in the table below, which is late April in the southeast and early to mid-May in most of the state.

    Average last frost date in Iowa by city

    Last spring freeze (32°F) and first fall freeze by city
    City County Average last spring freeze Safe date (90%) Average first fall freeze
    Des Moines Polk April 22 May 4 October 10
    West Des Moines / Waukee Dallas April 25 May 8 October 6
    Ames Story April 24 May 6 October 7
    Cedar Rapids Linn April 26 May 9 October 6
    Iowa City Johnson April 22 May 6 October 9
    Davenport Scott April 15 April 30 October 19
    Waterloo / Cedar Falls Black Hawk April 28 May 11 October 5
    Sioux City Woodbury April 26 May 10 October 4
    Council Bluffs Pottawattamie April 24 May 8 October 8
    Dubuque Dubuque April 23 May 6 October 9
    Mason City Cerro Gordo April 29 May 11 October 5
    Fort Dodge Webster April 26 May 9 October 7
    Spencer Clay April 28 May 11 October 5
    Decorah Winneshiek May 2 May 18 October 3
    Ottumwa Wapello April 16 April 30 October 15
    Burlington Des Moines County April 15 April 28 October 19
    Clinton Clinton April 18 May 2 October 14
    Keokuk Lee April 13 April 25 October 19

    How to read it: “Average” is the average date of the last 32°F freeze. ISU’s “late” date, shown here as the safe date, is the day after which only 10 percent of last spring freezes occurred. Your yard can differ: low spots and river valleys collect cold air, while yards near buildings and pavement stay warmer. Don’t see your town? ISU lists every Iowa county; links are in the sources.

    How to use your last frost date

    • Count back to start seeds indoors. Tomatoes and peppers are usually started about 6 to 8 weeks before the last frost. See our Iowa seed starting calendar.
    • Plant cold-hardy crops early. Peas, spinach, lettuce, onions and potatoes go in several weeks before the last frost, as soon as the soil can be worked.
    • Wait for the safe date for tender crops. Tomatoes, peppers, basil, cucumbers and squash are killed by frost; plant them after the safe date, when soil has warmed.
    • Watch the 10-day forecast. Averages plan the season; the forecast decides the week. Keep a frost cloth handy through mid-May.

    What to plant around the last frost

    Rough timing relative to your last frost date
    Timing Crops
    4 to 6 weeks before Peas, spinach, onion sets, potatoes, lettuce from seed
    2 to 3 weeks before Broccoli and cabbage transplants, carrots, beets, radishes
    Around the average date Sweet corn (once soil warms), beans in warmer areas
    After the safe date Tomatoes, peppers, eggplant, basil, cucumbers, squash, melons

    For tomatoes specifically, see when to plant tomatoes in Iowa.

    Frost vs. freeze: why it matters

    ISU explains that the two terms are often used interchangeably but are not the same. A frost forms when water vapor freezes onto surfaces, like dew turning to ice, and it can happen on clear, calm nights even when the air a few feet up is slightly above 32°F. A freeze is when the air itself drops below 32°F. Either can damage tender plants, though freezes usually do more harm. The table above uses 32°F freeze dates, so on clear, still nights near those dates, cover tender plants even if the forecast low is 34 to 36°F.

    Tools for frost-season planting

    All four were listed as sold by Amazon.com at the time of writing. Check the current listing before you buy.

    Know when the soil is ready: Taylor Soil Thermometer

    Product pick

    Taylor Soil Thermometer with Silicone Bumper

    Dial soil thermometer in a spring vegetable bed, illustrative AI image

    Illustrative image (AI-generated), not the exact product.

    See current photos and price on Amazon →

    Frost-free air is only half the story; warm-season crops also need warm soil. This stainless steel probe reads below the surface from 20 to 180°F, and the dial shows minimum, maximum and optimal ranges for germination, so you can see when beds are ready for beans, corn or tomatoes.

    Track overnight lows: AcuRite Indoor/Outdoor Thermometer with Daily Highs and Lows

    Product pick

    AcuRite Digital Indoor/Outdoor Thermometer with Daily Highs and Lows (00424CA)

    Digital indoor outdoor thermometer on a windowsill at dawn, illustrative AI image

    Illustrative image (AI-generated), not the exact product.

    See current photos and price on Amazon →

    A simple wireless thermometer that records the high and low of the past 24 hours, so you can see how cold your own garden actually got overnight. Over a few springs you will learn whether your yard runs colder or warmer than the county average.

    Get a frost alert: La Crosse Technology Weather Station with Custom Alerts

    Product pick

    La Crosse Technology Weather Station with Customizable Alerts

    Wireless outdoor temperature sensor on a garden fence post, illustrative AI image

    Illustrative image (AI-generated), not the exact product.

    See current photos and price on Amazon →

    A color weather station with a wireless outdoor sensor and custom high and low temperature alerts. Set the low alert to around 36°F and it warns you when it is time to cover plants. It also shows a forecast, dew point and humidity.

    Cover plants on frosty nights: Amazon Basics Plant Covers, 10 x 30 ft

    Product pick

    Amazon Basics Plant Covers for Frost Protection, 10 x 30 ft

    White frost cloth draped over plants on a frosty morning, illustrative AI image

    Illustrative image (AI-generated), not the exact product.

    See current photos and price on Amazon →

    A lightweight, breathable frost cloth designed for light frost and late cold snaps, which is exactly what most Iowa springs bring after planting. Drape it over plants in the evening, weigh down the edges, and remove it once temperatures rise the next morning.

    Conclusion

    The last frost date in Iowa ranges from mid-April along the Mississippi in the southeast to early May in the northeast. Use the average date to plan seed starting and cool-season planting, the safe date for tomatoes and other tender crops, and your local forecast for the final call. Keep a frost cloth ready until mid-May.

    FAQs

    When is the last frost in Iowa?
    Based on ISU Extension data, the average last 32°F freeze ranges from about April 13 in Lee County (Keokuk) to about May 2 in Winneshiek County (Decorah). Most of central Iowa averages around April 22 to 26.

    When is the last frost in Des Moines?
    Polk County averages April 22 for the last spring freeze. Only about 10 percent of years have a freeze after May 4.

    When is it safe to plant tomatoes in Iowa?
    After the safe date for your county, usually early to mid-May, when nights stay above 50°F and soil has warmed.

    What is the difference between frost and freeze?
    A frost is ice that forms on surfaces from water vapor; a freeze is when the air drops below 32°F. Frost can form on clear, calm nights even when the air temperature is slightly above freezing.

    Can it frost in Iowa in May?
    Yes. In about 10 percent of years the last freeze comes after early to mid-May in much of the state, and as late as May 18 in Winneshiek County.

    When is the first fall frost in Iowa?
    The average first fall freeze ranges from early October in the north and west to around October 19 in the southeast.

    Sources and review scope

    This guide was prepared on October 29, 2026. Frost and freeze dates are from Iowa State University Extension county tables based on 1950 to 2021 Midwestern Regional Climate Center data. Sellers were checked on Amazon.com on the same date.

    Explore more Lawn & Garden guides.
  • How to Protect Shrubs in an Iowa Winter

    How to Protect Shrubs in an Iowa Winter

    Skip to content

    Lawn & Garden • Winter Care • Updated October 29, 2026

    How to Protect Shrubs in an Iowa Winter

    Explore related guides: Gardening in Iowa: all guides · Fall garden cleanup · Winterize raised beds · Pet-safe ice melt · Overwinter geraniums · When to prune fruit trees in Iowa.

    Every spring, Iowa gardeners find the same surprises: arborvitae browned on the west side, burning bush chewed to the snow line, and yews split open by heavy snow. Most of that damage can be prevented in a weekend in November. Here is how to protect shrubs in winter from rabbits, deer, winter burn, snow and salt, based on Iowa State University Extension advice, plus six supplies sold by Amazon.com.

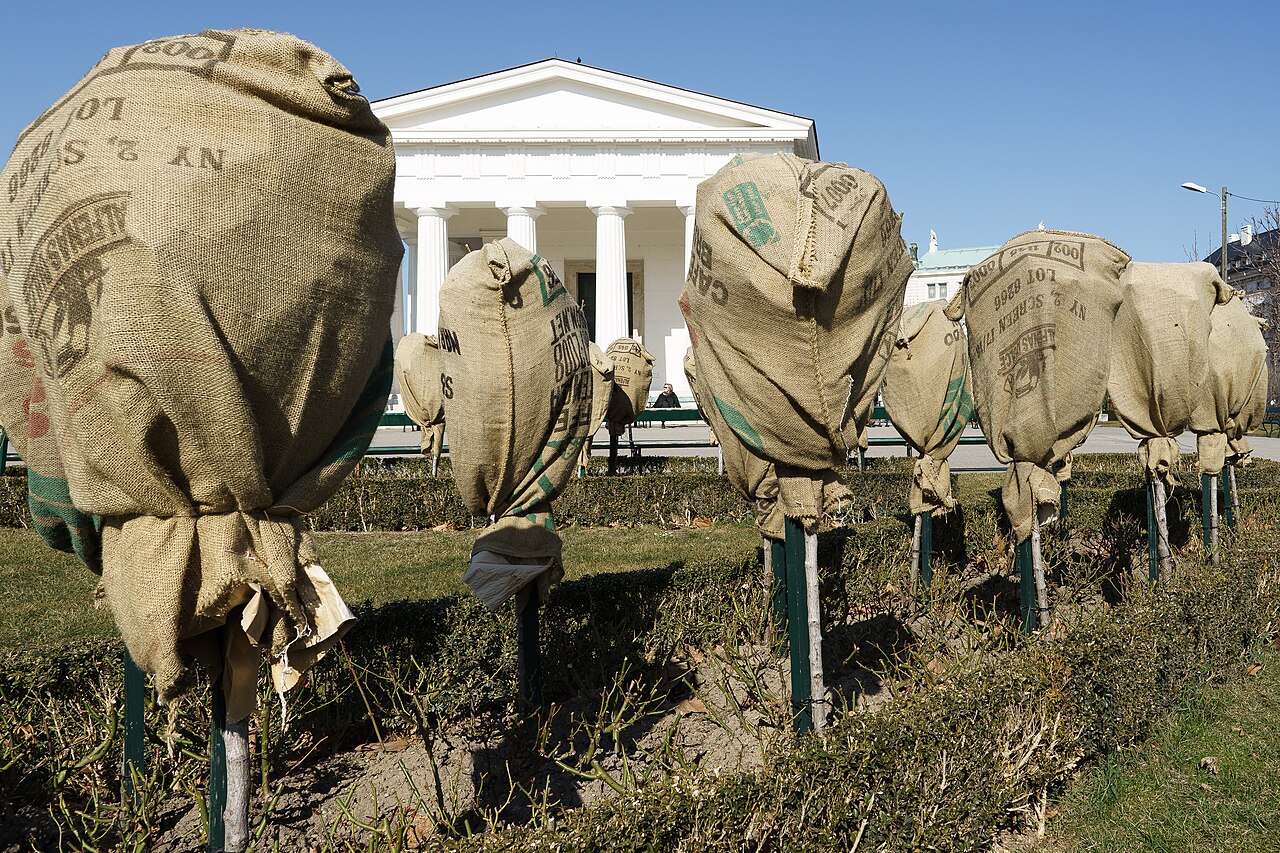
    Shrubs wrapped to protect them in winter in a public garden
    Roses wrapped for winter in the Volksgarten, Vienna. Photo: Neptuul, CC BY-SA 4.0, via Wikimedia Commons.

    The short answer

    Water shrubs well until the ground freezes, especially evergreens planted in the last two or three years. By early to mid-November, put 24 to 36 inch hardware cloth or chicken wire around rabbit favorites and pin it to the ground. Shield exposed evergreens from drying winds with a burlap screen on stakes, and consider an anti-transpirant spray. Brush heavy snow off gently, keep salty snow off beds, and check plants after every big storm.

    What damages shrubs in an Iowa winter

    Common winter damage and the fix
    Problem What you see in spring Main fix
    Rabbits Bark chewed off stems near the snow line 24 to 36 inch wire fence, pinned down
    Deer Foliage stripped from lower branches of arborvitae and pines Wraps or wire cylinders at least 6 feet tall
    Winter burn Brown needles or leaves, often on the windy or sunny side Fall watering, burlap screen, anti-transpirant
    Snow and ice Split or bent branches Brush snow off gently; tie upright shrubs
    Salt Browning on the side facing a road or walk Keep salty snow off; use gentler ice melt

    How to protect shrubs in winter, step by step

    1. Water deeply until the ground freezes. ISU Extension says all perennials, shrubs and conifers should be watered regularly in fall, and it matters most for evergreens planted in the last two or three years.
    2. Mulch the root zone with 2 to 4 inches of shredded bark or wood chips, kept a few inches away from stems.
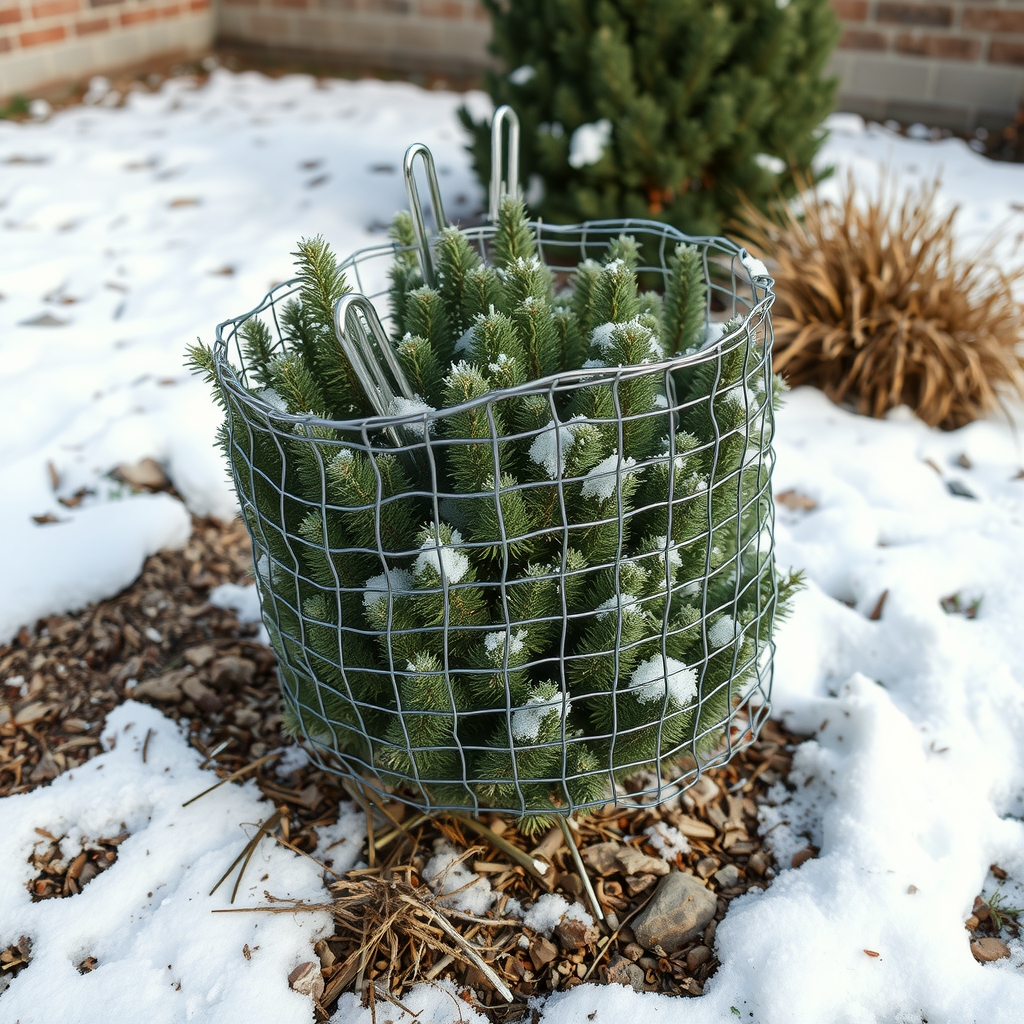
    3. Fence rabbit favorites by early to mid-November with 24 to 36 inch hardware cloth or chicken wire, pinned to the soil.
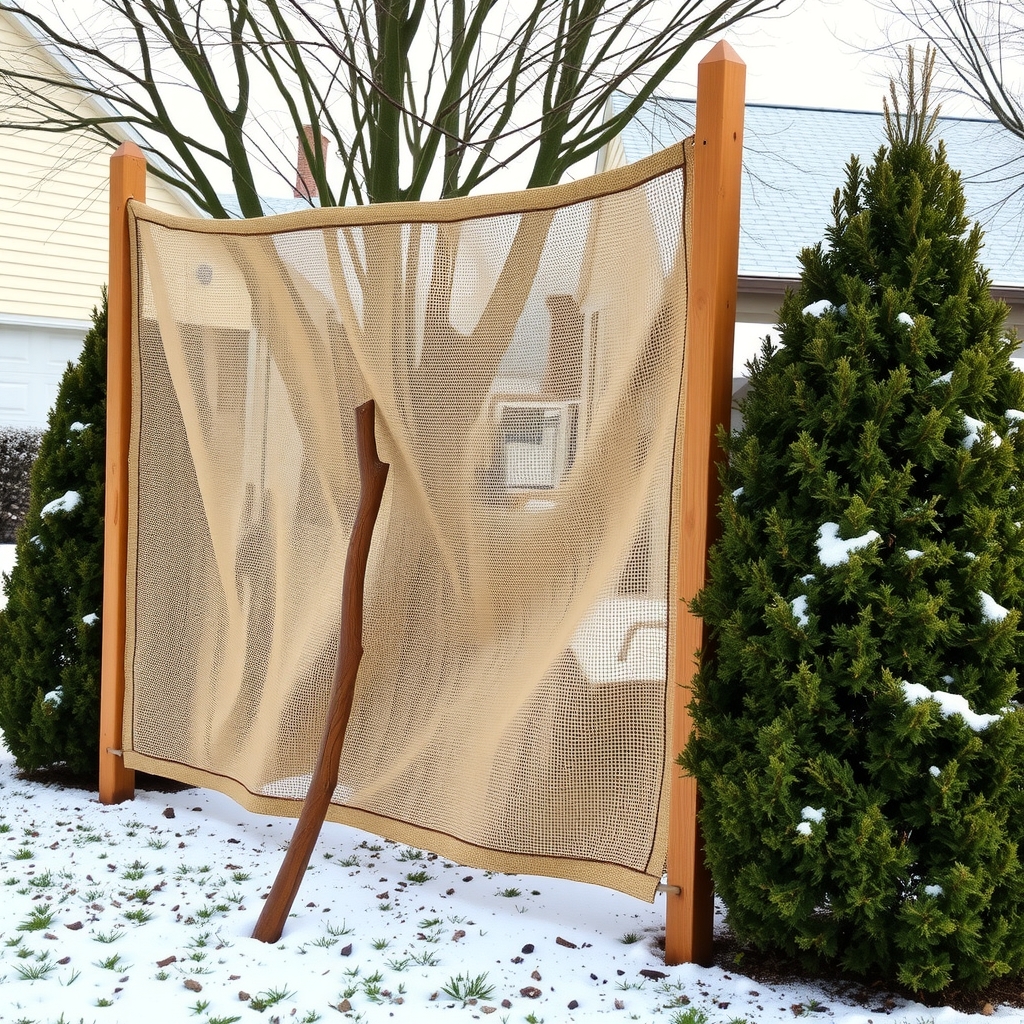
    4. Screen exposed evergreens on the windward side with burlap stretched between stakes. Leave a gap so air can move.
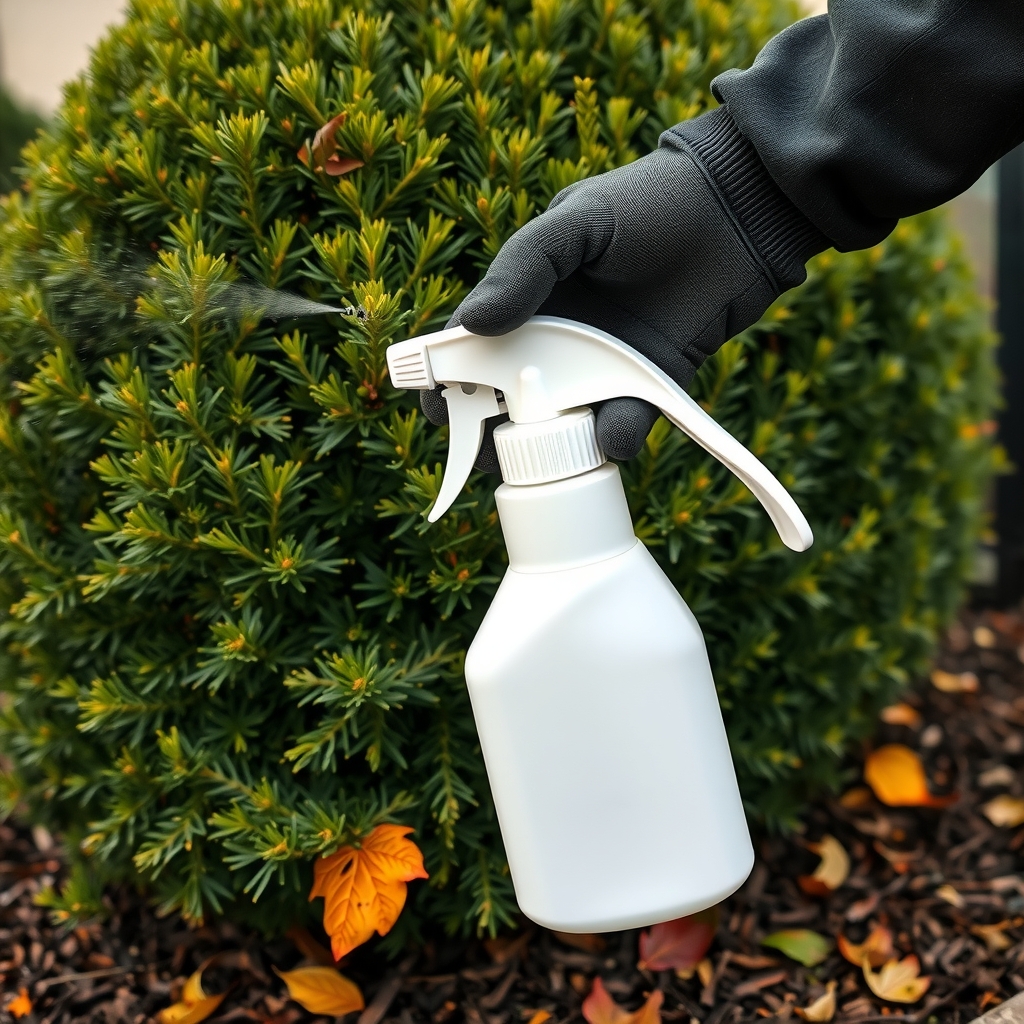
    5. Spray an anti-transpirant on broadleaf evergreens such as boxwood and rhododendron, following the label.
    6. Tie upright evergreens like arborvitae loosely with soft twine so heavy snow cannot split them.
    7. Check after storms: brush snow off, look for chew marks, and pull snow away from fences rabbits could climb.

    Protecting shrubs from rabbits and deer

    ISU Extension horticulturist Aaron Steil says the best way to prevent animal damage is a physical barrier. For rabbits, wrap chicken wire or hardware cloth fencing at least 24 to 36 inches tall around the base of the plant and pin it to the soil with U-shaped anchor pins so rabbits cannot crawl under. The fence must stay taller than the snow, so after a heavy snowfall, check that rabbits cannot reach over it.

    Rabbits often target crabapple, apple, pear, redbud, honey locust, serviceberry, burning bush, flowering quince, barberry, roses and raspberries, plus small evergreens, especially pines. Repellents can help but often need reapplying after rain or snow.

    For deer, ISU recommends wraps, tubes, wire fencing or wire cylinders at least 6 feet tall, which work best on smaller, younger plants.

    Preventing winter burn on evergreens

    Evergreens keep losing water through their needles and leaves all winter, but they cannot pull water from frozen soil. Wind and bright sun make it worse, and the result is browned foliage in spring. Three things help: deep watering before freeze-up, a burlap screen on the windy or sunny side, and an anti-transpirant spray. ISU notes that these sprays form a thin film that reduces water loss but break down over time, so they may need reapplying during winter.

    Do not panic if small evergreens get buried in snow. ISU says snow will not suffocate them and actually insulates them from drying winds; just watch for rabbit browsing as the snow melts.

    Snow, ice and salt

    Brush heavy, wet snow off shrubs with an upward sweep of a broom to lighten the load, but let ice melt on its own, since breaking it off often breaks the branches too. Do not pile salty snow from the driveway onto beds, and choose a gentler product for walks near plants. See our pet-safe ice melt guide.

    Supplies to protect shrubs in winter

    All six were listed as sold by Amazon.com at the time of writing. Check the current listing before you buy.

    For rabbit fences: VEVOR Hardware Cloth, 1/4 inch, 36 in x 50 ft

    Product pick

    VEVOR Hardware Cloth, 1/4 inch, 36 in x 50 ft, Galvanized

    Hardware cloth rabbit guard around a young shrub in snow, illustrative AI image

    Illustrative image (AI-generated), not the exact product.

    See current photos and price on Amazon →

    A 36-inch-tall roll matches the top of ISU’s 24 to 36 inch recommendation, so the fence stays above most snow. The 1/4-inch welded mesh is hot-dip galvanized to resist rust, and 50 feet is enough to circle several shrubs. Wear gloves when cutting; the edges are sharp.

    To pin fences down: Fabric and Garden Staples, 6 x 1 inch, 11 Gauge

    Product pick

    Fabric and Garden Staples, Commercial Grade, 6 x 1 in, 11 Gauge

    Steel U-shaped garden staples anchoring wire mesh at a shrub base, illustrative AI image

    Illustrative image (AI-generated), not the exact product.

    See current photos and price on Amazon →

    These are the U-shaped anchor pins ISU mentions for stopping rabbits from slipping under a fence. The steel staples also hold down burlap, netting and soaker hoses. Push them in before the ground freezes.

    For windbreaks: Burlap Plant Cover and Landscape Fabric, 40 in x 12 ft

    Product pick

    Burlap Plant Cover and Landscape Fabric, 40 in x 12 ft Roll

    Burlap windbreak screen on stakes beside an arborvitae in snow, illustrative AI image

    Illustrative image (AI-generated), not the exact product.

    See current photos and price on Amazon →

    Natural, breathable burlap for the classic ISU windbreak: staple it between wooden stakes on the windy or sunny side of young evergreens. Unlike plastic, it lets air and moisture through, so it will not cook plants on sunny days. A 12-foot roll covers two or three small shrubs.

    Anti-transpirant: Bonide Wilt Stop, 40 oz Ready-to-Use

    Product pick

    Bonide Wilt Stop Anti-Transpirant, 40 oz Ready-to-Use Spray

    Spraying anti-desiccant on a boxwood shrub in fall, illustrative AI image

    Illustrative image (AI-generated), not the exact product.

    See current photos and price on Amazon →

    A ready-to-spray anti-transpirant that forms a soft, clear film to slow moisture loss, which is the main cause of winter burn on boxwood, rhododendron, holly and young conifers. Spray on a dry day above freezing. ISU notes these films break down over time, so check the label and reapply during a winter thaw if needed.

    For young trunks: Dimex EasyFlex Plastic Tree Trunk Protectors, 6 Pack

    Product pick

    Dimex EasyFlex Plastic Tree Trunk Protectors, 6 Count

    Grey plastic trunk guards on young crabapple trees in snow, illustrative AI image

    Illustrative image (AI-generated), not the exact product.

    See current photos and price on Amazon →

    Coil-style guards for small trees and tree-form shrubs such as crabapples and lilac standards. Each 9-inch guard wraps a trunk up to about 4 inches across and can be linked for larger trunks. They help against rodents and mower damage; for rabbits in deep snow, add a taller wire fence as well.

    For cold snaps: Amazon Basics Plant Covers for Frost Protection, 10 x 30 ft

    Product pick

    Amazon Basics Plant Covers for Frost Protection, 10 x 30 ft

    White frost cloth draped over rose bushes on a frosty morning, illustrative AI image

    Illustrative image (AI-generated), not the exact product.

    See current photos and price on Amazon →

    A big, breathable frost cloth for sudden early or late cold snaps on roses, hydrangeas and newly planted shrubs. It is designed for light frost and mild cold, not deep winter, so use it in October, November, April and May, and remove it on warm days.

    Conclusion

    Protecting shrubs in an Iowa winter comes down to a short November checklist: water deeply, mulch, fence rabbit favorites with 24 to 36 inch wire, screen exposed evergreens with burlap, and keep salt and heavy snow off. A few hours now saves replacing plants in spring.

    FAQs

    When should I protect shrubs for winter in Iowa?
    Have rabbit fencing and other protection in place by early to mid-November, and keep watering until the ground freezes.

    Should I wrap my shrubs in burlap?
    A burlap screen on stakes on the windward side works well for exposed evergreens. If you wrap a shrub directly, keep it loose, never use plastic, and remove it in spring.

    How tall should a rabbit fence be?
    Iowa State University Extension recommends chicken wire or hardware cloth at least 24 to 36 inches tall, pinned to the soil so rabbits cannot crawl under it.

    Do anti-desiccant sprays work?
    They can reduce moisture loss and winter burn on evergreens, but the film breaks down over time and may need reapplying during winter.

    Should I remove snow from evergreens?
    Brush off heavy, wet snow gently to prevent breakage, but let ice melt on its own. Light snow cover actually insulates small evergreens.

    Which shrubs do rabbits eat in winter?
    Common targets include burning bush, roses, barberry, flowering quince, serviceberry, raspberries and small pines, plus young crabapple, apple and pear trees.

    Sources and review scope

    This guide was prepared on October 29, 2026 from the following sources and from the product listings on Amazon.com. Homingwell did not perform hands-on testing. Sellers were checked on Amazon.com on the same date.

    Explore more Lawn & Garden buying guides.
  • Best Rain Barrels for Iowa Homes: 6 Picks, Rebates and Winter Tips

    Best Rain Barrels for Iowa Homes: 6 Picks, Rebates and Winter Tips

    Skip to content

    Lawn & Garden • Water • Updated October 29, 2026

    Best Rain Barrels for Iowa Homes: 6 Picks, Rebates and Winter Tips

    Explore related guides: Gardening in Iowa: all guides · Broadcast spreaders · Compost bins for cold climates · Winterize raised beds.

    A single summer storm can send hundreds of gallons off an Iowa roof and into the storm drain. A rain barrel catches some of that water for your garden, and several Iowa cities will even pay part of the cost. This guide covers how much water you can collect, which Iowa cities offer rebates, how to keep mosquitoes out, why you must drain it before winter, and six barrels and parts sold by Amazon.com.

    Rain barrel collecting roof water beside a Midwest house
    Rain barrels are an old Midwest idea: a wooden barrel at the historic Nathan Boone House in Missouri. Photo: Mcasagrand, CC BY-SA 4.0, via Wikimedia Commons.

    The short answer

    For most Iowa homes, a 50-gallon flat-back rain barrel with a screened top, a spigot near the bottom and an overflow port is the best start. Set it on a level, solid base, raise it on a stand for better hose pressure, keep every opening screened against mosquitoes, and send overflow away from your foundation. Before the first hard freeze, drain it, leave the spigot open and disconnect it or switch your diverter to winter mode. Check whether your city offers a rebate first; some require approval before you buy.

    How a rain barrel works

    A rain barrel sits under a gutter downspout. Roof water flows in through a screened opening, a spigot near the bottom lets you fill a watering can or attach a hose, and an overflow port sends extra water away once the barrel is full. A diverter, which fits into the downspout, lets you switch between filling the barrel and sending water down the spout as usual.

    How much can you collect? As a rule of thumb, 1 inch of rain on 1,000 square feet of roof produces roughly 600 gallons. A Des Moines-area rain barrel seller told WeAreIowa that even a quarter inch of rain can fill three 50-gallon barrels. That is why many Iowa homeowners link two or more barrels.

    Use rain barrel water for gardens, lawns, houseplants and washing tools, not for drinking. When watering vegetables, water the soil rather than the leaves and wash produce before eating, as University of Kentucky guidance advises.

    Iowa rain barrel rebates

    Examples of Iowa city rain barrel incentives
    City Rain barrel incentive Notes
    Ames One-time $50 rebate For Ames utility customers who buy or build a barrel
    West Des Moines Up to $75 reimbursement One barrel per address; approval needed before installation
    Marion Up to $50 per barrel Up to three barrels; apply and get approval before buying
    Coralville Cost-share program Covers rain barrels and other stormwater practices

    Many other Iowa cities, including several in the Des Moines metro, Sioux City and others, run similar stormwater programs. Search your city name plus “rain barrel rebate”, and keep your dated receipt and a photo of the installed barrel.

    Rain barrel setup tips

    1. Build a level, solid base. A full barrel can weigh 400 pounds or more, so use pavers or a sturdy stand, never soft soil.
    2. Raise it. A stand or blocks add pressure for a hose and make it easy to fit a watering can under the spigot.
    3. Screen every opening. Stormwater programs recommend fine mesh on the inlet and overflow. Mosquitoes need several days of standing water to develop, so use the water regularly.
    4. Use Bti dunks if needed. Extension sources note that Bti mosquito dunks kill larvae and are safe for birds, pets and fish.
    5. Direct overflow away from the house, into a flower bed, lawn or rain garden, and check for erosion.
    6. Keep gutters clean and rinse the screen so leaves do not clog the inlet.

    Rain barrels in an Iowa winter

    Water that freezes inside a barrel can crack the plastic and split fittings. In late fall, before hard freezes:

    • Drain the barrel completely and leave the spigot open.
    • Disconnect it from the downspout, or set your diverter to send water down the spout.
    • Turn the barrel upside down or store it in a garage or shed. Collapsible barrels fold flat for storage.
    • Reconnect in spring once nights stay above freezing.

    Fall is also the time to clean up the rest of the yard; see our fall garden cleanup checklist.

    Best rain barrels and parts

    All six were listed as sold by Amazon.com at the time of writing. Check the current listing before you buy.

    Best overall: RTS Home Accents 50-Gallon ECO Rain Barrel

    Product pick

    RTS Home Accents 50-Gallon ECO Rain Barrel, Flat Back

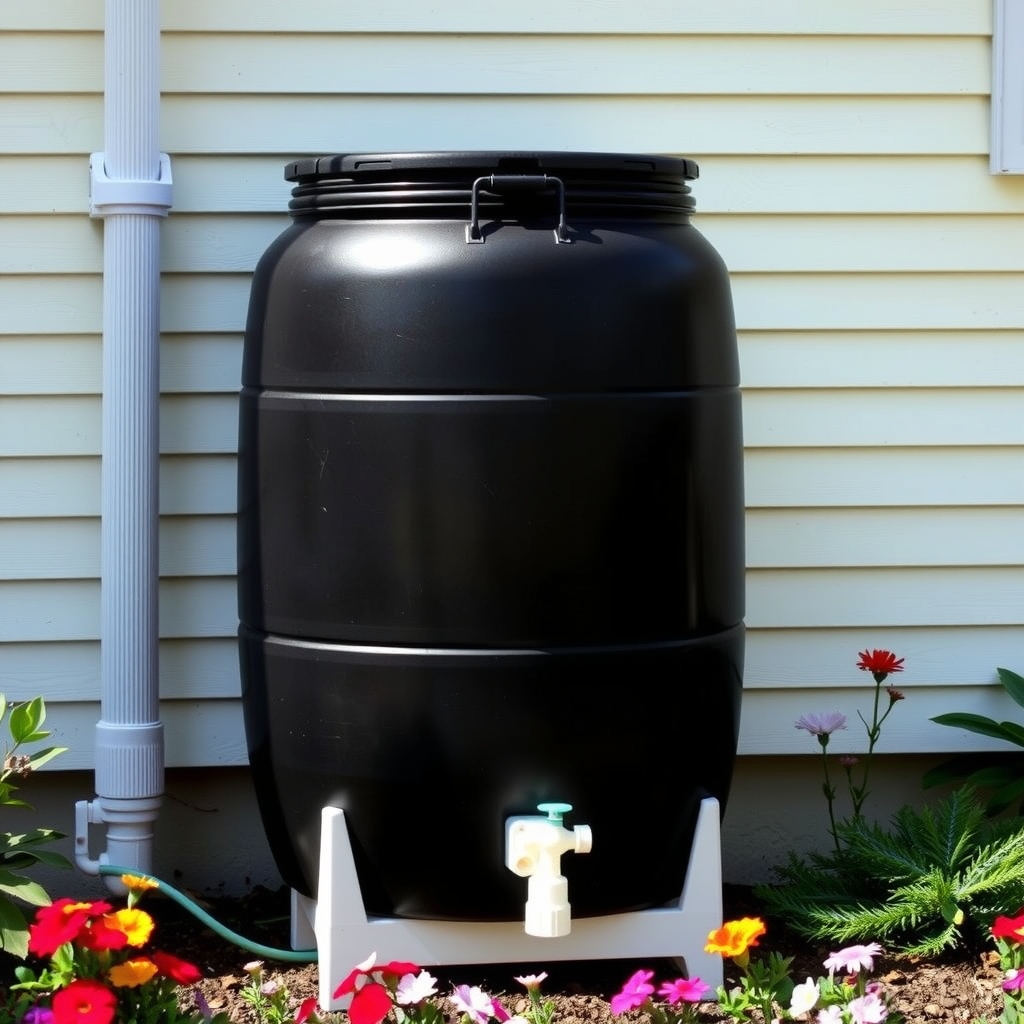
    Black flat-back rain barrel under a downspout, illustrative AI image

    Illustrative image (AI-generated), not the exact product.

    See current photos and price on Amazon →

    A 50-gallon barrel made from 100 percent recycled, UV-resistant plastic, with a flat back that sits tight against the house. It has a built-in overflow you can use to link more barrels and a plastic spigot. The best value for a first barrel.

    Upgrade spigot: RTS Home Accents 50-Gallon Rain Barrel with Brass Spigot

    Product pick

    RTS Home Accents 50-Gallon Rain Barrel with Brass Spigot, Walnut

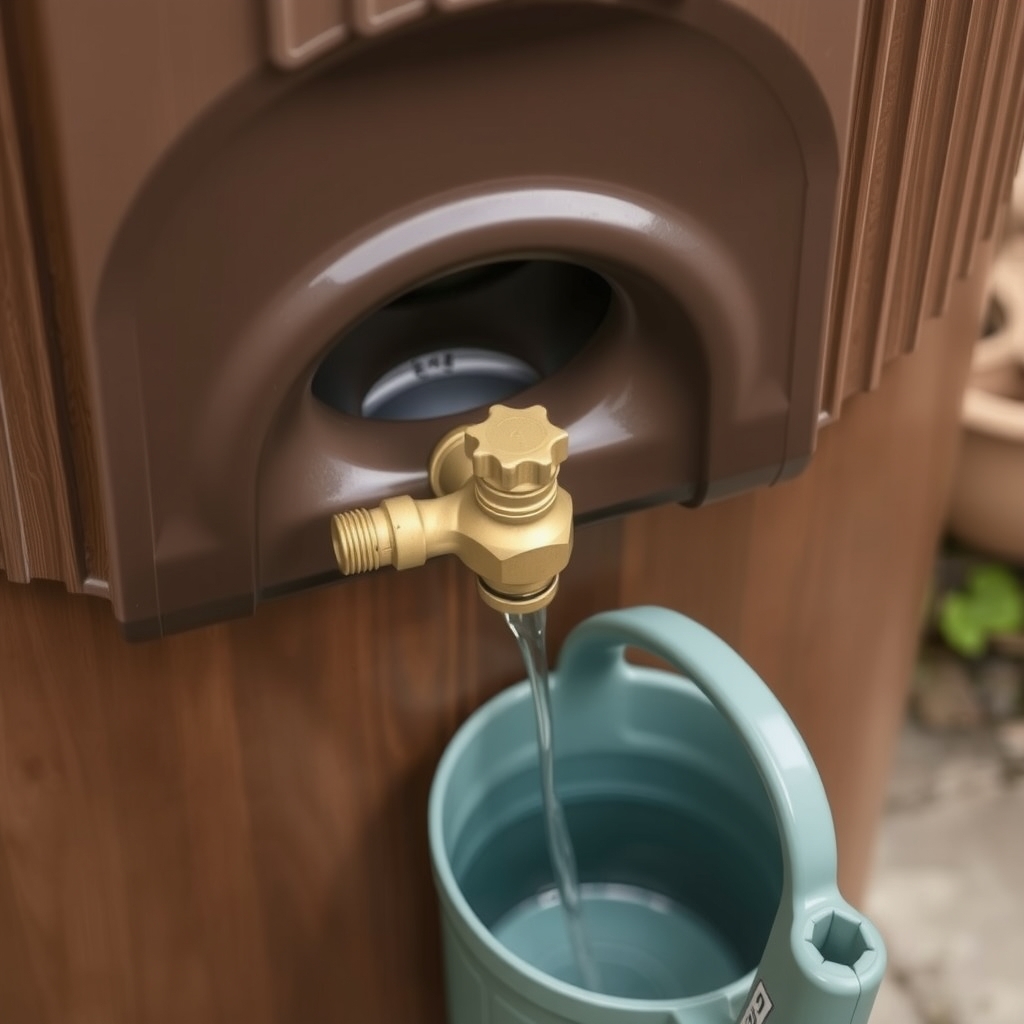
    Brass spigot on a brown rain barrel filling a watering can, illustrative AI image

    Illustrative image (AI-generated), not the exact product.

    See current photos and price on Amazon →

    The same 50-gallon flat-back design in a walnut color, with a brass spigot that holds up better than plastic to daily use and hose connections. It also has the built-in overflow for linking barrels. Worth the extra cost if the barrel is your main garden water source.

    Best for more storage: RTS Home Accents 50-Gallon ECO Rain Barrel, 2-Pack with Stands

    Product pick

    RTS Home Accents 50-Gallon ECO Rain Barrel 2-Pack with Stands

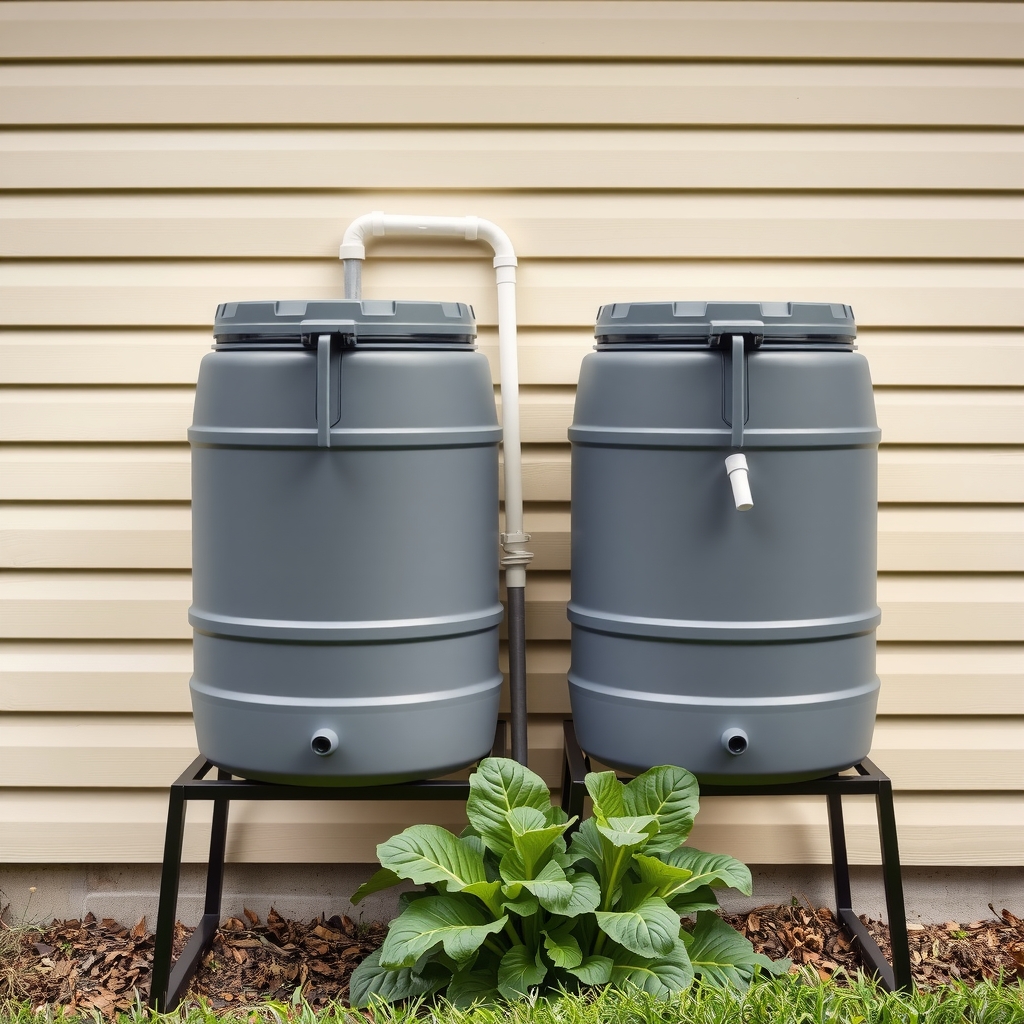
    Two linked rain barrels on stands beside a house, illustrative AI image

    Illustrative image (AI-generated), not the exact product.

    See current photos and price on Amazon →

    Two recycled-plastic 50-gallon barrels, each with its own stand, for 100 gallons of storage. Link them through the overflow so the second fills when the first is full. Note that the set may ship in more than one box. A good choice if your city rebates more than one barrel.

    Best budget and easy storage: Happygrill 60-Gallon Collapsible Rain Barrel

    Product pick

    Happygrill 60-Gallon Collapsible Rain Barrel with Spigot

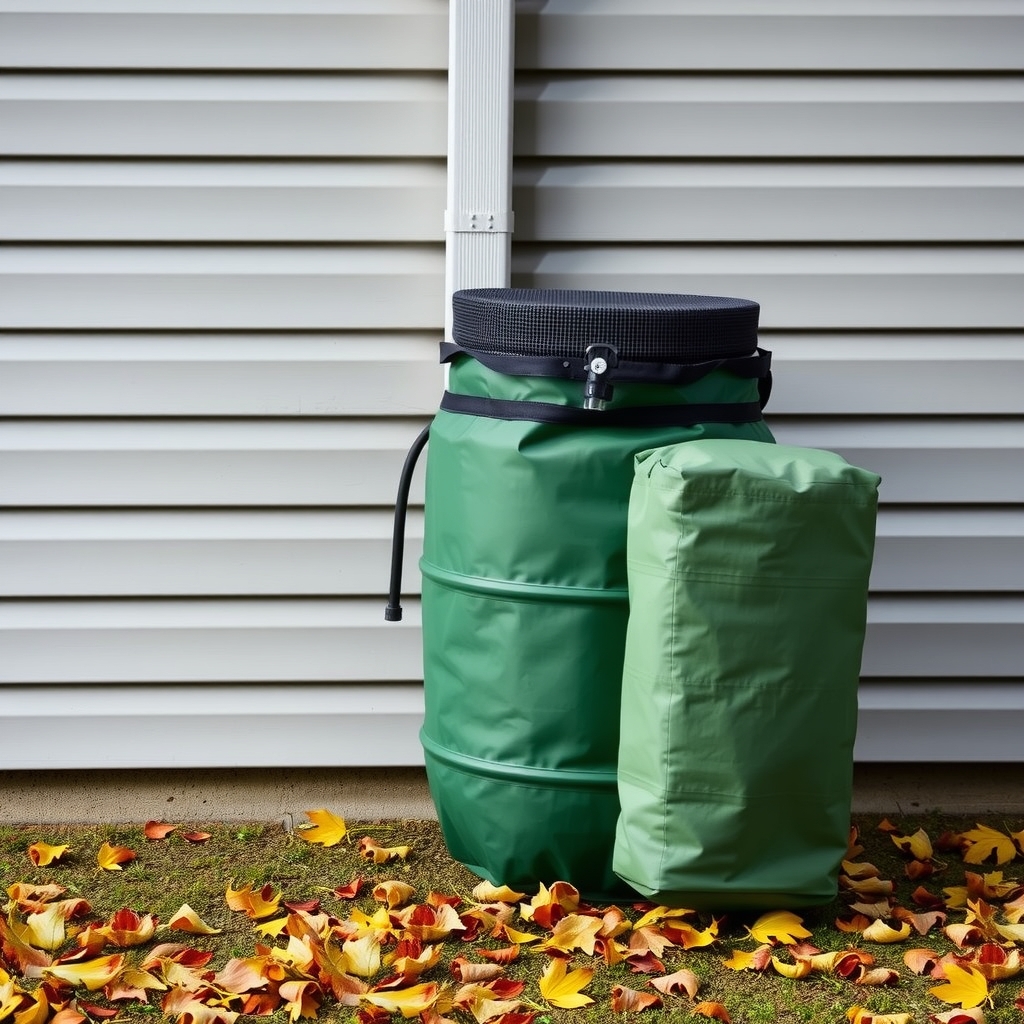
    Collapsible green rain barrel with mesh top under a downspout, illustrative AI image

    Illustrative image (AI-generated), not the exact product.

    See current photos and price on Amazon →

    A low-cost barrel with a PVC frame and mesh fabric that folds flat, which is a real advantage in Iowa: drain it in fall and store it in the garage all winter. It has a mesh top and spigot and sits under a downspout. It is less rigid than a hard plastic barrel, so keep it on flat, firm ground.

    Sturdier collapsible: 53-Gallon Collapsible Rain Barrel with Support Poles

    Product pick

    53-Gallon Collapsible Rain Barrel, 550D PVC with 6 Support Poles

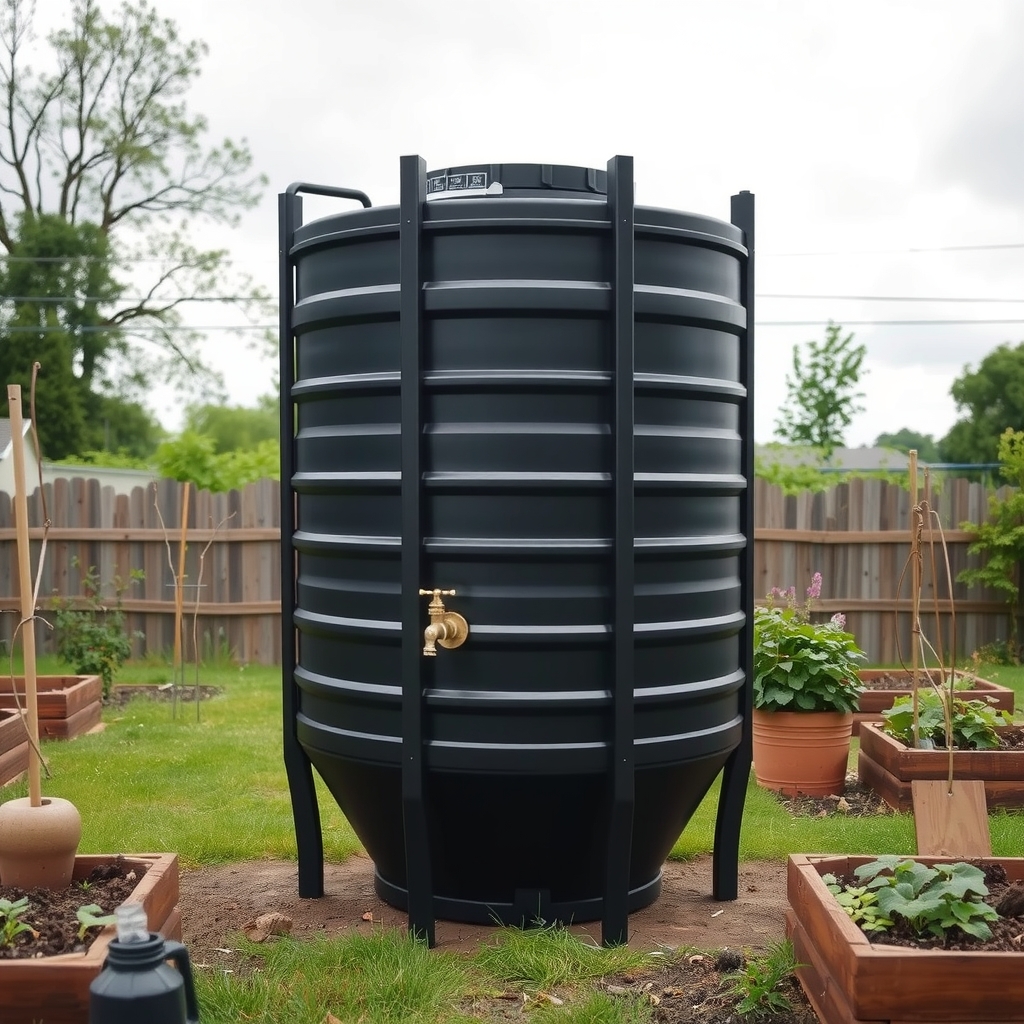
    Collapsible rain tank with support poles by raised beds, illustrative AI image

    Illustrative image (AI-generated), not the exact product.

    See current photos and price on Amazon →

    A heavier 550D PVC collapsible tank with six extra support poles for stability, a mesh filter top, and the accessories needed for setup in the box. Like other collapsibles, it folds away for winter, but it stands up better when full than lighter models.

    Add-on: Oatey Mystic Rainwater Collection System (Diverter)

    Product pick

    Oatey Mystic Rainwater Collection System, 2 x 3 in., with Hose and Plug

    Downspout rainwater diverter with hose to a rain barrel, illustrative AI image

    Illustrative image (AI-generated), not the exact product.

    See current photos and price on Amazon →

    A diverter that fits standard 2 by 3 inch residential downspouts and feeds a barrel through a 4-foot high-flow hose. This bundle also includes a spare hose and an outlet plug, which Oatey says is used for winterizing: pull the hose, plug the port, and water goes down the downspout as normal. UV resistant and paintable to match your gutters.

    Conclusion

    A rain barrel is one of the simplest ways to save water and reduce runoff in Iowa. Start with a 50-gallon flat-back barrel like the RTS ECO, add a second barrel or a diverter as you go, keep every opening screened, and drain it before winter. Check your city first: a rebate can cover a big part of the cost.

    FAQs

    Are rain barrels legal in Iowa?
    Yes. Iowa cities actively encourage them, and the City of Ames says rain barrels are completely legal and encouraged there. Several cities also offer rebates.

    Do I need to empty my rain barrel in winter?
    Yes. Drain it before hard freezes, leave the spigot open, and disconnect it or set the diverter to winter mode. Ice can crack the barrel and fittings.

    How do I keep mosquitoes out of a rain barrel?
    Cover the inlet and overflow with fine mesh, keep the lid tight, use the water often, and add Bti mosquito dunks if needed.

    Can I use rain barrel water on vegetables?
    Yes, for irrigation. Water the soil rather than the leaves and wash produce before eating. Do not drink rain barrel water.

    How much water does a rain barrel collect?
    About 600 gallons fall on 1,000 square feet of roof per inch of rain, so a 50-gallon barrel can fill in a light rain. Linking barrels adds storage.

    Where should I put my rain barrel?
    Under a downspout, on a level and solid base, raised on a stand, with overflow directed away from the foundation.

    Sources and review scope

    This guide was prepared on October 29, 2026 from the following sources and from the product listings on Amazon.com. Homingwell did not perform hands-on testing. Sellers were checked on Amazon.com on the same date.

    Explore more Lawn & Garden buying guides.

  • Best Broadcast Spreaders for Iowa Lawns: 6 Picks for Seed and Fertilizer

    Best Broadcast Spreaders for Iowa Lawns: 6 Picks for Seed and Fertilizer

    Skip to content

    Lawn & Garden • Lawn Care • Updated October 29, 2026

    Best Broadcast Spreaders for Iowa Lawns: 6 Picks for Seed and Fertilizer

    Explore related guides: Gardening in Iowa: all guides · Soil test kits · Fall garden cleanup · Snow shovels · Rain barrels · When to fertilize your lawn in Iowa · When to plant grass seed in Iowa.

    Late October and early November is one of the best times to feed an Iowa lawn, and stripes of dark and pale grass next spring are usually a spreader problem, not a fertilizer problem. A good broadcast spreader puts seed and fertilizer down evenly, fast, and at the rate on the bag. This guide covers broadcast vs. drop spreaders, how to calibrate one, Iowa State University timing, and six spreaders sold by Amazon.com, from handheld to tow-behind.

    Green front lawn where a broadcast spreader is used for fertilizer and seed
    Even feeding gives an even, dense lawn. Photo: Itchy Melvin, CC BY-SA 2.0, via Wikimedia Commons.

    The short answer

    For most Iowa yards up to about a third of an acre, a walk-behind broadcast spreader with an edge guard is the best all-round choice. For half an acre and up, choose a large push model with air-filled tires or a tow-behind for a riding mower. Use a handheld for small lawns and patching. Whatever you buy, check the setting against the fertilizer bag, calibrate once a year, and never put down more than 1 pound of actual nitrogen per 1,000 square feet in one application, as Iowa State University Extension advises.

    Broadcast spreader or drop spreader?

    Two main spreader types
    Broadcast (rotary) Drop
    How it works A spinning plate throws product in a wide fan Product drops straight down through holes
    Coverage Wide, fast, fewer passes Narrow, exact strip
    Mistakes Forgiving; overlapping hides small gaps Missed strips show as stripes
    Best for Medium and large lawns, seed, ice melt Small lawns, tight beds, near water

    Virginia Cooperative Extension notes that drop spreaders suit limited spaces because they avoid throwing product onto sidewalks and driveways. A broadcast spreader with an edge guard or side shield gives you most of that control on borders while keeping the speed of a rotary.

    What size broadcast spreader do you need?

    • Under 5,000 sq ft (small city lot): a handheld crank or cordless spreader.
    • 5,000 to 15,000 sq ft (typical suburban yard): a walk-behind spreader like the Scotts EdgeGuard DLX.
    • 15,000 to 25,000 sq ft (up to half an acre): a 100 to 130 lb push spreader with pneumatic tires.
    • Half an acre and more: a tow-behind spreader for a riding mower or lawn tractor.

    How to calibrate a broadcast spreader

    1. Start with the bag setting. The setting printed on the fertilizer bag is a starting point, not a guarantee; UMass Extension recommends checking it by calibration.
    2. Measure a test area, such as 10 by 10 feet (100 sq ft), on the lawn.
    3. Weigh the right amount for that area. Example from Preen: a 25 lb bag that covers 5,000 sq ft needs 0.5 lb per 100 sq ft.
    4. Spread it at a steady walking pace and see whether the hopper runs out right at the end of the area.
    5. Adjust the dial up or down and repeat until it matches.
    6. Overlap passes so the edges of each fan meet, and shut the gate when you stop or turn.

    Before you buy fertilizer, a soil test tells you whether you need phosphorus or potassium at all. See our soil test kit guide.

    When to fertilize a lawn in Iowa

    Iowa State University Extension says Kentucky bluegrass lawns can be fed in spring (April or May), mid-September, and late October or early November. A one-feeding plan uses the late October to early November timing; a moderate plan adds mid-September; a high-quality lawn gets all three. ISU recommends no summer fertilizing of cool-season grass in June, July and August.

    To figure out how much product to use, divide the nitrogen rate you want by the nitrogen percentage on the bag. ISU’s example: for 0.75 lb of nitrogen with a 20-5-10 fertilizer, 0.75 divided by 0.20 equals 3.75 lb of product per 1,000 sq ft.

    Best broadcast spreaders

    All six were listed as sold by Amazon.com at the time of writing. Check the current listing before you buy.

    Best overall: Scotts Turf Builder EdgeGuard DLX Broadcast Spreader

    Product pick

    Scotts Turf Builder EdgeGuard DLX Broadcast Spreader

    Push broadcast spreader with a side shield on a green lawn, illustrative AI image

    Illustrative image (AI-generated), not the exact product.

    See current photos and price on Amazon →

    The default pick for a typical suburban yard. It comes pre-calibrated with no assembly, holds enough product for up to 15,000 sq ft, and the EdgeGuard side shield keeps fertilizer off beds, driveways and sidewalks. It handles seed, fertilizer and ice melt, so it earns its garage space in winter too.

    Best for half-acre lawns: Agri-Fab 45-0614 130 lb Push Broadcast Spreader

    Product pick

    Agri-Fab 45-0614 130 lb Push Lawn and Garden Broadcast Spreader

    Large push broadcast spreader with pneumatic tires on a wide lawn, illustrative AI image

    Illustrative image (AI-generated), not the exact product.

    See current photos and price on Amazon →

    A big, made-in-USA walk-behind with a 130 lb hopper that covers up to half an acre (25,000 sq ft) per fill and throws a 10 to 12 foot spread. The 13 by 4 inch pneumatic tires roll well over bumpy yards. A good match for acreage lots where you still want to walk, not ride.

    Built to last: Chapin TurfPro 89303C 100 lb Push Spreader

    Product pick

    Chapin 89303C TurfPro 100 lb Push Lawn Spreader

    Lawn spreader spinner plate throwing fertilizer granules over grass, illustrative AI image

    Illustrative image (AI-generated), not the exact product.

    See current photos and price on Amazon →

    A contractor-style spreader with a stainless steel axle, gears and gate link arm, 12-inch wide-tread pneumatic tires and a large T-handle with rubber grips. A slide lever sets the gate opening for each product. Chapin backs it with a 5-year limited warranty, which matters because fertilizer is hard on cheap metal parts.

    Best tow-behind: Brinly BS26BH-A Tow Behind Broadcast Spreader, 125 lb

    Product pick

    Brinly BS26BH-A Tow Behind Broadcast Spreader with Universal Hitch, 125 lb

    Tow-behind broadcast spreader hitched to a riding mower, illustrative AI image

    Illustrative image (AI-generated), not the exact product.

    See current photos and price on Amazon →

    For rural and acreage lawns, a tow-behind does the job from the mower seat. This Brinly holds 125 lb in a rust- and dent-proof poly hopper, uses a locking dial for rate settings, and has spread pattern control to keep product where you want it. Brinly provides pre-calibrated settings for many products, and assembly takes about 30 minutes.

    Best handheld: Chapin 8706G 3 lb Hand Crank Spreader

    Product pick

    Chapin 8706G 3 lb Hand Crank Lawn Spreader

    Handheld crank spreader spreading grass seed on a bare patch, illustrative AI image

    Illustrative image (AI-generated), not the exact product.

    See current photos and price on Amazon →

    The cheapest way to overseed bare spots in fall or feed a tiny lawn. A thumb control sets the gate while you crank with the other hand, and the hopper doubles as a scoop for one-handed filling. Lightweight poly construction resists corrosion, with a 2-year limited warranty.

    Cordless option: Craftsman V20 Four Season Handheld Spreader

    Product pick

    Craftsman V20 Four Season Handheld Seed Spreader, 1.2 Gal

    Cordless battery handheld spreader over a small lawn, illustrative AI image

    Illustrative image (AI-generated), not the exact product.

    See current photos and price on Amazon →

    No cranking: a motor spins the plate, with 6 speed settings and an adjustable swath. The 1.2 gallon hopper suits small lawns, garden beds and sidewalks in winter. It runs on the Craftsman V20 battery system, so check the listing to see whether a battery and charger are included.

    Conclusion

    Pick the spreader that matches your yard: handheld for small lots and patching, a walk-behind like the Scotts EdgeGuard DLX for most suburban lawns, a 100 to 130 lb push model for half an acre, and a tow-behind for acreage. Calibrate it, overlap your passes, and follow Iowa State timing, with the most important feeding in late October or early November.

    FAQs

    Is a broadcast spreader better than a drop spreader?
    For most lawns, yes. A broadcast spreader covers ground faster and is more forgiving of small gaps. A drop spreader is better for small, tight areas where you must keep product off pavement, beds or water.

    When should I fertilize my lawn in Iowa?
    Iowa State University Extension lists spring (April or May), mid-September, and late October or early November. If you only fertilize once, choose late October to early November.

    How much fertilizer should I put down at once?
    No more than 1 pound of actual nitrogen per 1,000 square feet per application. Divide the nitrogen rate by the nitrogen percentage on the bag to get pounds of product.

    Do I need to calibrate a new spreader?
    Bag settings are a starting point. A quick test on a measured 100 sq ft area tells you whether the spreader actually puts down the right amount, and it is worth repeating every year or two.

    Can I use a broadcast spreader for grass seed and ice melt?
    Yes. Most broadcast spreaders handle seed, fertilizer and ice melt. Rinse and dry the spreader after salt or fertilizer to slow corrosion.

    What size spreader do I need for a half-acre lawn?
    Half an acre is about 21,800 square feet. A 100 to 130 lb push spreader or a tow-behind will cover it with one or two fills.

    Sources and review scope

    This guide was prepared on October 29, 2026 from the following sources and from the product listings on Amazon.com. Homingwell did not perform hands-on testing. Sellers were checked on Amazon.com on the same date.

    Explore more Lawn & Garden buying guides.
  • Best Soil Test Kits for Home Gardens: 6 Honest Picks

    Best Soil Test Kits for Home Gardens: 6 Honest Picks

    Skip to content

    Lawn & Garden • Soil • Updated October 29, 2026

    Best Soil Test Kits for Home Gardens: 6 Honest Picks

    Explore related guides: Gardening in Iowa: all guides · Compost bins for cold climates · Seed starting kits · When to start seeds in Iowa · Broadcast spreaders.

    Yellow tomato leaves, a patchy lawn, blueberries that never take off: before you buy fertilizer or lime, find out what your soil actually needs. A soil test kit gives you a quick answer at home, and a lab test gives you the full picture. This guide explains what home kits can and cannot measure, how to take a good sample, when a lab is worth it, and six testers sold by Amazon.com.

    Soil test kit color chart used to check garden soil pH
    Comparing a soil sample against a pH color chart. Photo: CSIRO Forestry and Forest Products, CC BY 3.0, via Wikimedia Commons.

    The short answer

    For a quick home check, a capsule-style soil test kit or pH paper used with a soil and water mix will tell you roughly where your pH sits and whether nutrients look low. Home kits are best at pH, usually within about one unit of a lab reading; nitrogen, phosphorus and potassium results are much less reliable. Before you add lime, sulfur or a lot of fertilizer, send a sample to a lab that gives home garden recommendations. Iowa State University Extension keeps a list of those labs.

    Soil test kit or lab test?

    Home kit vs. lab test
    Home soil test kit Lab test
    Speed Minutes About 1 to 2 weeks with mailing
    pH Rough, often within about 1 unit Precise, to one decimal
    N, P, K Low, medium or high at best Measured amounts plus fertilizer rates
    Extras Usually none Organic matter, texture, other nutrients
    Best for Spot checks, comparing beds, yearly tracking New gardens, problem areas, before liming

    A smart approach: test with a lab once to get a baseline, then use a home kit to spot-check beds between lab tests. University of Delaware recommends testing vegetable gardens every 1 to 2 years and lawns every 2 to 3 years once fertility is in good shape.

    Types of soil test kits and meters

    • Capsule or color kits. You mix soil and water with a reagent and compare the color to a chart. Easy and cheap; best for pH, rough for nutrients.
    • pH paper or strips. Dip into a soil and water mix. Simple and fast; precision depends on the paper’s range and steps.
    • Digital pH pens. A calibrated electrode reads pH directly. The most accurate home option, but the priciest and they need calibration.
    • Analog probe meters. Push the probes into the soil and read a dial. Handy for moisture; a Journal of Extension study found soil pH probes gave poor pH readings, so do not rely on them before liming.

    How to take a soil sample

    1. Sample one area at a time, such as the vegetable garden or the front lawn. Do not mix them.
    2. Take 10 to 15 small samples across the area, from the top 3 to 6 inches, with a clean trowel. That is the method Iowa State University Extension describes.
    3. Remove roots, stones and plant bits, then mix everything well in a clean plastic bucket.
    4. Let it air dry on paper if it is wet.
    5. Use distilled water for home kits; tap water can change the pH reading.
    6. Test in fall or early spring. Lime works slowly, so testing in fall gives it time to act before planting.

    Adding compost is one of the easiest ways to improve any soil; see our compost bins for cold climates guide.

    Best soil test kits and meters

    All six were listed as sold by Amazon.com at the time of writing. Check the current listing before you buy.

    Best home kit: Luster Leaf 1605 Rapitest Digital Soil Test Kit

    Product pick

    Luster Leaf 1605 Rapitest Digital Soil Test Kit

    Digital soil test kit with color capsules on a potting bench, illustrative AI image

    Illustrative image (AI-generated), not the exact product.

    See current photos and price on Amazon →

    A capsule kit for pH, nitrogen, phosphorus and potash that uses a battery-powered digital reader instead of matching colors by eye, which removes some of the guesswork. A good all-round pick if you want a nutrient snapshot of several beds in one afternoon. Treat the nutrient results as low, medium or high, not exact numbers.

    Most accurate pH: Apera Instruments GroStar GS2 Soil pH Pen

    Product pick

    Apera Instruments AI102G GroStar GS2 Soil pH Pen Tester Kit

    Digital soil pH pen meter inserted into garden soil, illustrative AI image

    Illustrative image (AI-generated), not the exact product.

    See current photos and price on Amazon →

    A lab-grade pH pen with a replaceable spear sensor that reads pH and temperature directly in moist soil. Two-point calibration takes about a minute, and an averaging mode combines readings from several spots. It costs far more than a kit, so it suits serious vegetable growers, blueberry growers and anyone who tests often.

    Best budget pH: pHydrion Jumbo pH Paper, 0 to 13

    Product pick

    pHydrion 0 to 13 Jumbo pH Paper, 50 ft roll

    pH test paper next to a jar of soil and water, illustrative AI image

    Illustrative image (AI-generated), not the exact product.

    See current photos and price on Amazon →

    A 50-foot roll of wide pH paper is enough for years of tests. Stir a spoon of soil into distilled water, let it settle, and dip a strip in the liquid. It reads in 1 pH unit steps, so it tells you whether soil is clearly acidic, neutral or alkaline, but not the fine detail you need before liming.

    Quick checks: Luster Leaf 1818 Rapitest 4-in-1 Soil Tester

    Product pick

    Luster Leaf 1818 Rapitest 4-in-1 Soil pH, Moisture, Fertility and Light Tester

    Analog soil tester with three steel probes in a potted plant, illustrative AI image

    Illustrative image (AI-generated), not the exact product.

    See current photos and price on Amazon →

    A battery-free dial meter with three stainless steel probes that switches between sunlight, fertility, moisture and pH. It is quick for checking pots and beds, especially moisture and light. Like all probe meters, its pH reading is a rough guide only, so confirm with a kit or lab before you change your soil.

    Budget 3-in-1: iPower Soil Moisture, Light and pH Meter

    Product pick

    iPower 3-in-1 Soil Test Kit, Moisture, Light and pH Meter

    Handheld 3-in-1 soil meter with two probes on garden soil, illustrative AI image

    Illustrative image (AI-generated), not the exact product.

    See current photos and price on Amazon →

    A low-cost, no-battery meter with one switch for moisture, light and pH. The moisture scale (1 to 10, dry to wet) is the most useful part for houseplants, containers and seedlings. The pH mode covers 3.5 to 8, but treat it as a rough indicator.

    For watering: Luster Leaf 1820 Rapitest Soil Moisture Meter

    Product pick

    Luster Leaf 1820 Rapitest Soil Moisture Meter

    Analog soil moisture meter probe in a tomato raised bed, illustrative AI image

    Illustrative image (AI-generated), not the exact product.

    See current photos and price on Amazon →

    Not a nutrient test, but the tool many gardeners actually use most. It measures moisture at root level, needs no batteries, and includes watering needs for more than 150 plants. Great for raised beds and containers during dry Midwest summers.

    Conclusion

    The best soil test kit is the one that answers your question. For a quick pH and nutrient snapshot, the Rapitest digital kit is a solid start; for precise pH, a calibrated pen like the Apera GS2 is worth it; and for anything that will change your soil, such as lime, sulfur or heavy fertilizer, use a lab with home garden recommendations. Test every 1 to 2 years and keep notes so you can see trends.

    FAQs

    Are home soil test kits accurate?
    For pH they are usually close enough for a spot check, often within about one unit of a lab reading. Nitrogen, phosphorus and potassium results are much less reliable, so use a lab before making big changes.

    When is the best time to test garden soil?
    Fall or early spring, before you fertilize. Fall testing gives lime time to work before the next season.

    How deep should I take a soil sample?
    Iowa State University Extension suggests the top 3 to 6 inches, from 10 to 15 spots across the area, mixed together.

    Do soil pH probe meters work?
    They are handy for moisture, but a Journal of Extension study found soil pH probes gave poor pH measurements. Use pH paper, a kit or a calibrated pH pen for pH.

    What pH do most garden plants like?
    Most vegetables and flowers do well in slightly acidic to neutral soil, around 6.0 to 7.0. Blueberries need much more acidic soil.

    Where can I get a lab soil test in Iowa?
    Iowa State University Extension lists university and private labs that give home garden and lawn recommendations, along with how to collect and mail a sample.

    Sources and review scope

    This guide was prepared on October 29, 2026 from the following sources and from the product listings on Amazon.com. Homingwell did not perform hands-on testing. Sellers were checked on Amazon.com on the same date.

    Explore more Lawn & Garden buying guides.
  • Best Seedling Heat Mats: 6 Picks for Faster Germination

    Best Seedling Heat Mats: 6 Picks for Faster Germination

    Skip to content

    Lawn & Garden • Seed Starting • Updated October 29, 2026

    Best Seedling Heat Mats: 6 Picks for Faster Germination

    Explore related guides: Gardening in Iowa: all guides · Seed starting kits · Grow lights for seedlings · When to start seeds in Iowa.

    Peppers that take three weeks to sprout, tomatoes that come up patchy: in a cool Midwest basement, the problem is usually cold soil. A seedling heat mat warms the root zone so warm-season seeds sprout faster and more evenly. This guide explains which seeds need bottom heat, what temperature to aim for, why a thermostat is worth it, and six mats and controllers sold by Amazon.com.

    Seedling heat mat results: trays of healthy young plugs
    Even, healthy plugs start with even germination. Photo: Apapac, public domain, via Wikimedia Commons.

    The short answer

    Iowa State University Extension says most vegetable seeds germinate best when the seed starting mix is 70 to 75°F, and recommends electric heat mats in cool rooms. A standard 10 by 20 inch mat under one tray is enough for most home gardeners. Most mats warm the mix about 10 to 20°F above room temperature, so pair yours with a thermostat in a warm room, and take trays off the mat once most seeds have sprouted.

    Which seeds need a seedling heat mat?

    Bottom heat by crop type
    Crop group Heat mat? Why
    Peppers, eggplant Yes, most helpful Slow and uneven to sprout in cool mix
    Tomatoes, basil Yes Sprout much faster in warm mix
    Cucumbers, squash, melons Helpful if started indoors Warm-season crops that like warm soil
    Most flowers Often helpful Check the seed packet
    Lettuce, spinach, cabbage family Usually not Cool-season crops germinate fine in a cool room

    Always check the seed packet: it lists the best germination temperature for that variety. If your house stays above about 75°F, you may not need a mat at all.

    How to use a seedling heat mat

    1. Put it on a flat, dry surface such as a shelf or table, with the tray directly on top.
    2. Sow, water and cover the tray with a humidity dome, then turn the mat on.
    3. Check the mix daily. Warm mix dries faster; water from below when the surface looks dry.
    4. Turn it off or move the tray once most seeds are up. Leaving seedlings on heat after germination encourages soft, leggy growth.
    5. Move sprouted trays under grow lights right away. See our grow lights for seedlings guide.
    6. Keep cords dry and off the floor, and never fold or cut a mat.

    Do you need a thermostat?

    A basic mat simply raises the temperature a set amount above the room. In a 60°F basement that is perfect; in a 72°F kitchen it can push the mix above 90°F, which can cook seeds. A thermostat with a probe in the soil turns the mat on and off to hold the temperature you set. It is the best upgrade if you start several crops, and the maker of the Jump Start mats lists its thermostat as required for its mats.

    For Iowa timing, most warm-season crops are started indoors in March and April. Use our Iowa seed starting calendar.

    Best seedling heat mats and thermostats

    All six were listed as sold by Amazon.com at the time of writing. Check the current listing before you buy.

    Best overall: Hydrofarm Jump Start MT10006 Seedling Heat Mat, 17 Watt

    Product pick

    Hydrofarm Jump Start MT10006 Seedling Heat Mat, 17W, 8.9 x 19.5 in

    Seed tray with a humidity dome on a black heat mat, illustrative AI image

    Illustrative image (AI-generated), not the exact product.

    See current photos and price on Amazon →

    The classic single-tray mat. It warms the root zone 10 to 20°F above room temperature, has waterproof construction and a 6-foot cord, and the maker says it is 50 percent thicker than other brands. It is UL certified. Pair it with the JumpStart thermostat below if your room is warmer than about 60°F.

    Best budget: iPower 10 x 20 Inch Seedling Heat Mat

    Product pick

    iPower 10 x 20 Inch Waterproof Seedling Heat Mat

    Cell flat with sprouting peppers on a heating pad, illustrative AI image

    Illustrative image (AI-generated), not the exact product.

    See current photos and price on Amazon →

    A lower-cost mat sized for a standard 10 by 20 flat. The maker says it holds the root zone 10 to 20°F above air temperature, with evenly laid heating wire and a waterproof surface that wipes clean. A good pick for a first season or a second tray.

    Best combo: iPower 10 x 20.75 Inch Heat Mat and Digital Thermostat Set

    Product pick

    iPower Seedling Heat Mat and Digital Thermostat Combo Set

    Thermostat probe in a seed tray on a heat mat, illustrative AI image

    Illustrative image (AI-generated), not the exact product.

    See current photos and price on Amazon →

    If you want one box that does it all, this set pairs a 20-watt, 10 by 20.75 inch mat with heating film for even warmth and a digital thermostat with a soil probe. Set it to the temperature on your seed packet and it holds there, which removes the risk of overheating trays in a warm room.

    Thermostat upgrade: JumpStart Digital Thermostat Controller for Heat Mats

    Product pick

    JumpStart Digital Thermostat Controller for Heat Mats

    Digital thermostat controller beside seed trays, illustrative AI image

    Illustrative image (AI-generated), not the exact product.

    See current photos and price on Amazon →

    Already have a mat? This ETL-certified controller plugs in between the mat and the outlet and holds any setting from 68 to 108°F, with a choice of Fahrenheit or Celsius and an LED light that shows when it is heating. It works with Jump Start mats and most other plug-in seedling mats.

    For two trays: Hydrofarm Jump Start MT10008 Heat Mat, 20 x 20 Inch

    Product pick

    Hydrofarm Jump Start MT10008 Heat Mat, 45W, 20 x 20 in

    Two seed trays on a square heat mat, illustrative AI image

    Illustrative image (AI-generated), not the exact product.

    See current photos and price on Amazon →

    A square 20 by 20 inch mat holds two standard flats side by side, enough for a full spring of tomatoes and peppers for most home gardens. Same Jump Start construction and 10 to 20°F warming as the single-tray mat, with one cord and one thermostat for both trays.

    For big setups: Hydrofarm Jump Start MT10009 Heat Mat, 48 x 20 Inch

    Product pick

    Hydrofarm Jump Start MT10009 Heat Mat, 107W, 48 x 20 in

    Long heat mat with four seed trays on a bench, illustrative AI image

    Illustrative image (AI-generated), not the exact product.

    See current photos and price on Amazon →

    A 4-foot mat runs under four flats on a shelf or bench, a good match for a 4-foot shop light overhead. It can be daisy-chained with add-on units for even more space. At 107 watts it uses more power, so a thermostat is strongly recommended.

    Conclusion

    A seedling heat mat is the simplest way to get even, fast germination for peppers, tomatoes and other warm-season crops in a cool Midwest house. Choose a mat that fits your trays, add a thermostat if your room is warm, aim for about 70 to 75°F in the mix, and move trays off the heat and under lights as soon as they sprout.

    FAQs

    Do I need a heat mat to start seeds?
    Not always. Iowa State University Extension says most vegetable seeds germinate best at 70 to 75°F. If your room is cooler than that, a heat mat helps, especially for peppers, tomatoes and eggplant.

    What temperature should a seedling heat mat be?
    Aim for the temperature on the seed packet, usually around 70 to 75°F in the mix for most vegetables, a little warmer for peppers. A thermostat with a soil probe is the easiest way to hold it.

    Should I leave seedlings on a heat mat after they sprout?
    No. Turn the mat off or move the tray once most seeds have emerged. Extra heat after germination encourages soft, leggy growth; light matters more at that stage.

    Can a heat mat overheat seeds?
    Yes. Most mats add 10 to 20°F above room temperature, so in a warm room the mix can get too hot. Use a thermostat, or check the mix with a thermometer.

    Can I put a heat mat under a humidity dome tray?
    Yes. Set the tray with its dome directly on the mat until seeds sprout, then remove the dome and the heat.

    Which seeds do not need a heat mat?
    Cool-season crops like lettuce, spinach and the cabbage family usually germinate well in a cool room without bottom heat.

    Sources and review scope

    This guide was prepared on October 29, 2026 from the following sources and from the product listings on Amazon.com. Homingwell did not perform hands-on testing. Sellers were checked on Amazon.com on the same date.

    Explore more Lawn & Garden buying guides.
  • Best Grow Lights for Seedlings: 6 Picks for Sturdy Starts

    Best Grow Lights for Seedlings: 6 Picks for Sturdy Starts

    Skip to content

    Lawn & Garden • Seed Starting • Updated October 29, 2026

    Best Grow Lights for Seedlings: 6 Picks for Sturdy Starts

    Explore related guides: Gardening in Iowa: all guides · Seed starting kits for beginners · When to start seeds in Iowa · When to plant tomatoes · Seedling heat mats.

    Tall, pale, floppy seedlings almost always mean one thing: not enough light. A February or March window in Iowa simply is not bright enough. The right grow lights for seedlings do not have to be expensive. This guide explains what Iowa State University Extension recommends, LED versus fluorescent, how close and how long to run them, and six lights and accessories sold by Amazon.com.

    Grow lights for seedlings hanging a few centimeters above young plants
    Seedlings growing about 3.5 cm under artificial lights. Photo: Huskita, CC BY-SA 4.0, via Wikimedia Commons.

    The short answer

    For most home gardeners, Iowa State University Extension says a plug-in LED or fluorescent shop light is all you need for seed starting. Choose a full-spectrum or daylight LED fixture with at least 3,000 lumens, hang it on chains a few inches above the seedlings, raise it as they grow, and put it on a timer for about 14 to 16 hours a day. Expensive purple grow panels are not required for seedlings.

    Grow lights for seedlings: LED vs fluorescent

    LED and fluorescent lights for starting seeds indoors
    LED shop light or strip T5 fluorescent
    Energy use Lowest Higher
    Heat Very little Some; still safe close to plants
    Lifespan Many years Tubes dim; replace every 1–2 years
    What to look for Full spectrum or daylight, 3,000+ lumens High-output, full-spectrum or daylight tubes
    Distance Start a few inches above; follow the maker No more than 4–6 inches above

    ISU Extension notes that fluorescent tubes dim over time and should be replaced every one to two years, which is a cost to factor in. LEDs cost a bit more up front but use less power and last much longer, which is why most gardeners are switching.

    How much light do seedlings need?

    • Brightness. ISU suggests at least 3,000 lumens for an LED fixture over a standard tray. A 4-foot fixture covers two 10 by 20 inch flats.
    • Distance. Keep lights close: many growers hang LED shop lights about 2 to 4 inches above the leaves, and ISU says fluorescents should be no more than 4 to 6 inches above. Raise the light as the plants grow.
    • Hours. 14 to 16 hours a day on a timer is the usual target. Turn the lights off at night; seedlings need a dark period too.
    • Coverage. One small clip light cannot evenly cover a full flat. Seedlings at the edges lean and stretch.
    • Air. A small fan on low strengthens stems and dries the surface of the mix.

    A simple seed starting light setup

    1. Use a shelf. A wire shelving unit lets you hang a light under each shelf with S-hooks and chains.
    2. Hang the lights on chains so you can raise them an inch or two each week.
    3. Plug everything into a timer set for 14 to 16 hours, for example 6 a.m. to 10 p.m.
    4. Add a heat mat under trays of tomatoes and peppers until they sprout. See our seed starting kit guide.
    5. Check daily. If seedlings stretch, lower the light. If leaves bleach or curl, raise it a little.

    In Iowa, most warm-season crops are started indoors in March and April. Use our Iowa seed starting calendar to time each crop.

    Best grow lights for seedlings

    All six were listed as sold by Amazon.com at the time of writing. Check the current listing before you buy.

    Best overall: SunBlaster 24-Inch Prism Lens LED Strip Light

    Product pick

    SunBlaster 24-Inch Prism Lens LED Strip Light, 24W 6400K

    LED grow light strip hanging above seedling trays, illustrative AI image

    Illustrative image (AI-generated), not the exact product.

    See current photos and price on Amazon →

    A 24-watt, 6400K full-spectrum LED strip rated at about 3,400 lumens, which meets ISU’s 3,000-lumen guideline in a 2-foot fixture. A built-in reflector and prism lens focus light down onto the tray, and you can link up to eight strips to light a whole shelf. It comes with hanging and flush-mount clips and a 6-foot cord with a switch.

    Best budget: Feit Electric 3-Foot LED Shop Light, 3,000 Lumens

    Product pick

    Feit Electric 30W 3-Foot LED Shop Light, 3,000 Lumens

    LED shop light hanging over seedling trays in a garage, illustrative AI image

    Illustrative image (AI-generated), not the exact product.

    See current photos and price on Amazon →

    This is exactly the kind of plain plug-in shop light ISU Extension recommends: 3,000 lumens of 4000K white light, rated for about 50,000 hours, with hardware to hang it on chains or mount it flush. It is not sold as a grow light, but for seedlings that only need a few weeks of strong light, it does the job at a lower price. It has fewer reviews than the other picks.

    Fluorescent option: SunBlaster T5 High Output Strip Light, 3 Feet

    Product pick

    SunBlaster T5 High Output Fluorescent Strip Light, 3 Feet

    T5 fluorescent grow light above young seedlings, illustrative AI image

    Illustrative image (AI-generated), not the exact product.

    See current photos and price on Amazon →

    High-output T5 fluorescents are the classic seed starting light, and ISU Extension still lists them as a good choice. This 3-foot strip suits a single row of flats on a shelf. Keep it within 4 to 6 inches of the seedlings, and plan to replace the tube every year or two as it dims.

    For small shelves: iPower 40W LED Grow Light Strips with Timer

    Product pick

    iPower 40W LED Plant Grow Light Strips with Auto Timer

    LED grow light bars mounted under a shelf above seedlings, illustrative AI image

    Illustrative image (AI-generated), not the exact product.

    See current photos and price on Amazon →

    Thin LED bars that stick or screw under a shelf, with a built-in 3, 9 or 12-hour timer and 10 brightness levels. They are handy for a bookcase or a short rack in an apartment. Note that the 12-hour maximum on the built-in timer is a little short for seedlings, so many gardeners plug them into an outlet timer instead.

    Complete station: VEVOR 4-Tier Plant Stand with 45W Grow Light

    Product pick

    VEVOR 4-Tier Plant Stand with 45W Full Spectrum Grow Light

    Four-tier plant stand with grow lights and seedling trays, illustrative AI image

    Illustrative image (AI-generated), not the exact product.

    See current photos and price on Amazon →

    If you would rather not build your own shelf, this steel rack about 24 by 14 by 50 inches comes with three LED panels totaling 45 watts, three color modes, seven brightness levels and a timer. Shelves are adjustable and it rolls on wheels. It is best for a modest number of small trays; a big seed starting operation needs more light per shelf.

    Must-have accessory: GE 24-Hour Plug-In Mechanical Timer, 3-Pack

    Product pick

    GE 24-Hour Plug-In Mechanical Timer, 3-Pack

    Plug-in outlet timer controlling a grow light, illustrative AI image

    Illustrative image (AI-generated), not the exact product.

    See current photos and price on Amazon →

    A timer is the cheapest upgrade to any light. These push-pin timers set in 30-minute steps with no apps or Wi-Fi, so it is easy to run lights 14 to 16 hours a day, and there are three in the pack for several shelves. They use a two-prong polarized outlet, so check that your light’s plug fits.
    Conclusion

    The best grow lights for seedlings are bright, close and on a timer. A full-spectrum LED strip or shop light with at least 3,000 lumens, hung a few inches above the tray and run 14 to 16 hours a day, will grow short, sturdy transplants. Start Iowa seedlings in March and April, raise the lights as they grow, and harden them off before planting out.
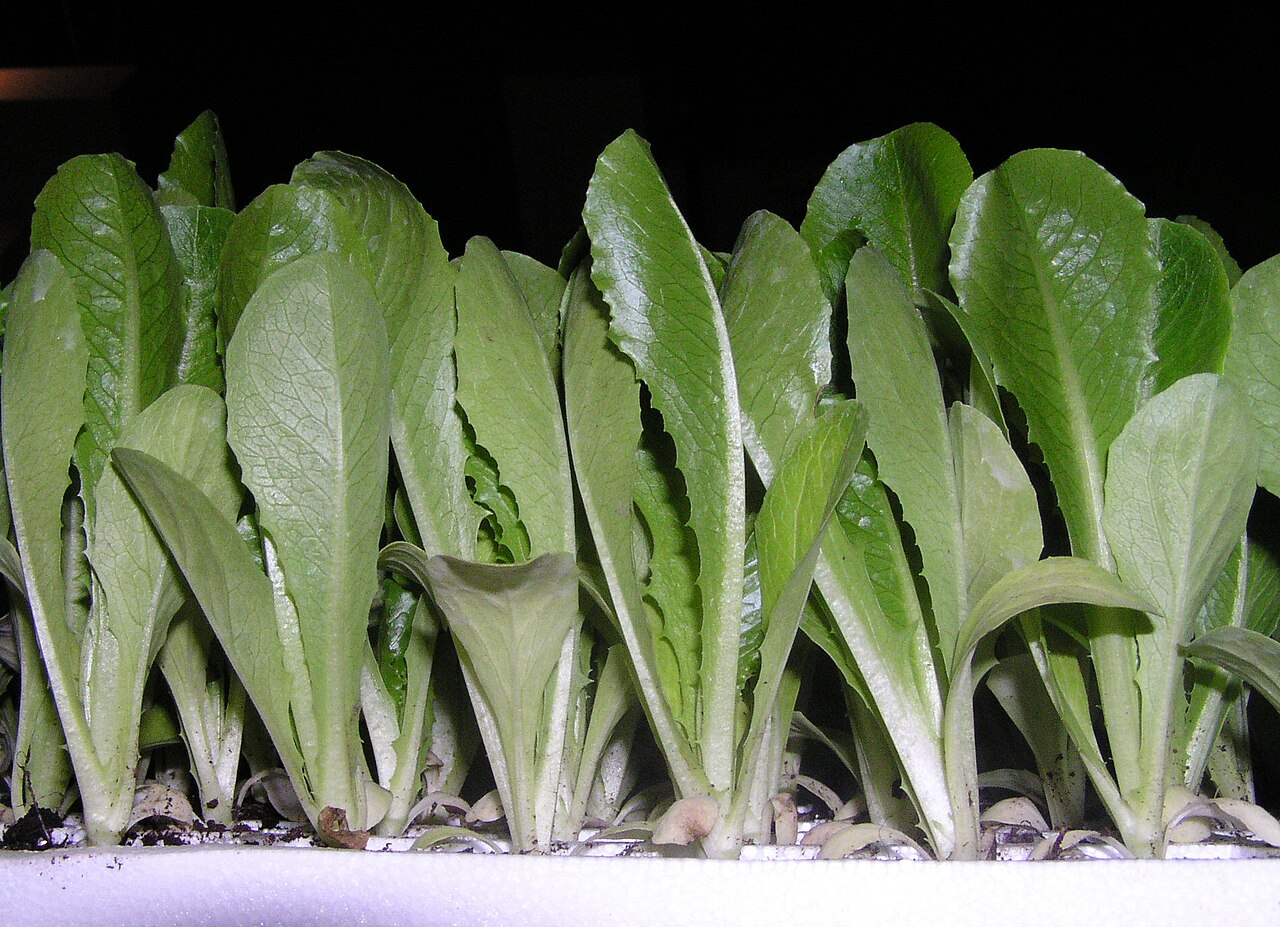
    FAQs

    What kind of light is best for seedlings?
    Iowa State University Extension says a plug-in LED or fluorescent shop light is ideal for most home gardeners. Choose full-spectrum or daylight LEDs with at least 3,000 lumens, or high-output fluorescent tubes.

    How close should grow lights be to seedlings?
    Close. Fluorescent lights should be no more than 4 to 6 inches above seedlings, and many growers keep LED shop lights about 2 to 4 inches above the leaves. Raise the light as the plants grow and follow the maker’s guidance for stronger panels.

    How many hours of light do seedlings need?
    About 14 to 16 hours a day. Use a plug-in timer and turn the lights off at night so plants get a dark period.

    Do I need a special grow light or will a shop light work?
    A regular LED shop light works well for seedlings. ISU Extension notes that expensive grow lights are not necessary for starting transplants.

    Why are my seedlings leggy under a grow light?
    The light is usually too far away, too dim or on for too few hours. Lower it to a few inches above the leaves, make sure it covers the whole tray, and run it 14 to 16 hours a day.

    Can seedlings get too much light?
    If an LED is very close and very bright, leaves can bleach or curl. Raise the light an inch or two, but keep the hours the same.

    Sources and review scope

    This guide was prepared on October 29, 2026 from the following sources and from the product listings on Amazon.com. Homingwell did not perform hands-on testing. Sellers were checked on Amazon.com on the same date.

    Explore more Lawn & Garden buying guides.